


BEFORE EMBROIDERING
Getting Ready
Basic operations B-61
B
1
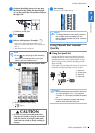
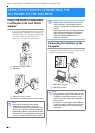
Using the Embroidery Foot “W+”
with LED Pointer
By plugging in the connector on the back of your
machine, the embroidering needle drop point will
be indicated on the fabric, allowing you to
accurately position the pattern.
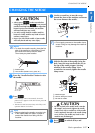
■ Attaching the Embroidery Foot
“W+” with LED Pointer
a
Press the “Needle Position” button to raise
the needle.
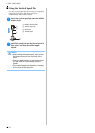
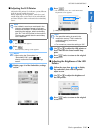
b
Press .
→ The entire screen becomes white, and all keys and
operation buttons are locked.
c
Raise the presser foot lever.
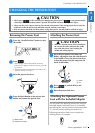
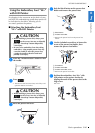
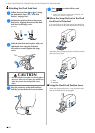
d
Push the black button on the presser foot
holder and remove the presser foot.
a Black button
b Presser foot holder
→ Remove the presser foot from the presser foot
holder.
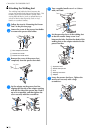
e
Use the included screwdriver to loosen the
screw of the presser foot holder, then
remove the presser foot holder.
a Screwdriver
b Presser foot holder
c Presser foot holder screw
→ Remove the presser foot holder.
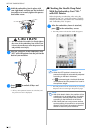
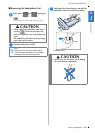
f
Position the embroidery foot “W+” with
LED pointer on the presser foot bar by
aligning the notch of the presser foot to the
large screw.
Side view
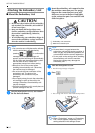
CAUTION
• When attaching a presser foot, always press
on the screen. You may accidentally
press the “Start/Stop” button and possibly
cause injury.
• Be sure to use embroidery foot when doing
embroidery. Using another presser foot may
cause the needle to strike the presser foot,
causing the needle to bend or break and
possibly cause injury.
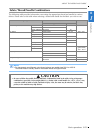
CAUTION
• When attaching a presser foot, always press
on the screen. You may accidentally
press the “Start/Stop” button and possibly
cause injury.