


5
Bosch Security Systems 09/06 BLCC110U
Solution 64 User Guide
Introduction
Your system helps to secure life, property and investments
against fire, theft and bodily harm. It consists of a keypad (or
keypads), sensors such as motion detectors or devices located
on doors and windows, and other sensing devices designed to
detect the presence of smoke or combustion. The location and
quantity of sensing devices will have already been discussed
with you by your alarm installer.
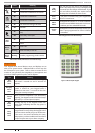
Control of your security system is achieved through the unique
Graphic keypad, which displays all system information in written
text and graphical symbols. Its versatility and ease of operation,
make it ideal for any home or business application.
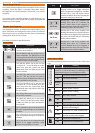
Features
Listed below are the main features of the Solution 64 control
panel.
Up to 64 Fully Programmable Zones
Fire Alarm Verification
Up to 48 Unique PINs
Up to 5 Relay Outputs (1 amp rating)
3 Open Collector Outputs
Supervised Siren Driver
8 Programmable Schedules
Up To 8 Areas (Common Area Programmable)
Built-In Dialler
Up To 8 Fully Supervised Graphic Keypads
Keyswitch Input (Programmable)
256 History Event Memory
EMI / Lightning Transient Protection
Programmable Via Keypad
Remote Programmable Via Upload/Download Software
Alarm Event Memory
Automatic Test Reports
Built-In Telephone Line Fail Monitor
User’s Guide
This user’s guide shows you how to use and maintain your security
system. It covers basic functions, such as turning the system on
and off as well as some general programming. More complex
programming and system configuration should be performed
by your installer.
Many of the programming functions described in this guide
will have already been programmed by your alarm installer
while others may need to be programmed or changed by you.
Depending on your particular system configuration some
features described in this manual may not be available. Please
discuss this with your alarm installer.
Functions outlined in this user guide may require you to enter
your PIN (Personal Identification Number) so make sure you
choose a number that is easy to remember. For security reasons
do not write this code down or give it to anyone else. If more
than one person needs to operate the system then you should
create a unique code for them if this has not been done by your
installer. This guide will explain how to do this.
Please take the time to familiarise your self with the following
terms before reading the rest of this guide.
Zones
A ‘Zone’ is a detection device, or group of devices connected
to your security system. Zones are identified by the area they
monitor, such as a front door, bedroom window or hallway.
Faulted Zones
When a zone (such as a door or window) is closed, it is said to be
‘normal’. When the door or window is open, the zone is said to be
‘faulted’. When you turn your system on, you will usually want all
of the zones in your system to be normal, although, you can turn
your system on with faulted zones.
Zones Types
There are two basic types of zones, Non 24-hour and 24-hour.
See below.
Non 24-Hour Zones
Non 24-hour zones respond to alarm conditions depending upon
whether the system is turned on or off. They are programmed to
either respond instantly to alarm conditions or to provide a delay
for you to reach the keypad and turn the system off. Various
zones will be located throughout your premises.
When you turn your system on, you have the option of turning
on all zones (All On), or just some of the zones (Part On). Refer
to
All On and Part On, on page 7 for more information.
Bypassed Zones
A zone which has been bypassed will remain unarmed when
the system is armed. You may need to bypass a zone when
doing renovations in the building or if a sensor becomes faulty.
Bypassed zones will reset the next time the system is disarmed.
24-Hour Zones
24-hour zones are always on and cannot be turned off, even
when the system is turned off (disarmed). There are two types of
24-hour zones, fire zones and non-fire zones.
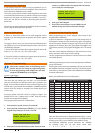
What Is An Area?
The Solution 64 control panel comes defaulted and programmed
for a single area configuration (Area 1), therefore, all zones are
assigned to Area 1. The alarm system can be divided into 8
individual areas running off the same control panel. In this case,
the security company would assign different sensors (zones) to
each area according to the area they belong.
Example:
Partitioning a commercial business to 4 individual areas may be
as follows:
Area 1 – Main entry/exit area
Area 2 – Sales
Area 3 – Administration
Area 4 – Dispatch
Each area can be controlled individually as if they were separate
alarm systems.
All On
When you turn an area All On, you are turning on all non 24-hour
zones, both interior (motion detectors) and perimeter (doors and
windows of the building).
Part On
When you turn an area Part On, you only turn on some of the
non 24-hour zones. Your security company will program which
zones are included in this portion. Part zones may include only
the perimeter (doors and windows) or your system, or sensors in
other areas of your premises. Check with your security company
to learn which zones are Part zones.