


13
Bosch Security Systems 09/06 BLCC110U
Solution 64 User Guide
time group to specify the access period, day of the week and
holidays. To now restrict the user, they must belong also to the
same timer group. This now restricts the user from accessing
the system outside the nominated times and days within the
schedules linked to the timer group.
User
Can only belong to 1 timer group.
Schedules
Multiple schedules can be linked to the same timer group.
Time Groups
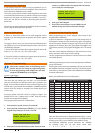
There are 8 different timer groups available.
Timer Group Example
To set up a timer group you need to select an unused
timer group number from 1 to 8, in this example we will
assume timer group number to be 5.
Select an unused schedule and program the times and
day of the week then assign the schedule to timer group
5.
Then under user properties assign the users who you
wish to restrict to timer group 5. Remember that you are
only able to assign a user to one timer group.
A master code holder is able to change the schedules so they
can change the access times for a given user. If a user tries to
operate the system outside their assigned timer group periods
then access will be denied.
Access > User Properties >
Timer Group
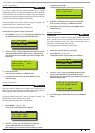
MENU 1-4-4
This menu is used to assign a User to a Timer Group. Timer
Groups can be used to restrict User access to be within specific
times defined by schedules. Each User can only be assigned to
one Timer Group. Setting this option to 0 will give the User 24
hour access to the system.
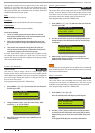
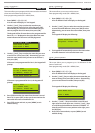
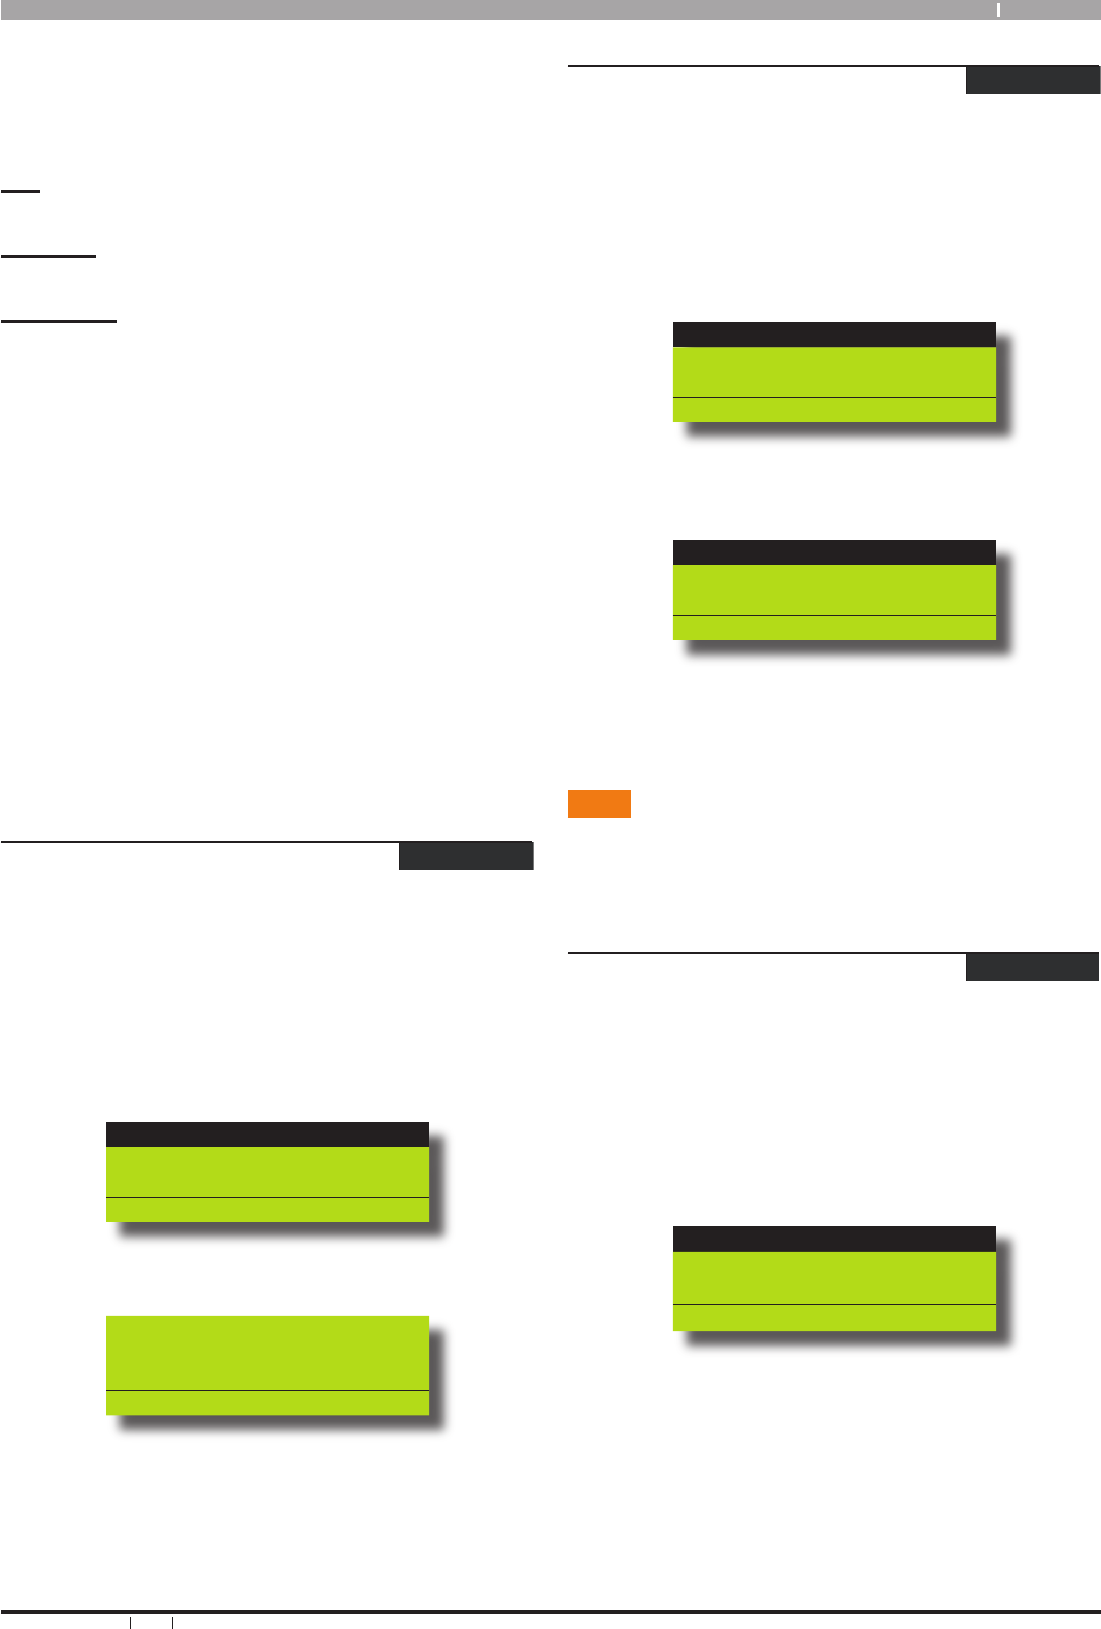
Enter programming mode (PIN + MENU) then,
Enter [MENU] + [1] + [4] + [4] and select the user from the
list then press [OK].
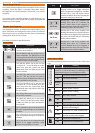
Ur001 John Smith
Ur002 Debbie Smith
Ur003 User 3 Name
Press OK or MENU
Using the numeric keys, enter the Timer Group. Valid
entries are 1 – 8 or 0 to disable.
Timer Group Ur001
00
Press 0-9 OK to SAVE
Press [OK] to save and exit or press [MENU] to exit
without saving.
1.
2.
3.
1.
2.
3.
Access > User Properties >
Access Assignment
MENU 1-4-5
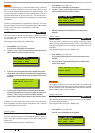
This menu allows you to assign each user to one or more access
groups. An access group is used to allow and/or restrict which
users have access to various system outputs. These outputs can
be used to control door strikes, gates or roller doors etc.
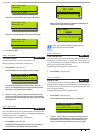
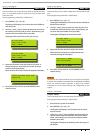
Enter programming mode (PIN + MENU) then,
Enter [MENU] + [1] + [4] + [5] and select the user from the
list then press [OK].
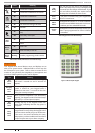
Ur001 John Smith
Ur002 Debbie Smith
Ur003 User 3 Name
Press OK or MENU
Use the up and down arrow keys to highlight the Access
Group then press the [ON] key to select or the [OFF] key
to deselect.
Access Group 1
Access Group 2
Access Group 3
Press OK ON OFF MENU
Repeat Step 2 until all required Access Groups are
programmed, then press [OK] to save and exit or press
[MENU] to exit without saving.
Areas
The Solution 64 control panel has the ability to be partitioned
up to 8 individual areas. This section outlines various commands
that control individual areas.
Areas > Commands >
Area Status
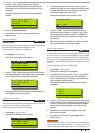
MENU 2-0-0
This menu allows users the ability view the area status of the
current area or the status of a different area. This menu is only
available via a keypad who’s corresponding area is turned off.
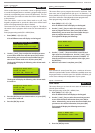
Enter programming mode (PIN + MENU) then,
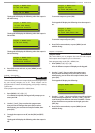
1. Enter [MENU] + [2] + [0] + [0].
A list of available areas will display on the keypad.
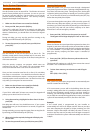
A001 Main Office
A002 Production
A003 Warehouse
PRESS , OK or MENU
2. Use the [
↑] and [↓] keys to select the area that you want
to view the status information, then press [OK] to select.
Alternatively, you can enter the area number, then press
[OK].
The keypad will display the area status information.
1.
2.
3.