


Installation
42 Instruction manual SGE
3
is
12. Use the pressure gauge to read the supply pressure and compare it against
the value from the gas table (3.4.3 "Gas data").
Note
Consult the mains gas supply company if the supply pressure is not correct.
You cannot yet start using the appliance. You must now take the appliance out
of service (10.3 "
Isolating the water heater from the mains").
Note
After conversion, you must check that the gas control valve is gastight.
13. Shut off the gas supply.
14. Disconnect the pressure gauge and retighten the sealing screw in the test
nipple.
15. If there is nothing else you need to check or adjust, you can put the covers
back on the appliance.
3.13.2 Procedure for checking the gas control valve pressure
The procedure for checking the gas control valve pressure is only applicable to
appliances that have a pressure-reducing valve. If the appliance does not have
a reducing valve, continue from adjusting the CO
2
value (3.13.3 "CO
2
adjustment").
To check the gas control valve pressure, proceed as follows:
1. Isolate (10.3 "
Isolating the water heater from the mains") the appliance from
the power supply.
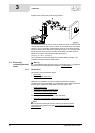
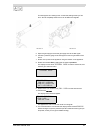
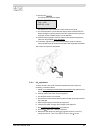
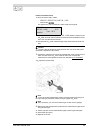
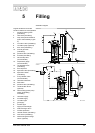
2. Carefully remove the covers from the appliance.
3. The electrical section is now visible.
4. The gas control valve has a test nipple that can be used for measuring the
gas control valve pressure. This test nipple has a sealing screw. Loosen the
sealing screw by a few turns. Do not completely loosen it as it can be difficult
to retighten.
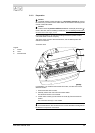
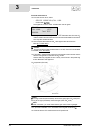
5. Open the gas supply.
6. Connect a pressure gauge to the test nipple.
7. Switch on the power to the appliance using the isolator on the appliance.
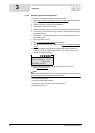
8. Switch the controller ON by setting the 0/I switch to position I .
The display will now show INTERNAL CHECK for about 10 seconds, and
will then go to the main menu.
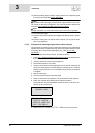
9. Select
SERVICE OPERATION
,
FULL LOAD
from the service menu.
INTERNAL CHECK
SERVICE MENU
SERVICE INTERVAL
»SERVICE OPERATION
È ANTI LEGIONELLA