4 - 54
Connect USB Client
See USB Connector (page 10-5) for connector pinouts.
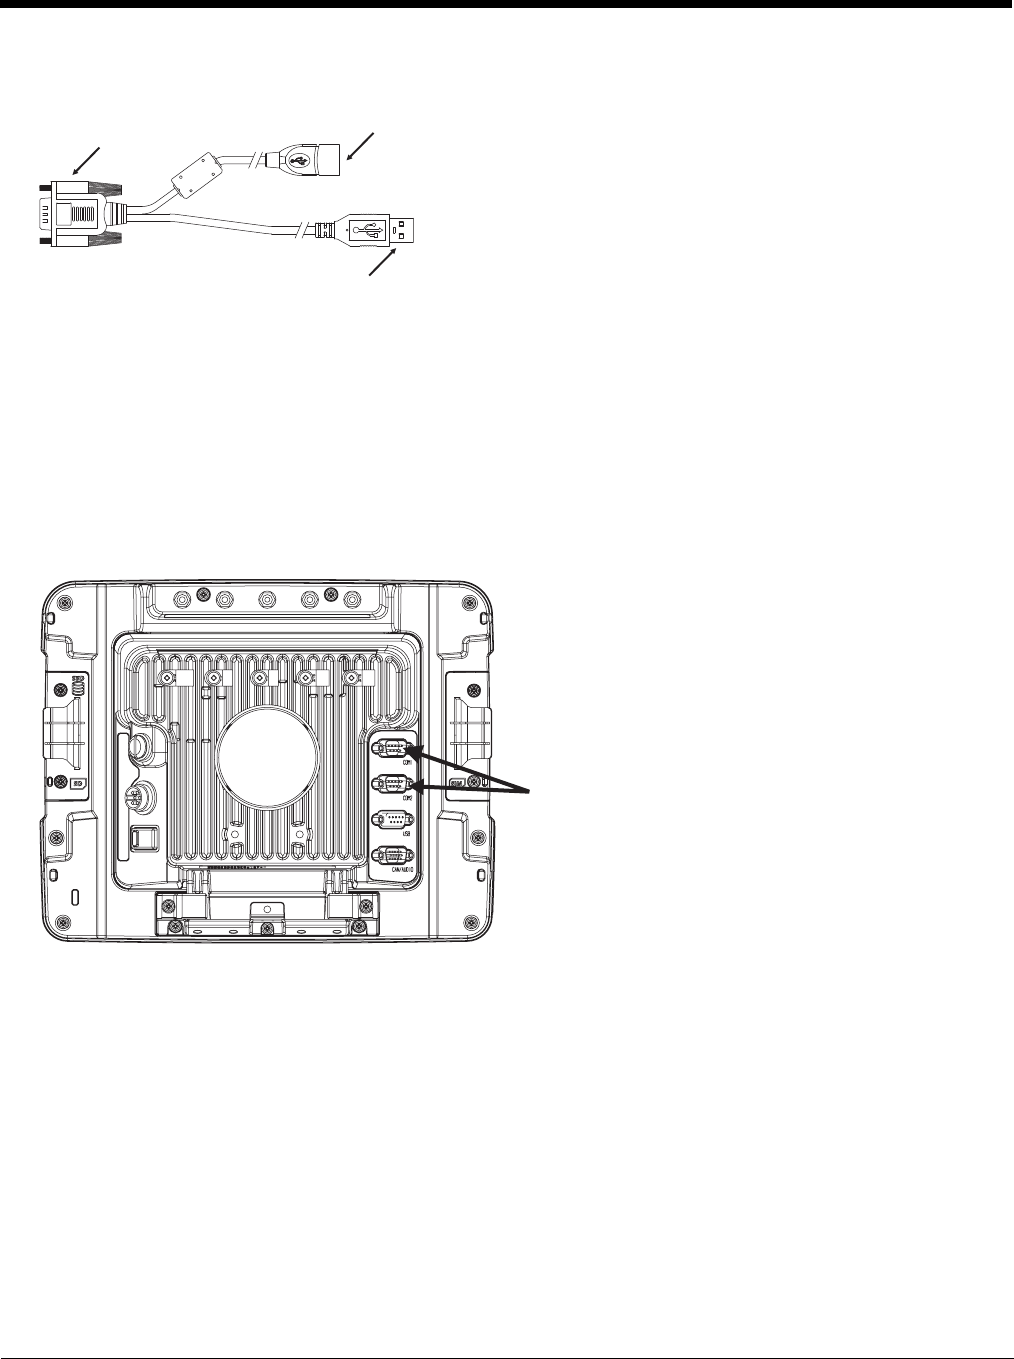
1. Seat the D9 connector firmly over the USB Connector on the Quick Mount Smart Dock.
2. Tighten the thumbscrews in a clockwise direction. Do not over tighten.
3. The USB client connector provides a client connection, such as for ActiveSync to a PC.
4. Secure the cables to the Thor VM2 with Strain Relief Cable Clamps (page 4-32).
Connect Serial Device
Note: Pin 9 of the desired COM port must be configured to provide +5V or RI as needed for the connected device. See the
Thor VM2 Reference Guide for details.
See COM1 and COM2 Connector (page 10-4) for connector pinouts.
1. Seat the cable end connector firmly over the serial COM port on the Quick Mount Smart Dock.
2. Turn the thumbscrews in a clockwise direction. Do not over tighten.
3. Secure the cables to the Thor VM2 with Strain Relief Cable Clamps (page 4-32).
4. Connect the other cable end to the desired serial device.
Connect a Tethered Scanner
1. The scanner cable is attached to either the COM1 or COM2 port on the Quick Mount Smart Dock.
2. Connect the serial cable for the scanner as directed above.
3. When the Thor VM2 is powered on, it provides power to the serial scanner.
4. Configure the Data Collection (DC) Wedge to manipulate scanned data as desired.
D9 Connector
USB Host Connector
USB Client Connector
