


24
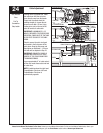
Please Do Not Return This Product To The Store. Contact your local Wayne-Dalton dealer. To find your local Wayne-Dalton dealer, refer to your
local yellow pages/business listings or go to the Find a Dealer section online at www.wayne-dalton.com
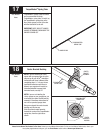
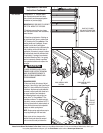
Tools Needed:
24
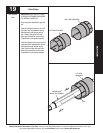
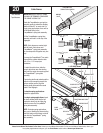
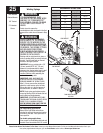
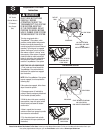
Starting on the right hand side, rotate
the cable drum until the set screw
faces directly away from the header.
Torque tube cam peak should be
pointing straight up. Loosen the set
screw no more than 1/2 turn. Using
locking pliers, pull on the end of the
cable to remove all cable slack.
IMPORTANT: A MINIMUM OF A 1/2
WRAP IS REQUIRED FOR PROPER DOOR
OPERATION. CABLE MUST BE TAUT AND
IN THE FIRST GROOVE OF THE CABLE
DRUM.
Check to ensure the cable is aligned
and seated in the first groove of the
cable drum. Snug the set screw, and
then tighten an additional 1-1/2 turns.
Left side will be adjusted in Step 23.
IMPORTANT: ENSURE THE CABLE IS
ALIGNED AND SEATED IN THE FIRST
GROOVE OF THE CABLE DRUM PRIOR
TO WINDING SPRINGS.
Leave approximately 6” of cable and cut
off the rest. Insert excess cable into hole
of cable drum.
NOTE: Illustrations show the right hand
TorqueMaster
®
Plus drum, left hand
TorqueMaster
®
Plus drum is
symmetrically opposite.
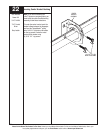
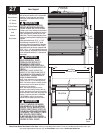
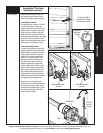
Cable Adjustment
Pliers
Flat Tip
Screwdriver
Step Ladder
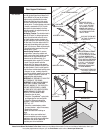
FIRST
GROOVE
Cable Drum
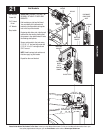
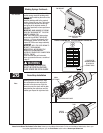
No space between Ratchet
Pawl and Cable Drum
indicates engagement
Cable Drum
Ratchet Pawl
ENGAGED SIDE VIEW
No space between
Ratchet Pawl and
Cable Drum
ENGAGED UNDERNEATH VIEW
Space between Ratchet Pawl
and Cable Drum
non-indicates engagement
Cable Drum
Ratchet Pawl
DISENGAGED SIDE VIEW
No space between
Ratchet Pawl and
DISENGAGED U
NDERNEAT H VIEW
UPPER POSITION
LOWER POSITION
LOWER POSITION SIDE VIEW
UPPER POSITION SIDE VIEW
Ratchet Pawl in Lower Position
Ratchet Pawl in Upper Position
Use these Illustration, in conjunction with the Instructions on the other side of
this label.
WARNING
Rachet
Bracket is
u
nder
EXTREME SPRING
TENSION
.
To avoid possible sever
e or
fatal injury,
DO NOT
remove
fasteners from ratchet bracket
until spring(s) are fully
wnwound.
To safely unwind spr
ing(s)
read
and follow
the directions in the
installation instructions
/owners
manual.
DO NOT
REMOVE T
HIS TAG.
PLIERS
SET SCREW
6”
CUT CABLE HERE
SET SCREW
RIGHT HAND DRUM
CAM PEAK
FIRST
GROOVE
SET SCREW
CAM PEAK
1/2 WRAP SHOWN
1-1/2 WRAP SHOWN
CABLE DRUM HOLE
RIGHT HAND DRUM