


14
Temco DV1000/1200/1400 Series
76657
No more than (4) 90° and (2) 45° offsets are to be used
per installation. Vent terminal cap location should be in
accordance with the Venting Graph chart and the Verti-
cal Termination Location information.
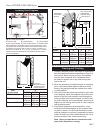
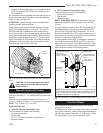
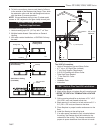
1. Measure the total wall thickness. Determine whether
or not the thimble extension is needed. If the com-
bustible wall depth is over 5” (127 mm), the exten-
sion should be used. (Fig. 19)
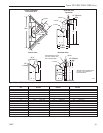
2. Assemble wall thimble with thimble extension flange
to top. Mate thimble to wall plate with the four tabs
provided. Bend tabs over to secure. (Fig. 19)
T186
Telescope extension
12/4/03 djt
Telescope Extension
T186
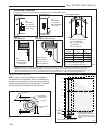
Fig. 19 The telescope extension must be used if wall thick-
ness is over 5” (127 mm).
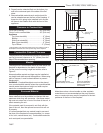
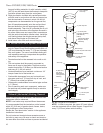
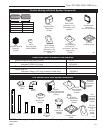
3. Install the wall thimble assembly through the framed
opening so the firestop plate is on the interior wall.
(Fig. 20) Telescope section should extend all the way
through wall.
4. Step 1: Apply Mill-Pac to 4” flue inner pipe on cap.
Step 2: Connect 4” flex flue to flue on cap with
band clamp.
Step 3: Apply silicone sealant to 7” outer pipe on
cap.
Step 4: Slide 7” outer flex over inlet and secure with
band clamp.
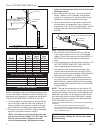
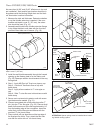
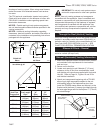
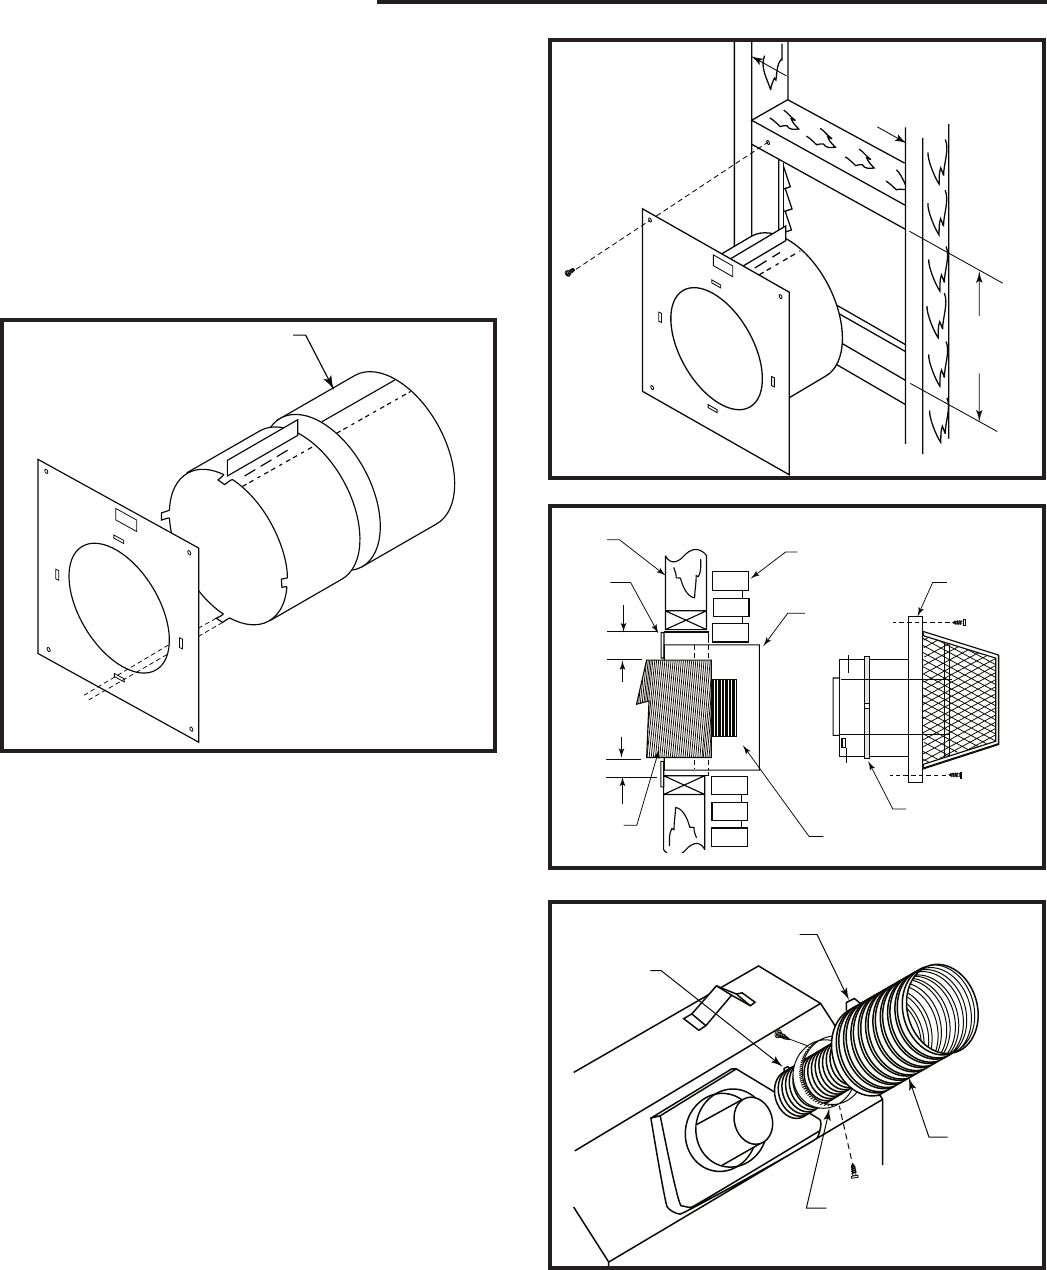
5. Secure vent cap terminal to exterior wall with screw
type fasteners as needed. (Fig. 21)
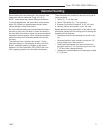
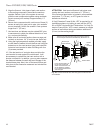
6. Connect corrugated side of the extension collar (7”
dia.) into the 7” dia. flex pipe. (Fig. 22) Place a small
bead of silicone around the collar approximately 1/4”
from the leading edge of the corrugation. Insert the
collar firmly into the flex pipe and secure with the
provided (7” dia.) band clamp.
7. Place a small mill-pac bead around the top edge of
the fireplace flue collar. Then, attach the flex tube
over the flue collar with a 4” dia. band clamp.
9¹⁄₂
" (241mm)
10¹⁄₂"
(267mm)
T187
wall thimble
12/5/03 djt
T187
Fig. 20 Install wall thimble with firestop on interior wall.
2" (51mm)
1" (25mm)
T188
vent cap terminal
12/5/03 djt
Inside
Wall
Wall
shield
Flex
Duct
Exterior Wall
Flange at
Top
Thimble Extension
Band Clamp
Terminal
Cap
Assembly
T188
Fig. 21 Secure vent cap terminal to exterior wall.
T189
extension collar
into flex vent
12/5/03 djt
7” (178 mm)
Band Collar
4” (102 mm)
Band Clamp
and Flex Flue
7”
(178 mm)
Flex Vent
Extension Collar
T189
Fig. 22 Insert collar into flex pipe and secure with band clamp.
ATTENTION:
Spacer springs must be installed when install-
ing flexible venting system.