


34
E
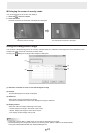
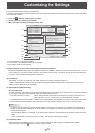
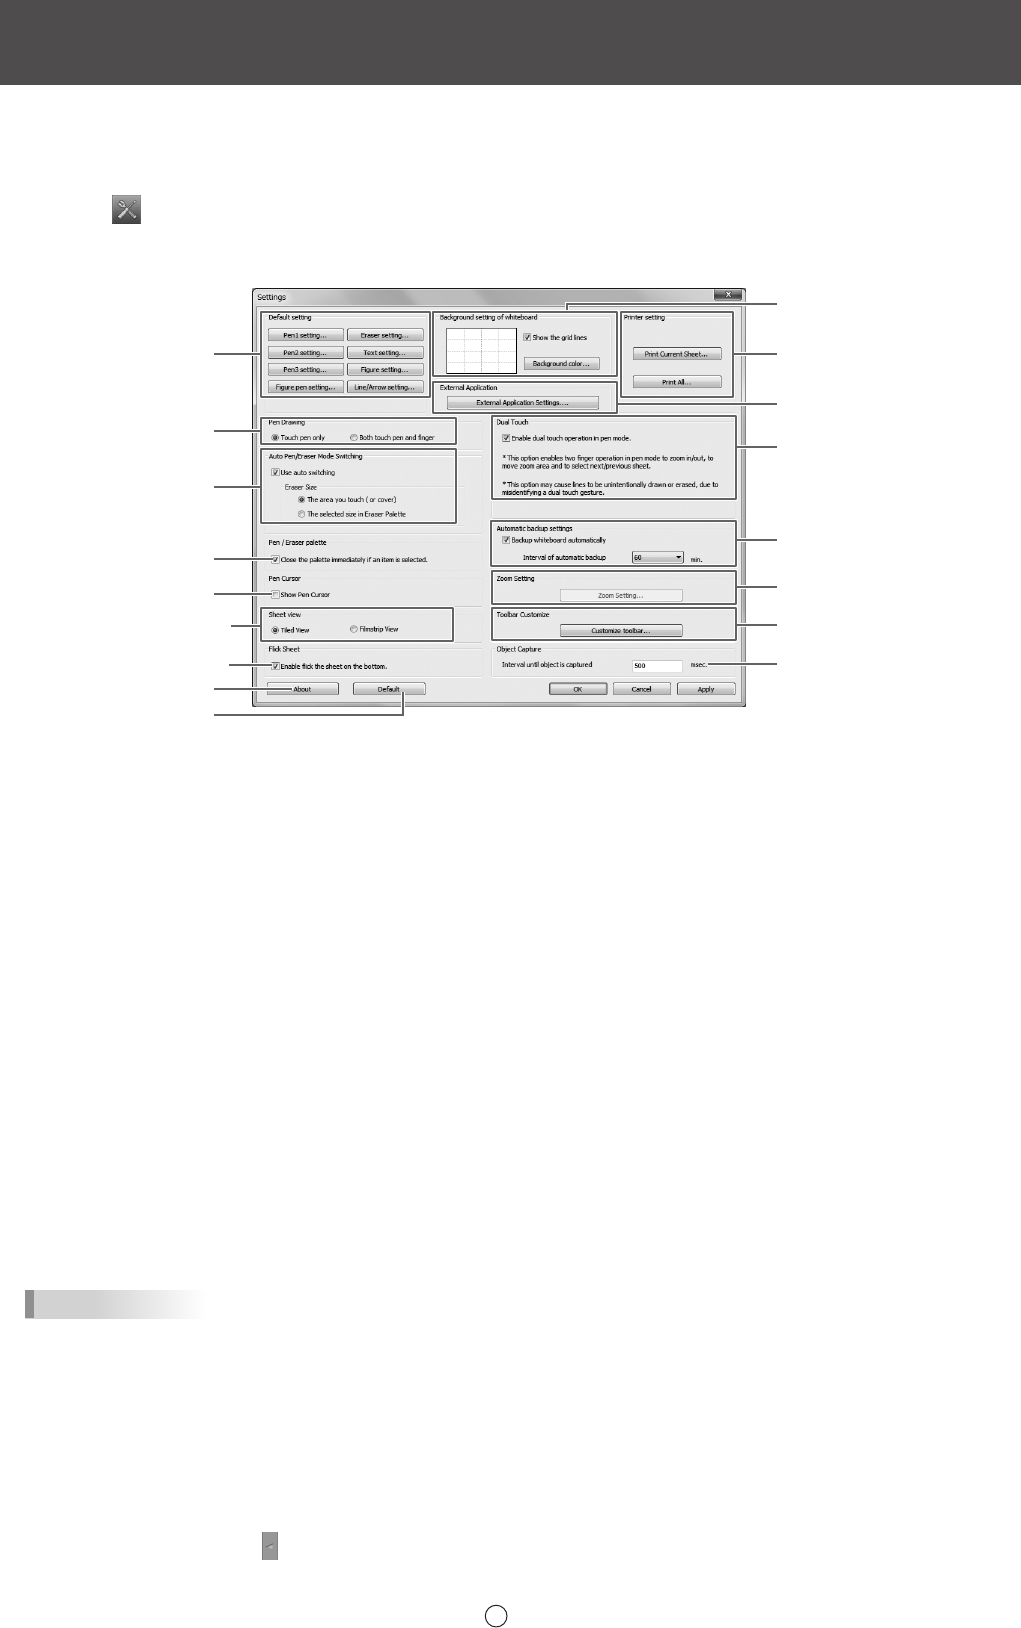
You can customize various settings of this software.
The settings are the same in both whiteboard mode and overlay mode. However, the contents of the screen will vary depending
on which mode is started.
1. Touch the
“Settings of Pen Software” button.
2. Set the options as necessary. (See below.)
3.Whenyounishadjustingthesettings,touch“OK”.
(5)
(13)
*
1
(1)
(2)
(3)
(4)
(6)*
1
(7)*
1
(8)
(9)
(10)
*
1
(11)
*
2
(14)
*
1
(15)
*
3
(16)
(17)
(12)
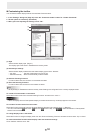
*1 Only whiteboard mode can be selected.
*2 For “Print All”, only whiteboard mode can be selected.
*3 Only overlay mode can be selected.
(1) Default settings for the Pen/Eraser/Text/Figure/Figure Pen/Line/Arrow
Set the following default settings that are applied when the Pen Software is started: the color and thickness of “Pen 1” to “Pen
3” and “Figure pen”, the size of “Eraser”, the font, size, style and color of “Text”, the shape, ll color, and line color/thickness
of “Figure”, and line color/thickness/type of “Line/Arrow”.
(2) Pen Drawing
Set whether or not you can draw with your nger when the pen function is selected (Page 14).
If a PN-L series interactive display is not connected when the pen software is started, this function cannot be used. The
setting is xed to “Both touch pen and nger”.
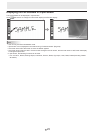
(3) Auto Pen/Eraser Mode Switching
Use auto switching
To use this function, select this to have the pen automatically switch to the eraser when the screen is touched with the eraser
or your nger in pen mode. Set the eraser size that is applied in “Eraser Size”.
• The area you touch (or cover) : When using an eraser or other object and the area of contact on the screen is at
least 1-9/16 inch (4 cm) x 1-9/16 inch (4 cm), erase the area of contact.
• The selected size in Eraser Palette :
Erase with the selected eraser size regardless of the amount of contact on the screen.
If a PN-L series interactive display is not connected when the pen software is started, this function cannot be used.
TIPS
• To use this function with a PN-L series interactive display, select the touch panel driver “Properties”, and congure the
settings on the “Operation Setting” tab as shown below. For information on the touch panel driver, see the Touch Panel
Driver Operation Manual.
- Set “Input Mode Setting” to “Standard”. If set to other than “Standard”, the pen/eraser auto switching function cannot be
used.
- If you have selected “The area you touch (or cover)”, set “Detect Eraser Area” to “Enable”.
(4) Pen/Eraser palette
Select this to have the palettes of “Pen 1” to “Pen 3” and “Eraser” close when a pattern is selected from a palette.
If the checkmark is removed,
must be clicked to close the palette.
Customizing the Settings