


User Manual Chapter 5 Capturing Images and Videos 71
Run Inspection
Use an inspection created on the XLG3™ VideoProbe
®
, PC or a demo inspection.
Follow the instructions below for conducting an MDI Inspection on the
XLG3™ VideoProbe
®
unit.
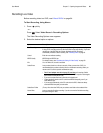
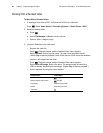
1. Press the MENU button.
2. Open an inspection: Use the Joystick to select the desired inspection.
Press ENTER to confirm.
3. Enter serial number or additional inspection data. Use the external keyboard to enter
text. The tab key advances the active text box; the arrow keys will move the cursor
along the text box.
4. Save to the appropriate drive.
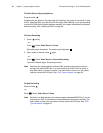
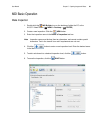
5. Select an inspection point: Use the Joystick to select and press ENTER to
confirm.
6. Move the video probe to the location that matches the corresponding location
described in the upper left-hand corner of the video screen.
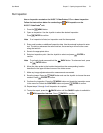
7. Make any image adjustments and/or measurements as needed.
8. Save the image: Press the SAVE button and use the Joystick to choose the save
method. Press ENTER to confirm.
9. Continue the inspection: Press the MENU button and locate the inspection name
in the menu list. Select the CONTINUE button and press ENTER to confirm.
10. Repeat steps 5 through 8 until inspection is complete.
11. To stop the report, press the BACK button until the CANCEL option is available in
the MDI Inspection interface. Press ENTER to confirm.
Note
If no inspection is listed, an inspection must first be exported.
Note
To go back a level press and hold the BACK button. To advance a level, press
the ENTER button.