6
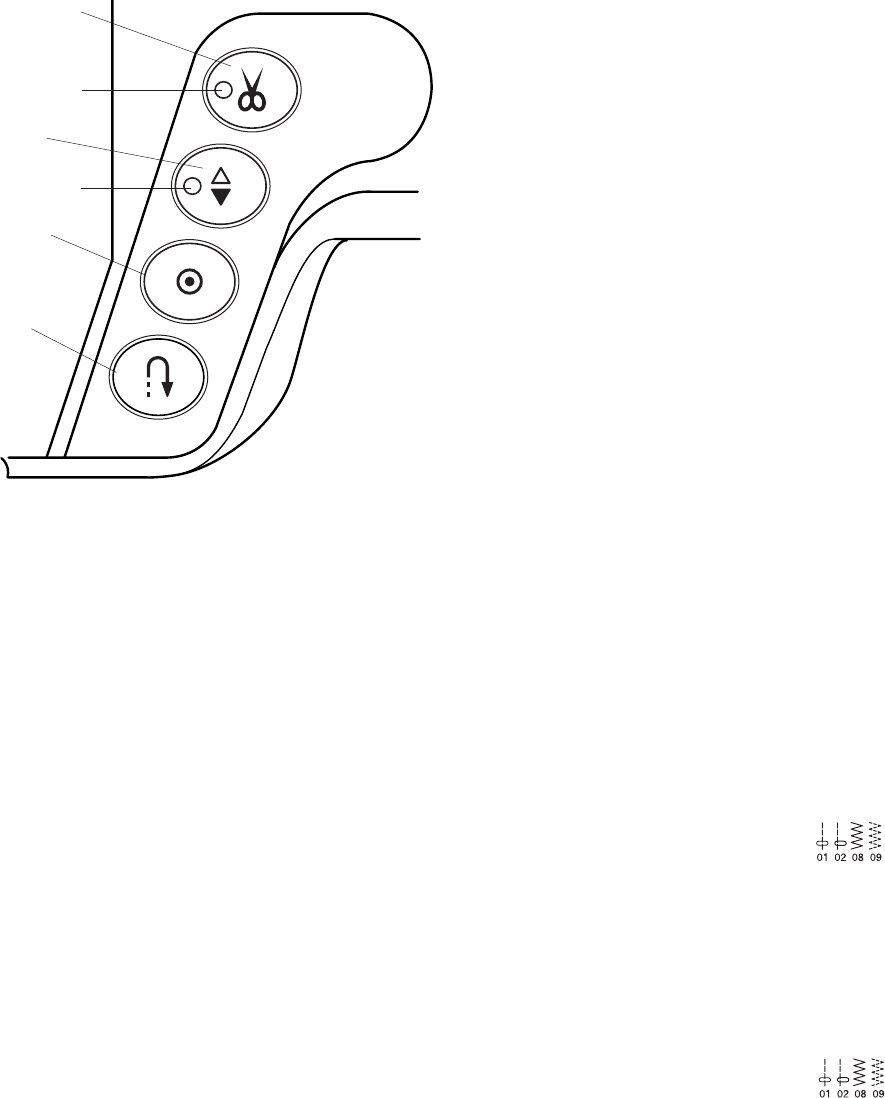
Function Buttons
1 Thread cutter button
Press this button after finishing sewing and the machine
will trim the threads.
The LED signal blinks while cutting the threads.
5 Thread Cutter Signal
NOTES:
The auto thread cutter will work well with normal sewing
threads #30 or finer.
Use the thread cutter on the face plate to cut the
specialized or thick threads if the auto thread cutter does
not work well.
When starting the next seam, pull the needle thread to pick
the bobbin thread up and draw them to the back and under
the foot.
Clean the auto thread cutter mechanism regularly to avoid
malfunction due to built up lint. (See page 70.)
Avoid using a paper spool when it begins to empty since it
will not unwind smoothly. It may cause the thread to bunch
or slip when using the auto thread cutter.
2 Up/Down needle button
Press this button to bring the needle bar up or down. The
LED signal will turn on when the needle is down.
The LED signal will turn off when the needle is up.
The machine will stop with the needle up or down
depending on the needle position determined by this
button.
The machine will always stop with the needle up after auto
thread cutting or buttonhole stitching.
6 LED signal
3 Auto-Lock button
When stitch pattern 01, 02, 08 or 09 has been
selected, the machine will immediately sew locking stitches
and automatically stop when the auto-lock button is
pressed.
When sewing all other stitches, the machine will sew
locking stitches at the end of the pattern being sewn and
automatically stop.
4 Reverse button
When stitch pattern 01, 02, 08 or 09 has been
selected, the machine will sew in reverse while the reverse
button is pressed.
If you press the reverse button when sewing all other
stitches, the machine will immediately sew locking stitches
and automatically stop.
1
2
3
4
5
6


