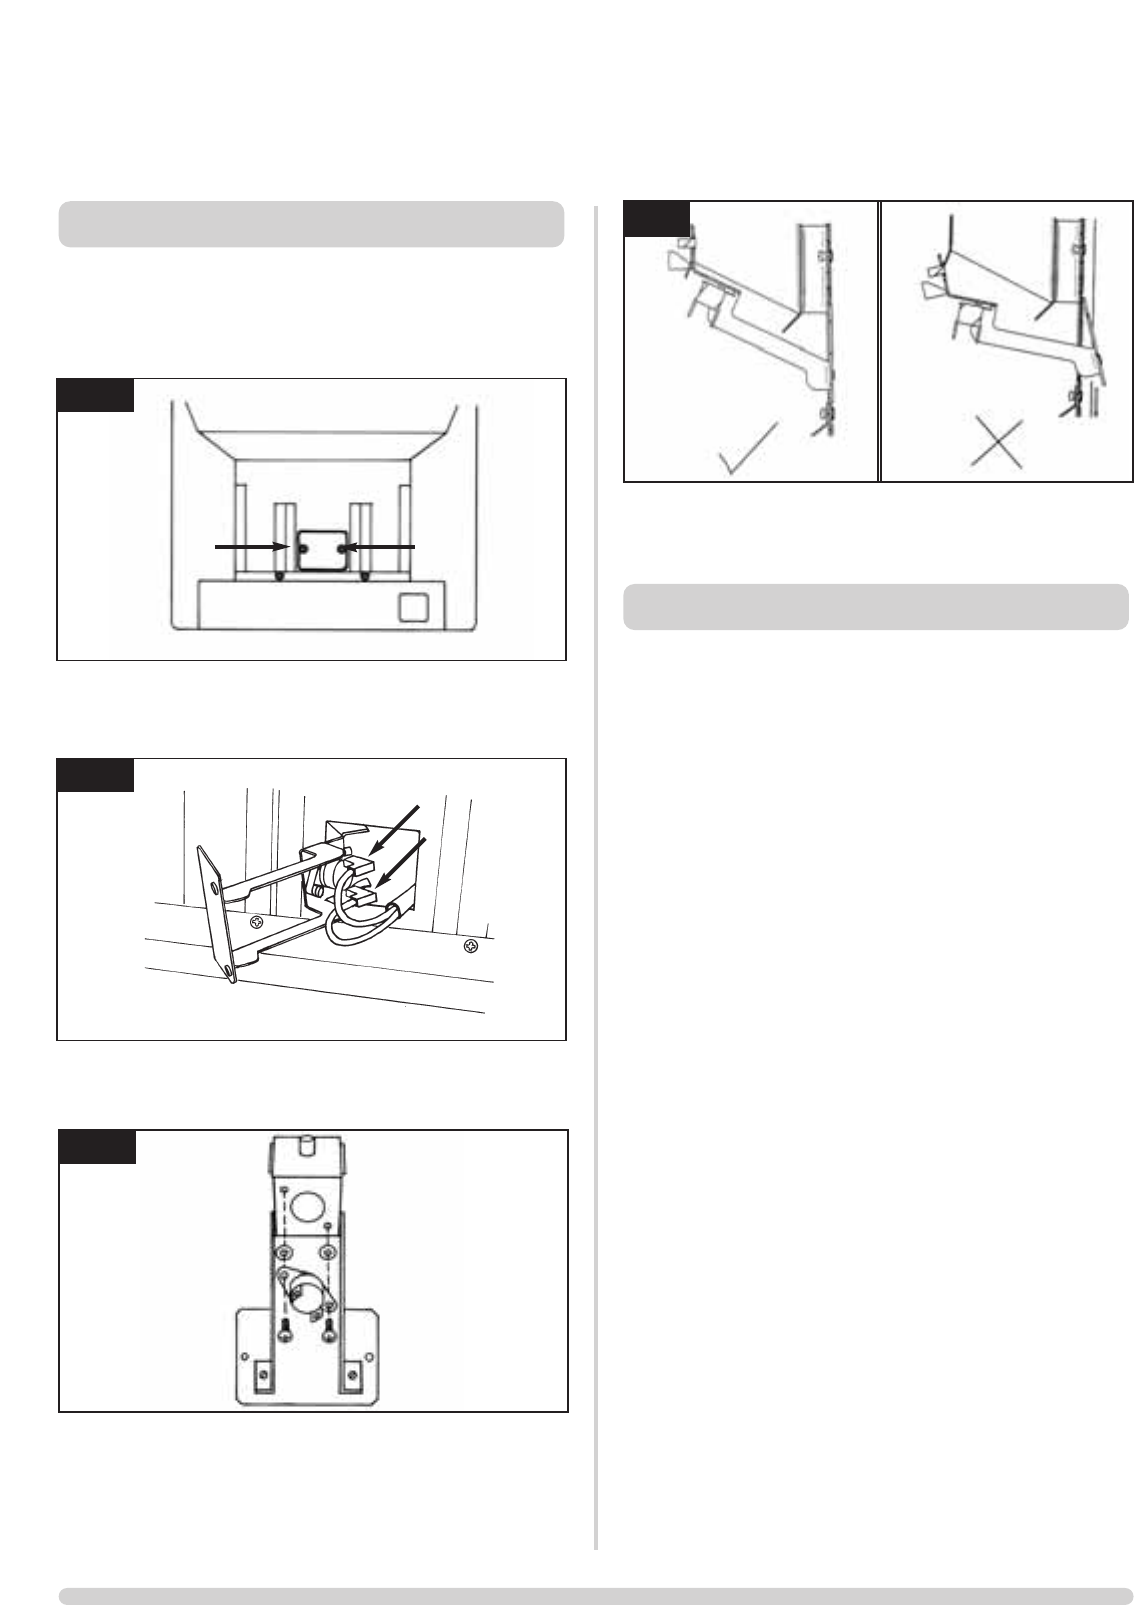
10.1 Open and remove the front door. Remove the glass frame.
Carefully remove the ceramic components and place to one
side. Undo the two screws at the back of the firebox and
carefully withdraw the bracket. See diagram 16
10.2 Disconnect the two sender wires. Undo the two taptite
screws and remove the sensor and the two plastic spacers.
See diagram 17
10.3 Refit the new sensor ensuring that the plastic spacers are
between the sensor and the bracket. Refit the leads. See
diagram 18
10.4 Feed the cable back through the hole as you replace the
bracket. When the bracket is located correctly it will sit
flush with the back panel without force required. If not
positioned correctly the bracket will sit at an angle. See
diagram 19
In order to change between gas types, it will be necessary
to change the following items
Pilot Unit
Control Valve**
Main Injector
Aeration Plate
Control Unit
Data Badge
The relevant parts can be ordered from Gazco, always
quote the appliance type and serial number when ordering
spare parts.
**NOTE: THE CONTROL VALVE IS FACTORY PRESET
FOR CORRECT GAS TYPE AND MODEL, A NEW UNIT
WILL NEED TO BE ORDERED WHEN CHANGING
BETWEEN GAS TYPES.
10. GAZCO FLUE SURE SYSTEM
20
SERVICING INSTRUCTIONS
REPLACING PARTS
16
17
11. CHANGING BETWEEN GAS TYPES
AR1442
AR1446
18
AR1452
AR1448AR1447
19


