


www.desatech.com
56131-F28
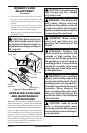
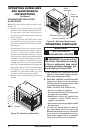
OPERATING FIREPLACE
MILLIVOLT
FOR YOUR SAFETY
WARNING: If you do not fol-
low these instructions exactly,
-
A. This appliance has a pilot which must be
lighted by hand. When lighting the pilot,
follow these instructions exactly.
B. BEFORE LIGHTING smell all around the
appliance area for gas. Be sure to smell next
to the oor because some gas is heavier than
air and will settle on the oor.
WHAT TO DO IF YOU SMELL GAS
• Do not try to light any appliance.
• Do not touch any electric switch; do not use
any phone in your building.
• Immediately call your gas supplier from
a neighbor’s phone. Follow the gas
supplier’s instructions.
• If you cannot reach your gas supplier, call the
re department.
C. Use only your hand to push in or turn the
gas control knob. Never use tools. If the
knob will not push in or turn by hand, don’t
try to repair it, call a qualied service tech-
nician or gas supplier. Force or attempted
repair may result in a re or explosion.
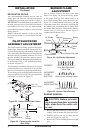
CLEANING AND REPLACING
GLASS DOOR
Note: Before proceeding, make sure unit is com-
pletely cool.
1. Remove top and bottom louvers and screen
assembly. Undo 4 latches and open glass door.
The procedure is the same for the end lover
panel but the entire frame must be removed
as one assembly.
2. To clean glass door, DO NOT remove glass
from frame. Use any glass cleaner to clean
glass. Do not use abrasive cleaners as this may
damage glass.
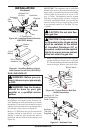
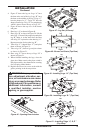
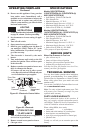
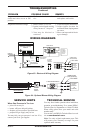
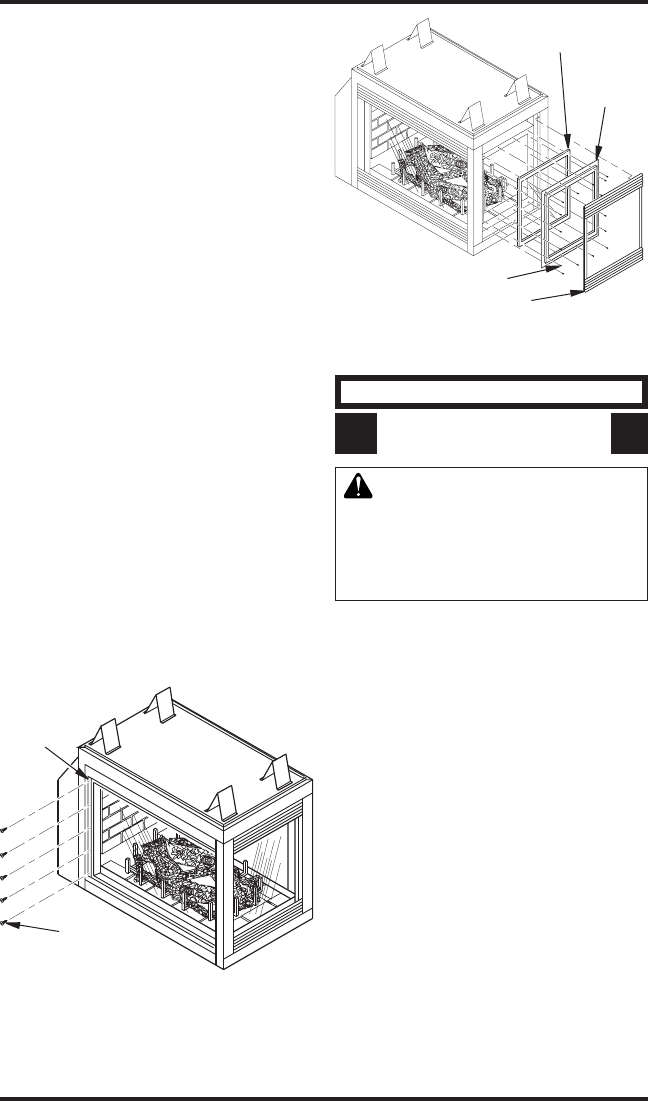
3. If replacement is necessary, the entire assem-
bly (frame and glass) must be replaced. If glass
is broken, wear gloves and tape remaining
fragments onto the frame. Remove 5 screws
located on end of rebox while holding frame
assembly to prevent it from falling and caus-
ing injury (see Figure 57). Mount new frame
at hinge with 5 new screws. Close and latch
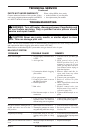
door. This will seat the gasket. If replacing end
glass panel, remove 16 screws around frame
(see Figure 58) To insure proper t, when
installing new glass panels make sure seam
in gasket is placed in the down position.
4. Replace screen assembly and top and bottom
louvers.
OPERATING GUIDELINES
AND MAINTENANCE
INSTRUCTIONS
Continued
Figure 57 - Removing Glass Door
Figure 58 - End Panel Replacement
Glass
Assembly
Frame
Assembly
Louver Assembly
Retainer Screws
Screws
Hinge