


Thermostats Crestron CHV-TSTAT and CHV-THSTAT
Installation
The location of the thermostat can affect its performance and efficiency. Install the
thermostat away from direct sunlight, drafts, doorways, skylights, and windows.
Also make sure the thermostat is conveniently located for programming, and do not
mount on an exterior wall. The thermostats may be mounted directly to drywall or to
a single-gang box.
Thermostats and sensors are mounted 60 inches (152.4 cm) above the finished floor
(HVAC industry standard).
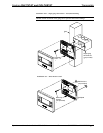
Refer to the following illustrations. Do the following to install the CHV-TSTAT or
the CHV-THSTAT.
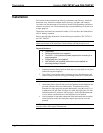
NOTE: When installing directly on drywall, use anchoring screws and hardware.
Make sure the back of the thermostat is flush with drywall and the unit is level.
Required Hardware
• Thermostat
• Phillips screwdriver (not supplied)
• Two 6/32 x 1 inch panhead screws (supplied) for mounting to a
single-gang box
• Single-gang box (not supplied)
• Wall anchors (not supplied) and screws (not supplied) for
mounting directly to drywall
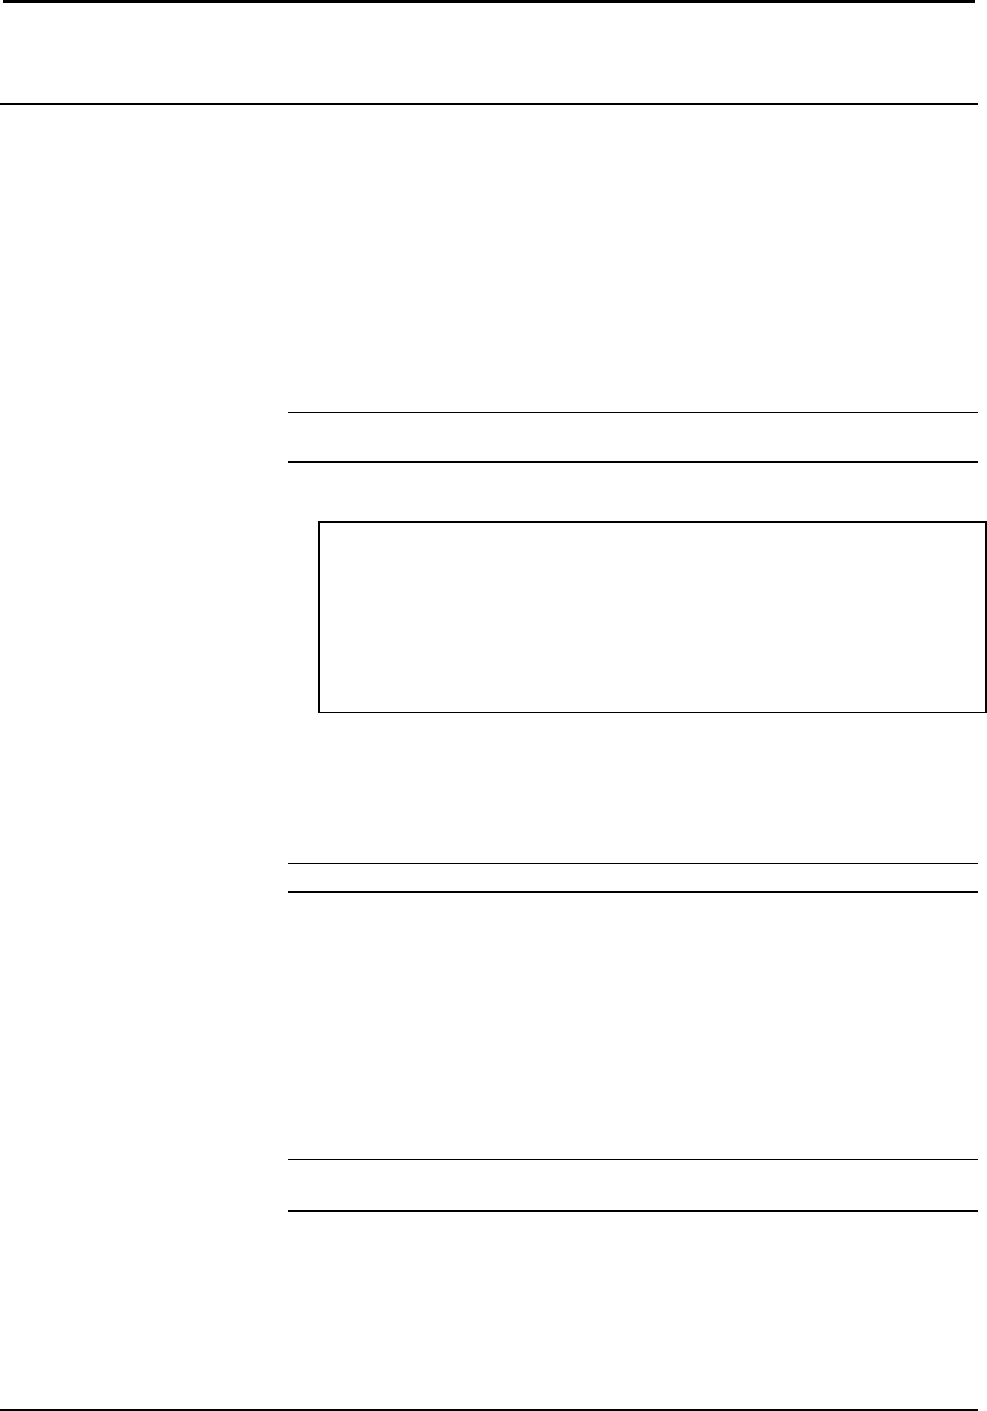
1. Separate thermostat front plate from back plate (you may need to exert force
when removing the faceplate).
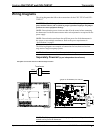
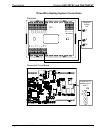
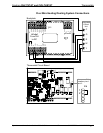
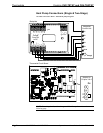
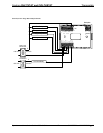
2. Turn off the circuit breaker when connecting power to the thermostat, and
connect wiring as required (wiring goes through center hole on back plate).
NOTE: Ensure the correct position of the P4 jumper; refer to pages 10, 11 and 12.
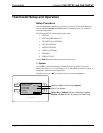
3. Attach back plate to drywall with screws and anchors (anchor hardware not
provided) 60 inches above the finished floor. Thermostat may also be
mounted to a single-gang box mounted horizontally, using the two 6/32 x 1
in panhead screws provided. If using a five-sided single-gang box, fill with
insulation material to minimize wall air ingress. Ensure that the thermostat
is level and the ventilation holes in the backplate are not blocked.
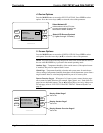
4. Note orientation of front plate connection leads and reattach the front plate
on the back plate (make sure front plate snaps in place and no wires are
pinched).
NOTE: If replacing an existing thermostat, make note of the wire colors and
positions before removing the old thermostat.
14 • Thermostats: CHV-TSTAT and CHV-THSTAT Operations and Installation Guide – DOC. 8163A