


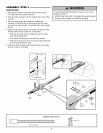
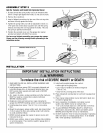

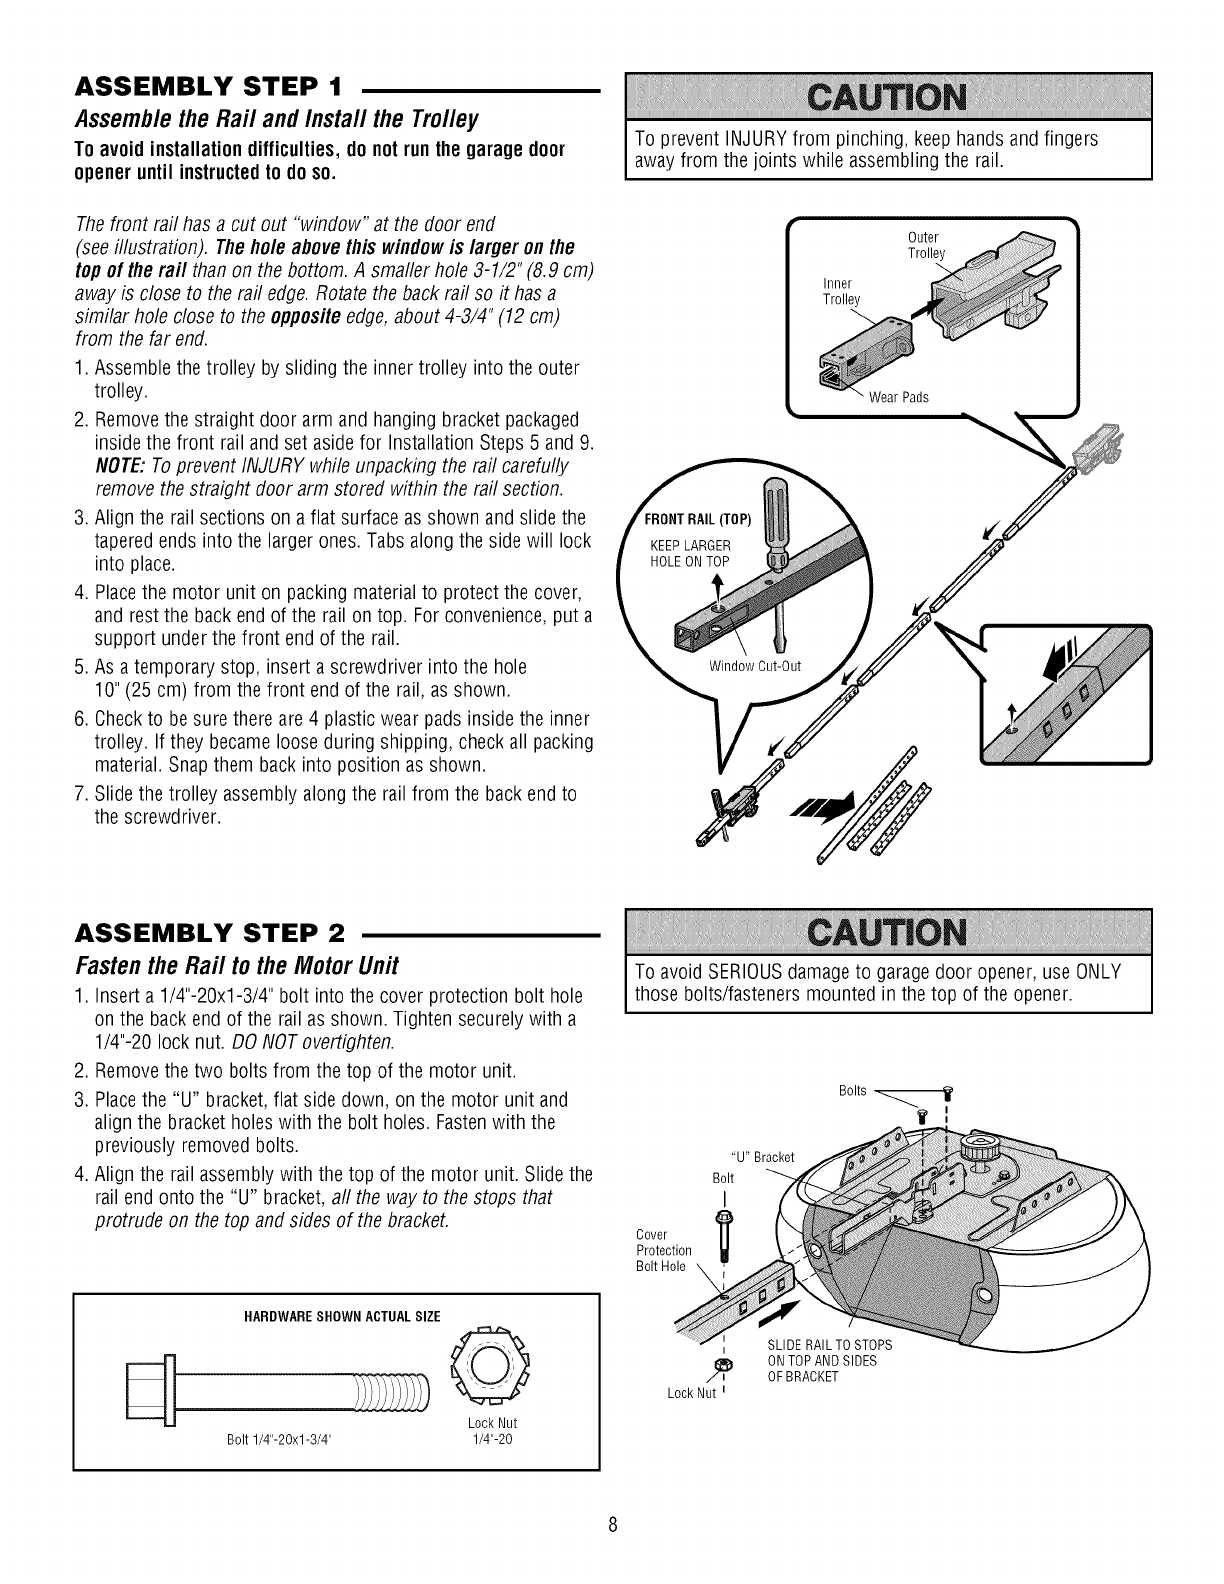
ASSEMBLY STEP 1
Assemble the Rail and Install the Trolley
To avoidinstallation difficulties,do notrun the garage door
openeruntil instructedto do so.
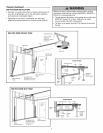
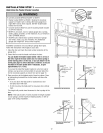
Thefront rail has a cut out "window" at the door end
(seeillustration). Theholeabovethis windowis larger on the
top ofthe raft than on the bottom. A smaller hole 3-1/2" (8.9 cm)
away is close to the rail edge.Rotate the back rail so it hasa
similar hole close to the oppositeedge, about 4-3/4" (12 cm)
from the far end.
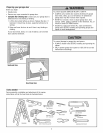
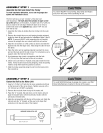
1. Assemblethe trolley by sliding the inner trolley into the outer
trolley.
2. Removethe straight door arm and hanging bracketpackaged
inside the front rail and set asidefor Installation Steps5 and 9.
NOTE:Toprevent INJURY while unpacking the rail carefully
remove thestraight door arm stored within the rail section.
3. Align the rail sections on a flat surface asshown and slide the
taperedends into the larger ones. Tabs along the side will lock
into place.
4. Placethe motor unit on packing material to protect the cover,
and rest the back end of the rail on top. Forconvenience,put a
support under thefront end of the rail.
5. As a temporary stop, insert a screwdriver into the hole
10" (25 cm) from the front end of the rail, as shown.
6. Checkto be sure there are 4 plastic wear pads insidethe inner
trolley. If they becameloose during shipping, checkall packing
material. Snapthem back into position as shown.
7. Slide the trolley assembly along the rail from the back end to
the screwdriver.
To prevent INJURYfrom pinching, keephands and fingers
away from the joints while assembling the rail.
Inner
Trolley
Outer
Trolley
Wear Pads
RAIL (TOP)
KEEPLARGER
HOLEONTOP
Window Cut-Out
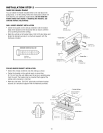
ASSEMBLY STEP 2
Fasten the Rail to the Motor Unit
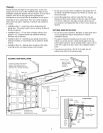
1. Inserta 1/4"-20xl-3/4" bolt into the cover protection bolt hole
on the back end of the rail as shown. Tighten securelywith a
1/4"-20 lock nut. DO NOTovertighten.
2. Removethe two bolts from the top of the motor unit.
3. Placethe "U" bracket,flat side down, on the motor unit and
align the bracketholes with the bolt holes. Fastenwith the
previously removed bolts.
4. Align the rail assemblywith the top of the motor unit. Slide the
rail end onto the "U" bracket,all the way to the stops that
protrude on the top and sides of the bracket.
HARDWARESHOWNACTUALSIZE
Lock Nut
Bolt 1/4"-20xl-3/4" 1/4"-20
To avoid SERIOUSdamageto garagedoor opener, use ONLY
those bolts/fasteners mounted in the top of the opener.
"U" Bracket
Bolt
I
Cover
Protection
Bolt Hole _
Bolts
I
I
I
Lock Nut i
SLIDE RAIL TOSTOPS
ONTOP ANDSIDES
OFBRACKET