


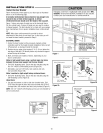
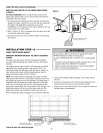


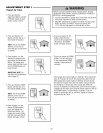

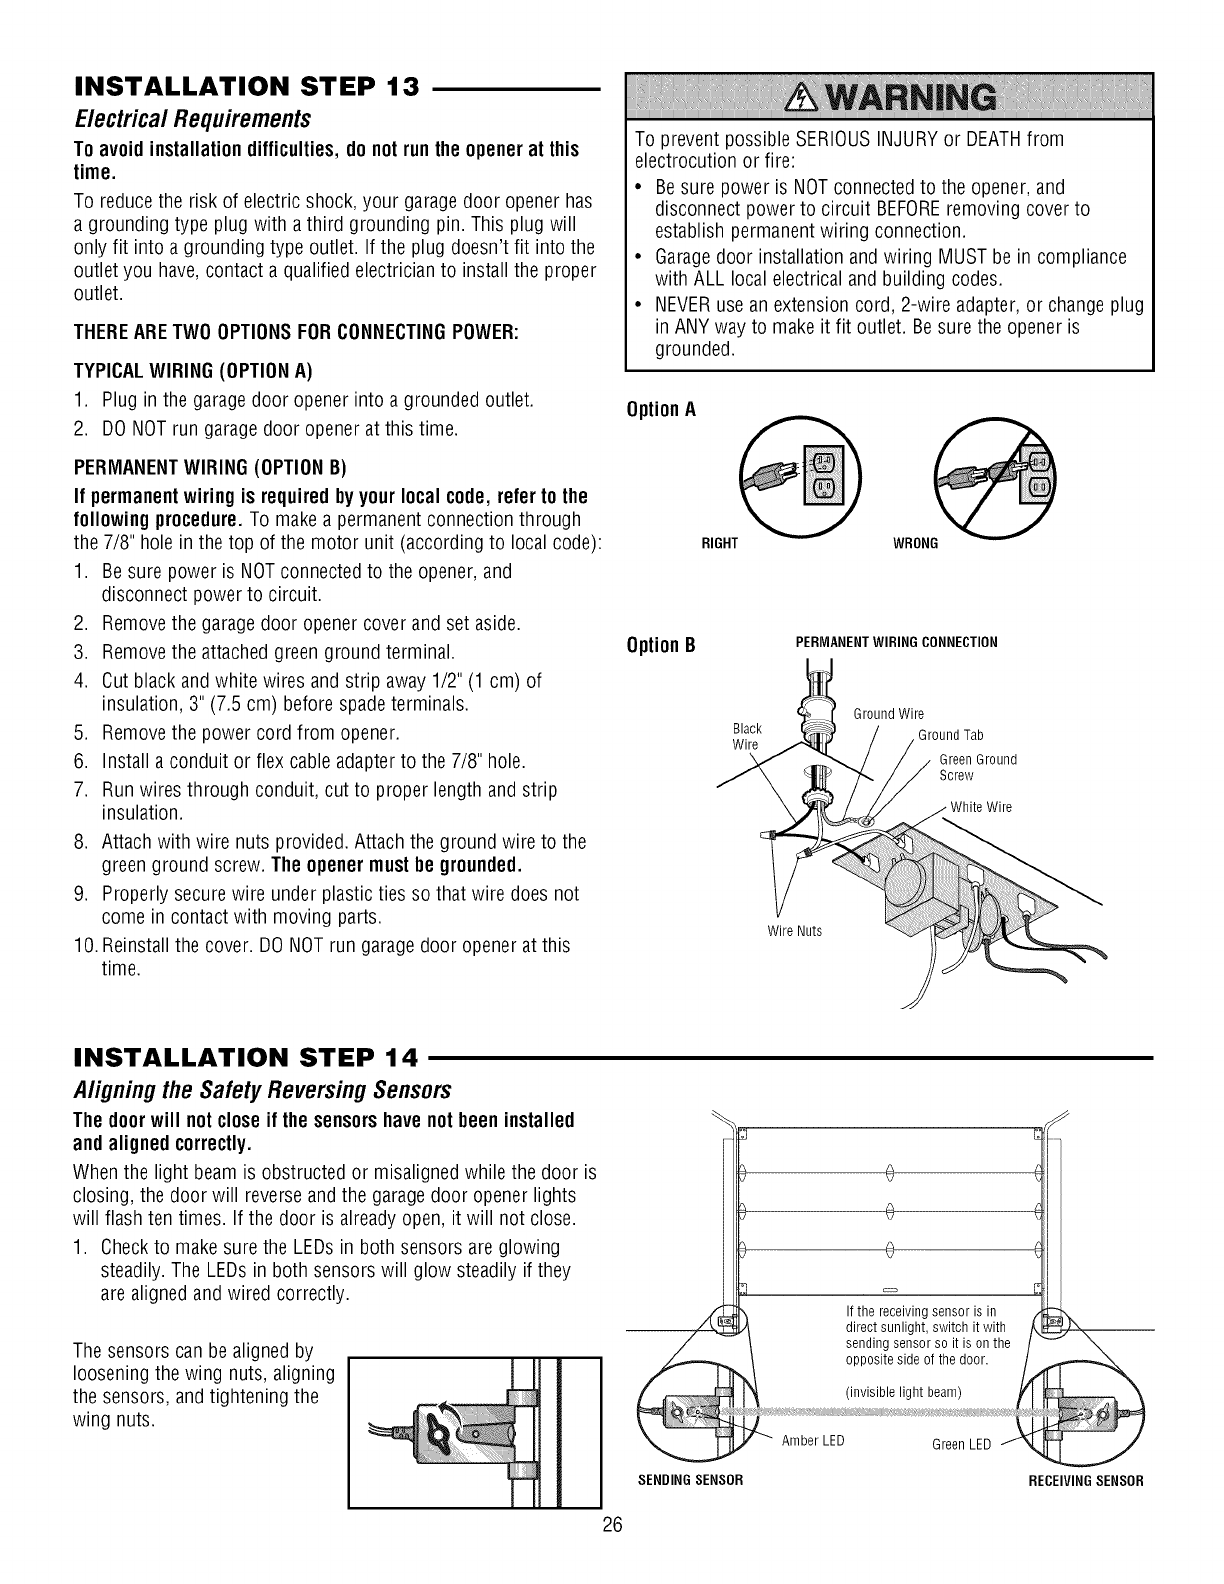
INSTALLATION STEP 13
Electrical Requirements
To avoid installationdifficulties, do notrun the openerat this
time.
To reducethe risk of electric shock, your garagedoor opener has
a grounding type plugwith a third grounding pin. This plug will
only fit into a grounding type outlet. If the plug doesn't fit into the
outlet you have,contact a qualified electrician to install the proper
outlet.
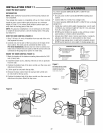
THEREARETWOOPTIONSFORCONNECTINGPOWER:
TYPICALWIRING(OPTIONA)
1. Plug in the garage door opener into a grounded outlet.
2. DO NOTrun garagedoor opener at this time.
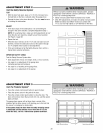
PERMANENTWIRING (OPTIONB)
If permanentwiring is required byyour local code, refer to the
followingprocedure.To makea permanent connection through
the 7/8" hole in the top of the motor unit (according to local code):
1. Be sure power is NOTconnected to the opener,and
disconnect power to circuit.
2. Removethe garagedoor opener cover and set aside.
3. Removethe attachedgreen ground terminal.
4. Cut black and white wires and strip away 1/2" (1 cm) of
insulation, 3" (7.5 cm) before spadeterminals.
5. Removethe power cord from opener.
6. Install a conduit or flex cable adapterto the 7/8" hole.
7. Run wires through conduit, cut to proper length and strip
insulation.
8. Attach with wire nuts provided. Attachthe ground wire to the
green ground screw. The openermustbe grounded.
9. Properly securewire under plastic ties so that wire does not
come in contact with moving parts.
10.Reinstall the cover. DONOTrun garage door opener atthis
time.
To prevent possible SERIOUSINJURYor DEATHfrom
electrocution or fire:
• Besure power is NOTconnectedto the opener,and
disconnect powerto circuit BEFOREremoving cover to
establish permanentwiring connection.
• Garagedoor installation and wiring MUSTbe in compliance
with ALL local electrical and building codes.
• NEVERusean extension cord, 2-wire adapter,or change plug
in ANYway to make it fit outlet. Besure the opener is
grounded.
OptionA
RIGHT WRONG
Option B
PERMANENTWIRING CONNECTION
Ground Wire
Black Ground Tab
Wire
GreenGround
Screw
WireNuts
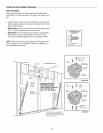
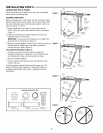
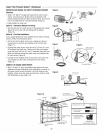
INSTALLATION STEP 14
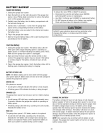
AligningtheSafetyReversingSensors
The doorwill notclose if thesensorshavenot been installed
and alignedcorrectly.
Whenthe light beamis obstructed or misaligned while the door is
closing, the door will reverse andthe garagedoor opener lights
will flash ten times. If the door is already open, it will not close.
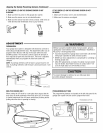
1. Check to makesure the LEDsin both sensors are glowing
steadily. The LEDsin both sensors will glow steadily if they
are aligned and wired correctly.
The sensorscan be aligned by
loosening the wing nuts, aligning
the sensors, andtightening the
wing nuts.
i SENDING SENSOR
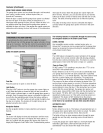
26
.
0
the receiving sensor is in
_irect sunlight, switch it with /(
sending sensor soit ison the /
opposite side of the door. /f
Amber LED GreenLED
RECEIVINGSENSOR