


Installation (for qualified installers only) 11
Travis Industries 100-01169_001 4050119
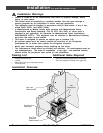
Vent Requirements
• The vent must maintain the required 1" clearance to combustible materials to prevent a fire. Do not fill
air spaces with insulation.
• The gas appliance and vent system must be vented directly to the outside of the building, and never
be attached to a chimney serving a separate solid fuel or gas-burning appliance. Each direct vent gas
appliance must use it's own separate vent system.
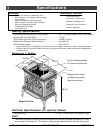
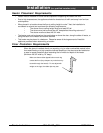
• When the vent passes through a
wall a wall thimble is required.
When the vent passes through a
ceiling a support box or firestop is
required. When the vent passes
through the roof, a roof flashing
and storm collar are required.
Follow the instructions provided
with the vent for installing these
items.
NOTE: Wall thimbles may have
different dimensions than what is
required by this heater.
• Failure to adjust the air shutter properly
may lead to improper combustion
which can create a safety hazard.
Consult your dealer or installer if you
suspect an improperly adjusted air
shutter.
•
This heater has been tested at
altitudes ranging from sea level to
8,000 feet (2,400 M). In this
testing we have found that the
heater, with its standard orifice,
burns correctly with just an air
shutter adjustment.
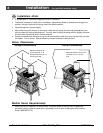
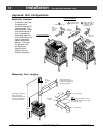
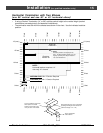
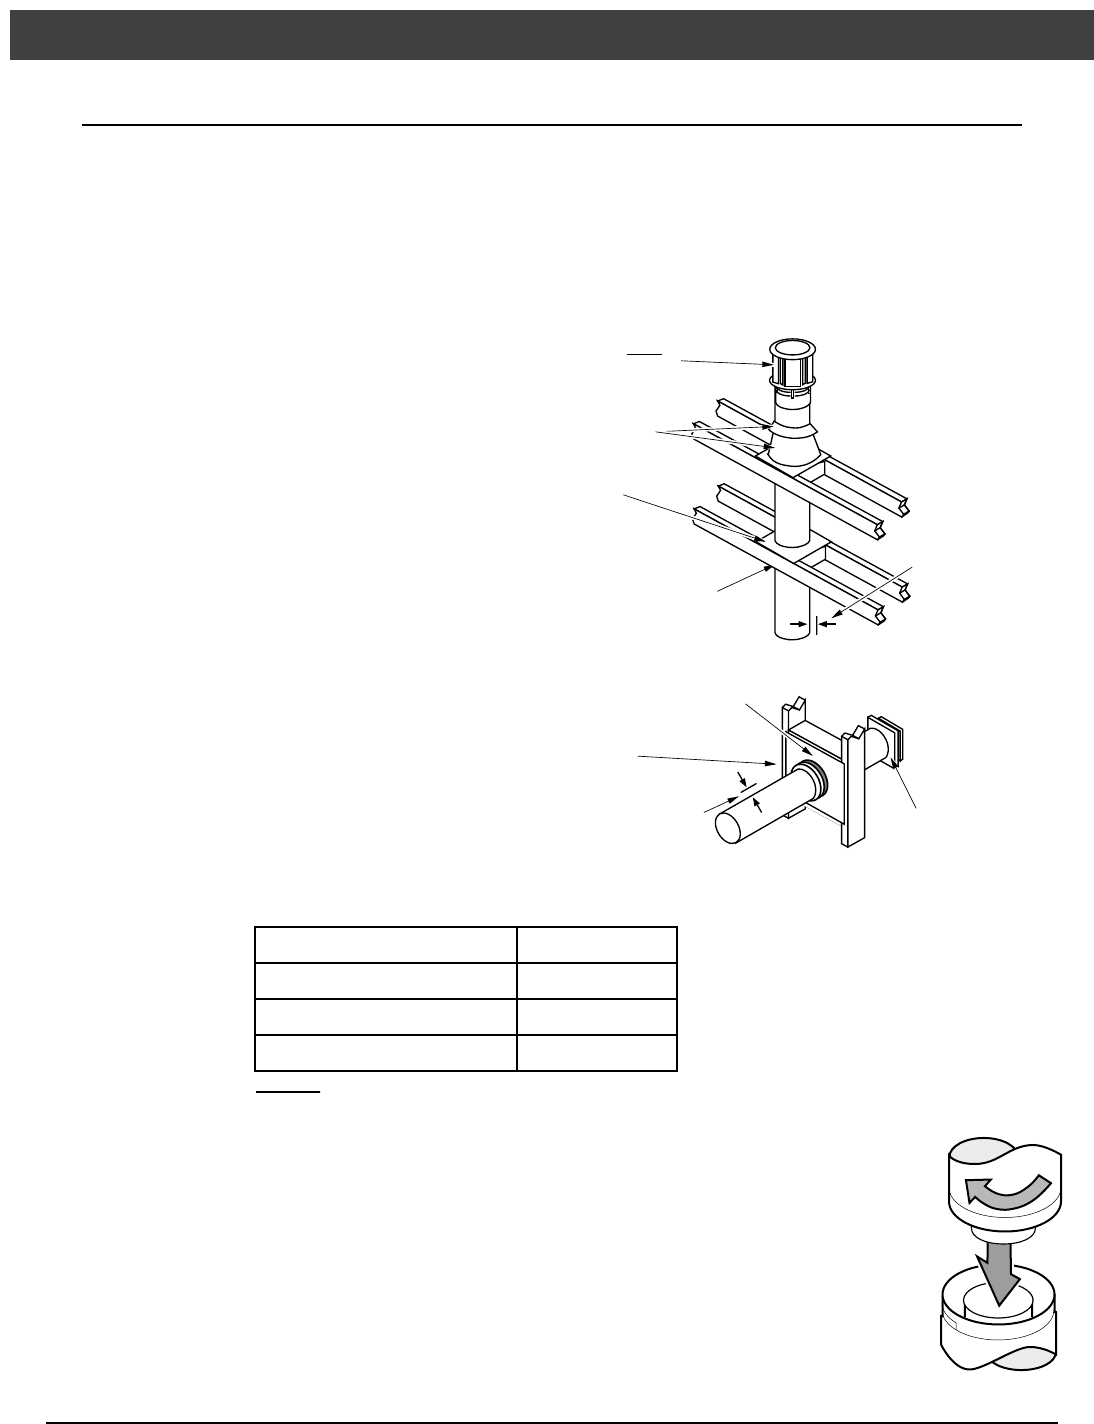
Use a firestop whenever
passing through a ceiling
Vertical Termination
NOTE:
always use the "high-wind"
version (if applicable)
Use a roof flashing and storm collar
whenever passing through the roof
Use a support box
on exposed vent
Vertical Vent
Requirements
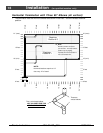
Use a thimble when
passing through a wall
Horizontal Termination
Maintain a minimum 1"
clearance from vent to any
combustible.
Minimum
Framing for wall
thimble
Horizontal Vent
Requirements
Maintain a minimum 1"
clearance from vent to
any combustible
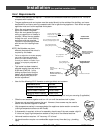
• Use of of the following 6-5/8" diameter co-axial gas direct vent systems:
Manuafacturer Series
Simpson Dura-Vent Model GS
Selkirk Hearth Products Direct-Temp
American Metal Products Ameri-Vent
NOTE : Always use the high-wind cap for the type of vent you are using (if applicable)
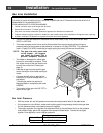
• Slide the vent sections together and turn 1/4 turn until the sections lock in place.
• Screws are not required to secure the vent. However, three screws may be used to
secure vent sections together if desired.
• High temperature sealant is recommended at the appliance starter section connection
(use high-temperature silicone or Mill-Pac®).
• If disassembly is required, at time of re-assembly check to see if the vent creates a tight fit.
If it does not, apply high temperature sealant to the joints of the affected sections.
• Horizontal sections require a 1/4" rise every 12" of travel
• Horizontal sections require non-combustible support every three feet (e.g.: plumbing
tape)