MS-70 / MX-50 / MF-50 / ML-50 63
15.2.
15.2.15.2.
15.2. Replacement of the Halogen Lamp
Replacement of the Halogen LampReplacement of the Halogen Lamp
Replacement of the Halogen Lamp
Replace the halogen lamp, when the drying time is excessive or the lamp is defective.
Use the halogen lamp of accessory AX-MX-34-120V or AX-MX-34-240V that is adapted
to your local voltage. The life of the halogen lamp is approximately 5000 hours.
Caution
Remove power cord before replacement. If the power cord is not removed during
lamp replacement, it may cause receiving an electric shock.
Read the power supply voltage label on the back of the heater cover and confirm
that the rated voltage of the halogen lamp is correct for your power supply voltage.
Voltage Label
The Rated Voltage of
the Halogen Lamp
Accessory number
100
-
120 V
AC 120 V
AX-MX-34-120V
200
-
240 V
AC 240 V
AX-MX-34-240V
Do not drop, throw or crack the halogen lamp. Broken glass may cause an injury.
Clean the surface of the halogen lamp. If there is a stain
or fingerprint, it may shorten life of the halogen lamp. Do
not touch the lamp directly.
Dispose of a used halogen lamp that keeps its shape. If
it is broken, glass may spread and cause injury.
We recommend that you replace the halogen
lamp, when it exceeds the rated life.
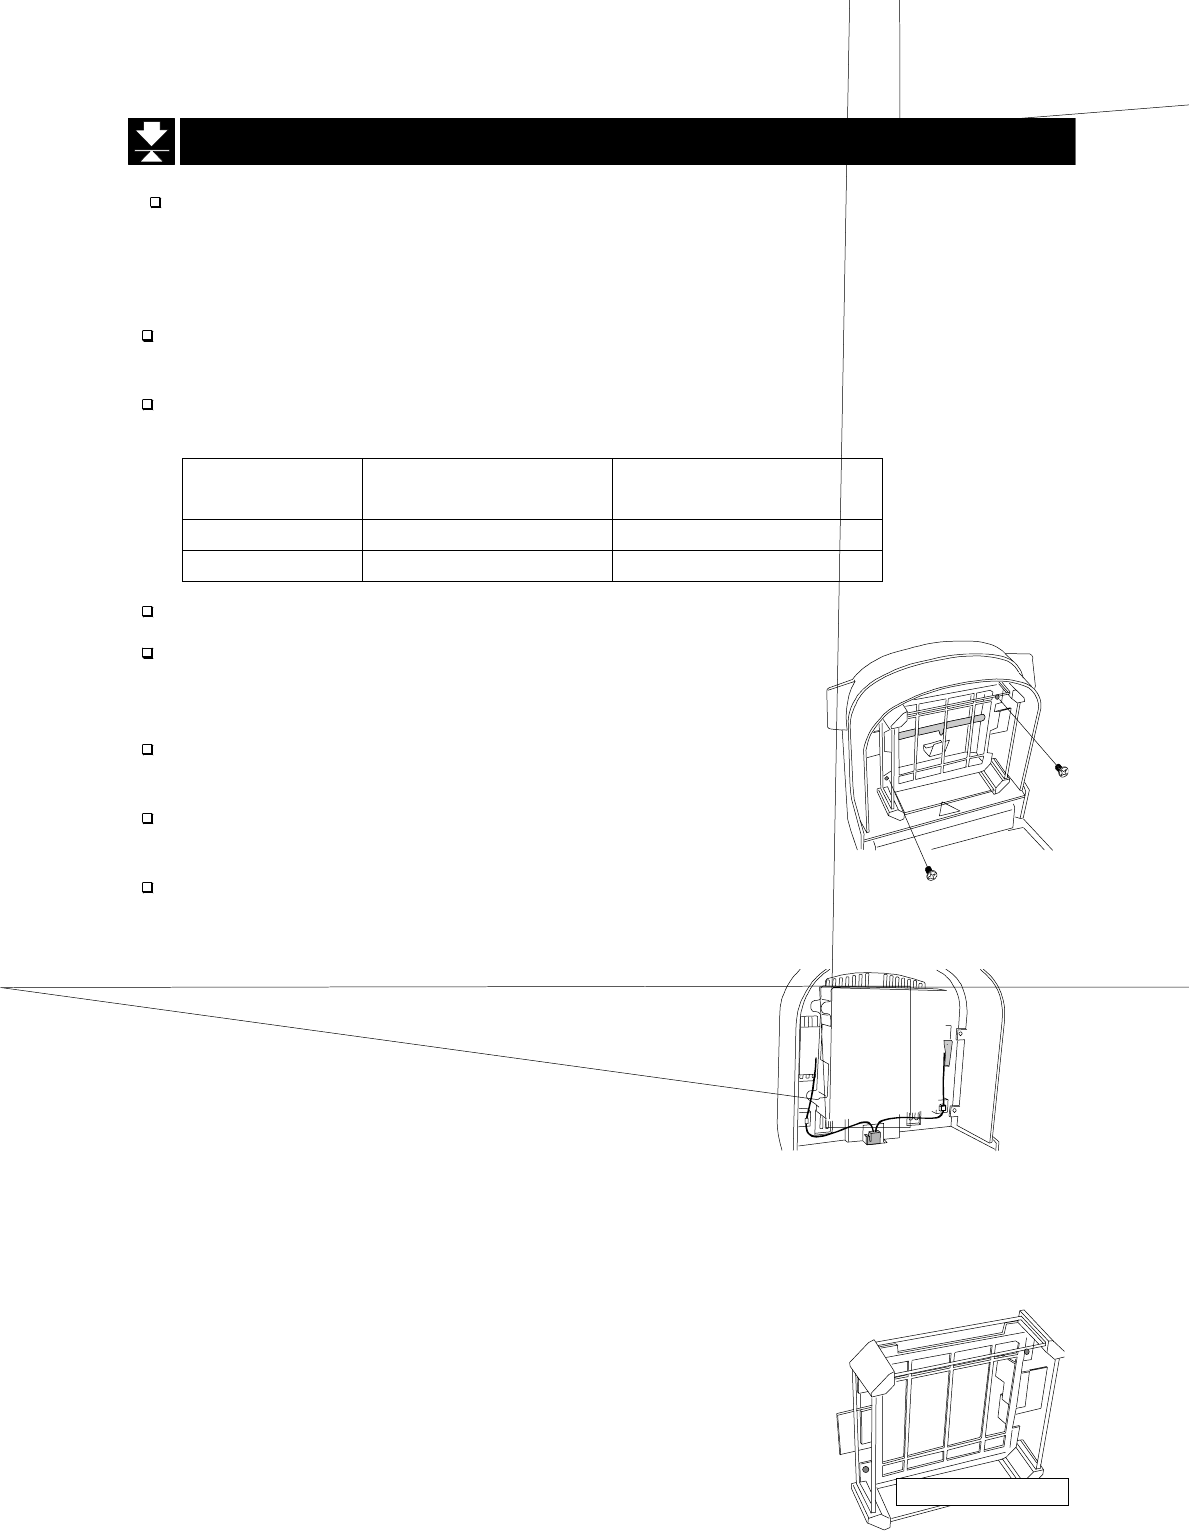
Affix the lamp wire to the hook so that the
lamp wire does not touch the glass-housing
and heater cover.
1. Turn off the power switch and remove
power cord.
2. Check rated voltage of the halogen
lamp that is printed around the holder.
3. Check that the lamp is cool.
4. Remove the two screws holding the
glass-housing.
5. Remove halogen lamp.
6. Install the new halogen lamp so that there is
downward projection of the heat and light.
7. Affix the lamp wire to the hook.
8. Affix the glass-housing with the two screws.
Do not pinch the wire between the glass housing and lid.
Glass-housin
g


