


10
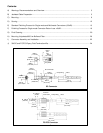
Fig. C8
Fig. C9
Fig. C10
Fig. C11
SECTION C
Mounting
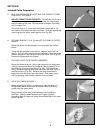
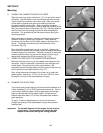
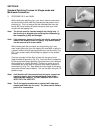
8. THREAD THE CONNECTOR ONTO THE FIBER
Slide the crimp ring up the cable within 1/2" (13 mm) of the end of
the jacket. Hold the cable in one hand directly behind the crimp
ring and hold the connector in the other hand. Rest your hands
on the table or against each other and carefully thread the
connector straight onto the fiber. Slowly rotate the connector
between thumb and forefinger in order to ease the funneling of the
fiber into the guide hole of the ferrule (Fig. C8). Carefully observe
that the fiber is moving through the ferrule while threading the
connector. This ensures that the fiber hasn't broken during the
mounting process.
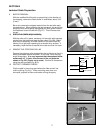
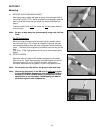
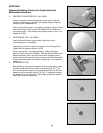
While rotating the connector, maintain a continuous light inward
pressure in order to assist entry alignment. Slowly slide the
connector onto the fiber until the buffer seats at the base of the
ferrule. The Kevlar must flare around the backbone of the
connector (Fig. C9).
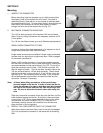
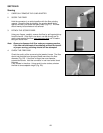
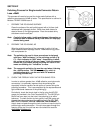
Once the buffer is seated, do not pull on the fiber. Keeping the
fiber forward will ensure that the epoxy does not deposit anywhere
inside the body of the connector. Hold the connector in place and
carefully slide the crimp ring up over the Kevlar until the ring is
seated with the back end of the connector (Fig. C10).
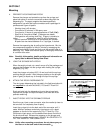
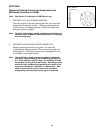
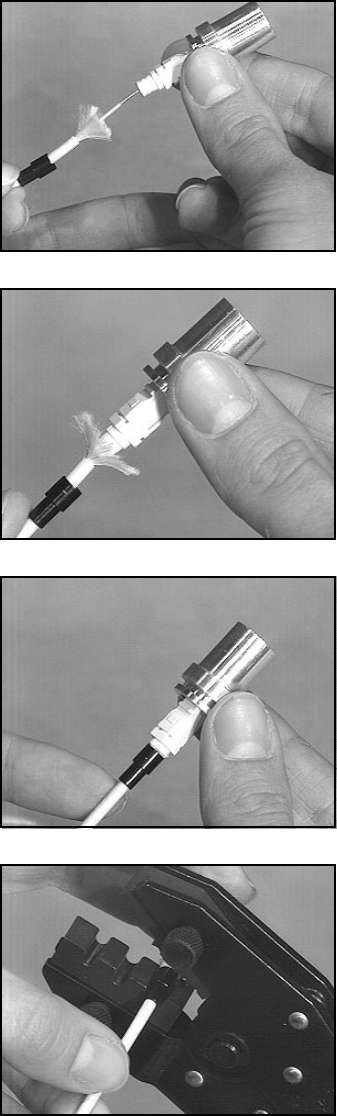
9. CRIMP THE RING ONTO THE CONNECTOR BACKBONE.
Make sure that the crimp ring is fully seated over the back of the
connector. Hold the connector in place with your forefinger and
middle finger. Be sure that the crimp cavity marked .190
completely covers the upper portion of the ring and crimp the ring
to the connector, securing the Kevlar (Fig. C11).
Next, crimp the smaller diameter of the crimp ring to retain the
cable's jacket. Use cavity .137 for 3.0 mm and .120 for 2.4 mm.
Be careful not to pinch the cable between the jaws.
10. EXAMINE THE EPOXY BEAD
The correct epoxy bead height at the fiber should be between 2 to
4 fiber diameters (0.10" to 0.020") above the ceramic tip. If this is
not the case, additional epoxy must be applied around the fiber
base to build the bead to the proper height. A short piece of
buffered fiber with about 1/4" (6 mm) of exposed fiber makes a
good applicator.
To apply: Carefully deposit epoxy on the end of the ferrule
through the opening in the load adapter using a short piece of
buffered fiber .
Important: The outside diameter of the ceramic ferrule must be
free of epoxy. Excess epoxy will adhere the load
adapter to the ferrule during the curing process.