


12 13
1. INSTALL
ZONE
1. INSTALL
****
12:00 am
ENTER PIN
12:00 am
1. INSTALL
ZONE
****
12:00 am
ENTER PIN
12:00 am
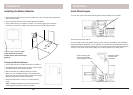
Installation
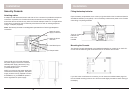
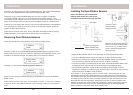
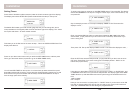
Initializing Door/Window Sensors
Remove the screw from the front of the Door/Window Sensor and install
2 AAA alkaline batteries inside. Observe polarity.
Set switch to MAX (left) for doors, or MIN (right) for windows.
Press and hold the button inside the Sensor for 3-4 seconds and then
release it. This initializes the Sensor and picks a random code that is
used when it is registered with the Console. Replace cover and place
the magnet next to the Sensor (with the arrows aligned).
See pages 14 and 15 if you want to use an additional magnetic contact
switch. Note, if the Sensors you purchased are different from shown
here, refer to the installation instructions that came with them.
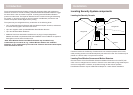
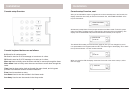
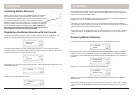
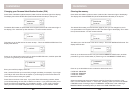
Registering Door/Window Sensors with the Console
Press either of the Menu up/down buttons (under the lid to the right of the display). The
display then shows ENTER PIN (Personal Identifi cation Number) in the top line.
The default PIN is 0000, you’ll fi nd out later (page 24) how you can change this, but for
now press 0000 on the keypad (under the lid to the bottom right of the display). This clears
the top line and shows * for each number entered.
This takes you to the fi rst level of the menu at step 1. This is the INSTALLATION level. The
display looks like this:
Press OK and the display looks like this:
Installation
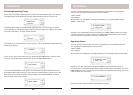
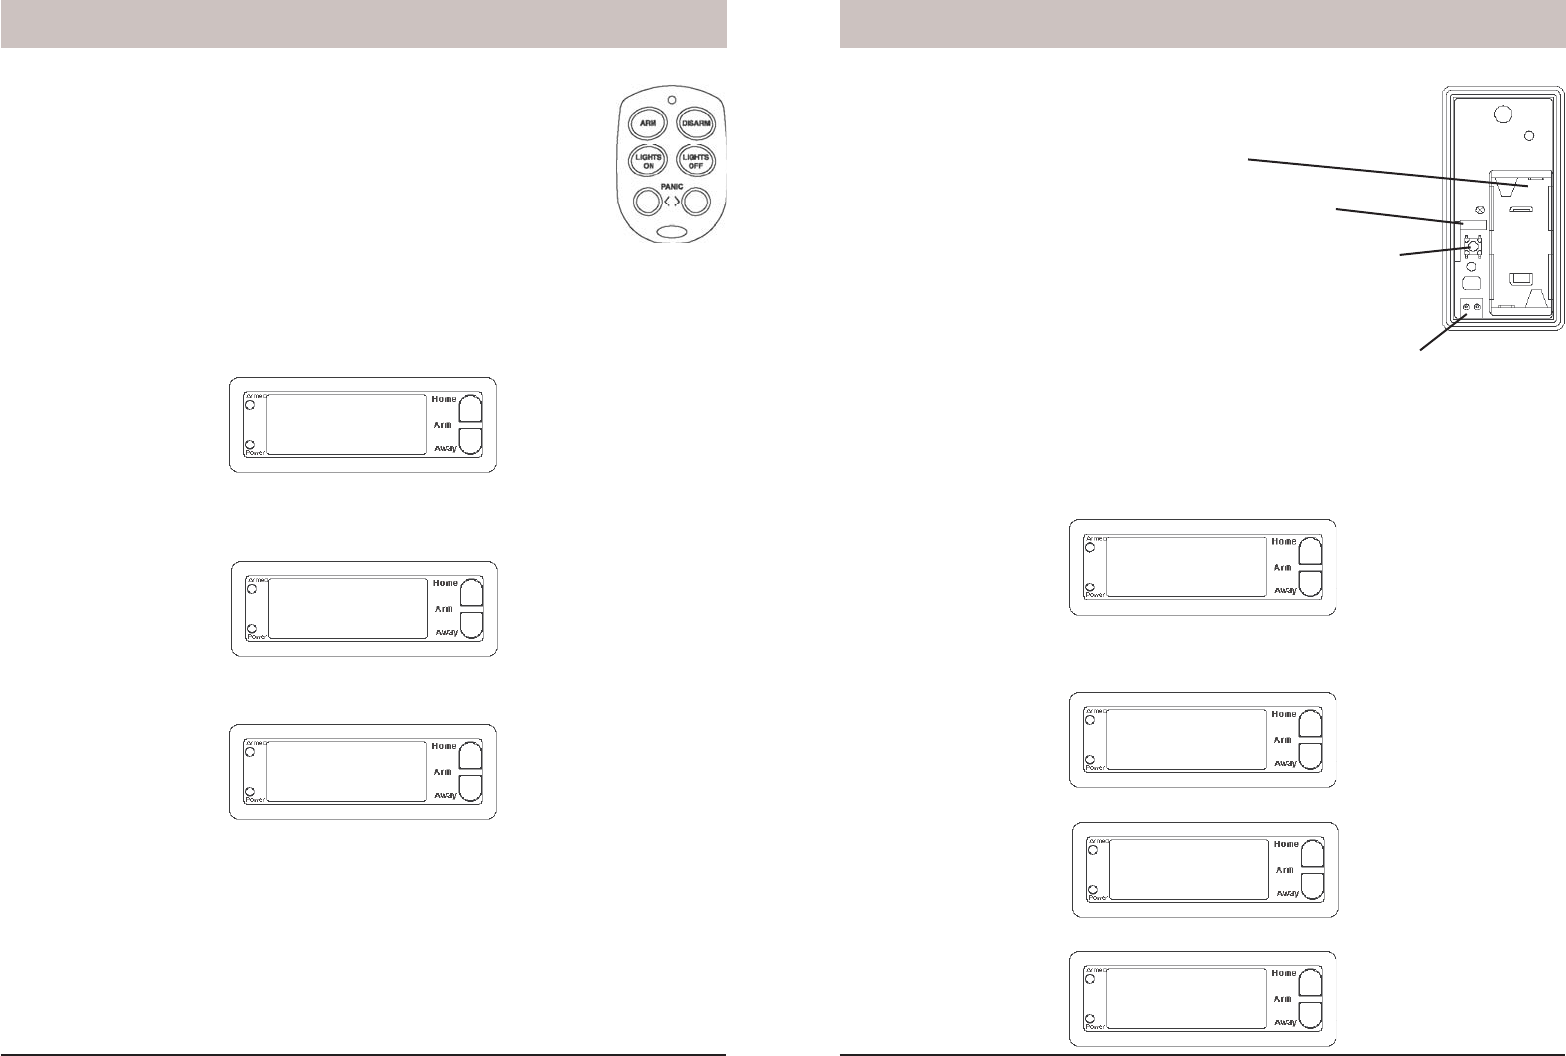
Initializing Keychain Remotes
Press and hold the ARM button on the Keychain remote for 3-4 seconds
and then release it. This initializes the remote and picks a random code
that is used when it is registered with the Console. Note, if the Keychain
remote you purchased is different from shown here, refer to the
installation instructions that came with it.
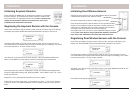
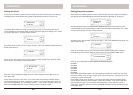
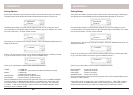
Registering the Keychain Remote with the Console
Press either of the Menu up/down buttons (under the lid to the bottom right of the display).
The display then shows ENTER PIN (Personal Identifi cation Number) in the top line.
The default PIN is 0000, you’ll fi nd out later (page 24) how you can change this, but for
now press 0000 on the keypad (under the lid to the bottom right of the display). This clears
the top line and shows * for each number entered.
This takes you to the fi rst level of the menu at step 1. This is the INSTALLATION level.
When you see INSTALL on the display, press OK. The display then looks like this:
Now simply press any button on the Keychain remote. The Console acknowledges that it
has been registered by beeping and displaying RMOT 1 SET, RMOT 2 SET, etc., as you
install more remotes.
Repeat this for any other Keychain Remotes you want to register.
Press Clear to back out of the menu. You are asked to confi rm, 1. YES, 2 NO. Pressing
1 takes you back to the HOME CONTROL screen. Pressing 2 takes you up one level of
menu.