


18 19
Installation
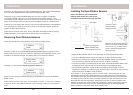
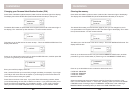
Hard-Wired Inputs
You can also connect two hard-wired magnetic contact switches to the console.
These will be zones 31 and 32.
You can install a total of 30 additional zones, which can be a combination of Door/Window
Sensors and Motion Detectors. So, for example, you could have 15 Door/Window Sensors,
15 Motion Detectors, and 2 hard-wired zones. The hard wired zones are treated as delayed
zones (i.e. they have exit and entry delays if you arm the system in the Away mode).
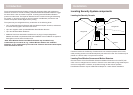
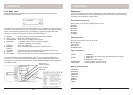
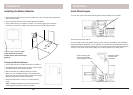
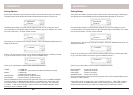
Installing the Motion Detector
• Attach the Motion Detector to a wall at a height of 5 to 6 ft. using the mounting bracket
and screws provided.
• Point the Motion Detector so that it looks slightly downwards.
• Set the slide switch (on the back) to position 1 for instant triggering for maximum
sensitivity or position 2 to trigger only after two movements have been sensed.
MOTION DETECTOR
5-6ft
30-40ft
90°
Installation
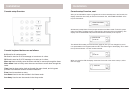
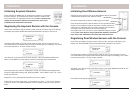
Testing the Motion Detector
• Set the slide switch on the Motion Detector to position 1.
• Press and hold the TEST button for about a second (until
the LED fl ashes twice) and then release it.
• Wait 20 seconds for the Motion Detector to settle.
• Walk in front of the Motion Detector. The indicator LED
lights each time it senses movement. Check the coverage
area and reposition the sensor as required.
• Press the TEST button to return to normal operating
mode.
Note: The Motion Detector will automatically return to
normal operating mode after about 2 minutes.
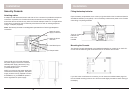
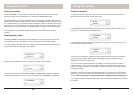
Magnetic Switch
Contacts sold
separately
Remove shorting link
before installing hard
wired magnetic contacts.
Tamper switch (under lid). Note,
some models do not have a
tamper switch. See note at top of
page 16.