


Tools Needed:
37
Please Do Not Return This Product To The Store. Contact your local Wayne-Dalton dealer. To find your local Wayne-Dalton dealer, refer to your
local yellow pages/business listings or go to the Find a Dealer section online at www.Wayne-Dalton.com
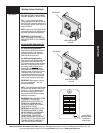
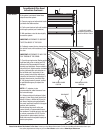
If the system is activated, follow these
steps to reset the system:
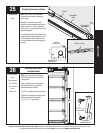
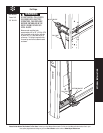
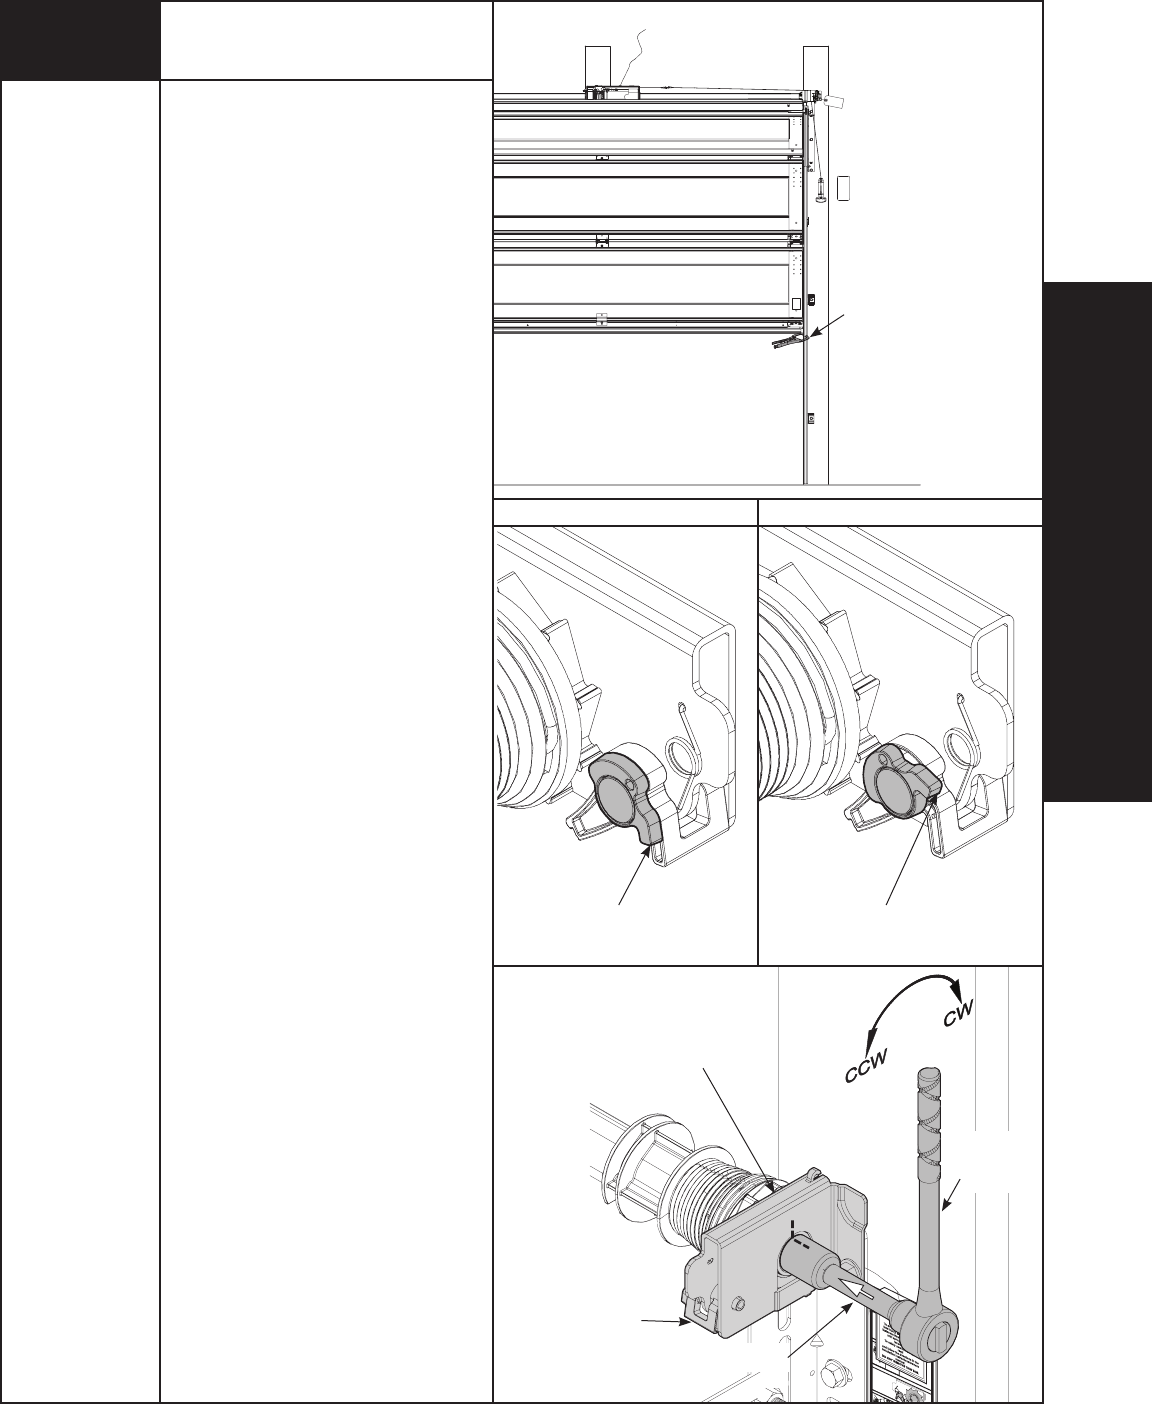
3. Clamp vice grips on both vertical tracks
just below the bottom section.
4. Flip the pawl knob on both end brackets
to the upper position (see illustration).
5. With assistance, raise the door slightly
to reset the system.
IMPORTANT: BE PREPARED TO SUPPORT
THE TOTAL WEIGHT OF THE DOOR.
6. Cautiously remove the vice clamps from
the vertical tracks; with assistance, lower
the door.
IMPORTANT: BE PREPARED TO HOLD THE
FULL TENSION OF THE SPRING.
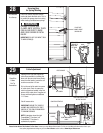
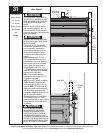
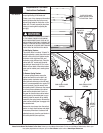
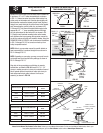
7. Check for spring tension. Starting on the
right hand side, place a ratchet and 5/8”
socket on the Torquemaster® Plus end
bracket (see illustration). Ensure ratchet is
set so that it will tighten counter clockwise
on the right hand side, and clockwise on
the left hand side (if applicable). If ten-
sion is present, remove the ratchet and
check the left hand side (if applicable). If
spring(s) have tension, proceed to Step
8; if no spring tension is present, contact
a qualified door agency to replace the
spring(s).
NOTE: A 3” extension is also
recommended for added clearance from
the horizontal angle.
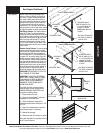
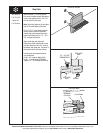
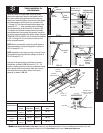
8. Lift door and check its balance. Adjust
spring(s), if door lifts by itself (hard to pull
down) or if door is difficult to lift (easy to
pull down). Anytime spring adjustments
are made, pawl knob must be in the upper
position (see illustration).
An unbalanced door such as this can
cause idrive® or Torquemaster® opera-
tion problems. To adjust spring(s), only add
or remove a maximum of 3/10 of a turn
(three teeth of ratchet wheel) at a time.
Both sides need to be adjusted equally on
double spring doors.
PLACE VICE CLAMPS
BELOW BOTTOM SECTION
ON BOTH VERTICAL TRACK
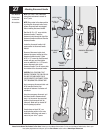
PAWL KNOB IN LOWER
POSITION
PAWL KNOB IN UPPER
POSITION
LOWER POSITION
UPPER POSITION
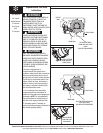
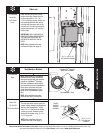
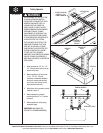
Cable Drum
No space between Ratchet
Pawl and Cable Drum
indicates engagement
Cable Dr
um
Ratchet Pawl
ENGAGED SIDE VIEW
No space between
Ratchet Pawl and
Cable Drum
ENGAGED UNDERNEATH VIEW
Space between Ratchet Pawl
and Cable Drum
non-indicates engagement
Cable Drum
Ratchet Pawl
DISENGAGED SIDE VIEW
No space between
Ratchet Paw
l and
DISENGAGED U
NDERNEAT
H VIEW
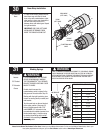
UPPER POSITION
LOWER POSITION
LOWER POSITION SIDE VIEW
UPPER POSITION SIDE VIEW
Ratchet Pawl in Lo
wer Position
Ratchet Pawl in Upper Position
Use these Illustration, in conjunction with the Instructions on the other side of
this label.
WARNING
Rachet Bracket is under
EXTREME SPRING
TENSION
.
To avoid possible severe or
fatal injury,
DO NOT
remove
fasteners from ratchet bracket
until spring(s) are fully
wnwound.
To safely unwind spr
ing(s)
read
and follow the direc
tions in the
installation instructions/owners
manual.
DO NOT REMOVE THIS TAG.
RATCHET
WITH 5/8”
SOCKET
END BRACKET
3” EXTENSION
TorqueMaster® Plus Reset
Instructions Continued...
PAWL
INSTALLATION