


Tools Needed:
25
Please Do Not Return This Product To The Store. Contact your local Wayne-Dalton dealer. To find your local Wayne-Dalton dealer, refer to your
local yellow pages/business listings or go to the Find a Dealer section online at www.Wayne-Dalton.com
21
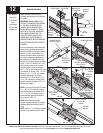
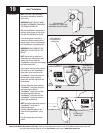
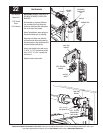
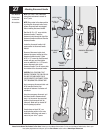
Shake the TorqueMaster
®
spring tube
assembly gently to extend the winding
shafts out about 5" on each side. For
single spring applications, there will be
no left hand spring in the
TorqueMaster
®
spring tube assembly.
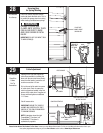
Lift the TorqueMaster
®
spring tube
assembly and rest it on the top of the
flagangles.
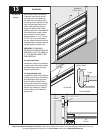
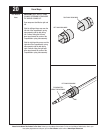
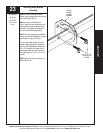
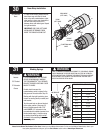
NOTE: Cable drums are marked right
and left hand. Cable drums and
TorqueMaster
®
spring tube assembly
are cam shaped to fit together only one
way.
IMPORTANT: RIGHT AND LEFT HAND
IS ALWAYS DETERMINED FROM INSIDE
THE GARAGE LOOKING OUT.
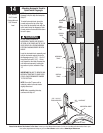
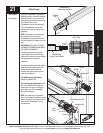
To install the cable drum, slide the
correct cable drum over the winding
shaft until the cable drum seats against
the TorqueMaster
®
spring tube
assembly.
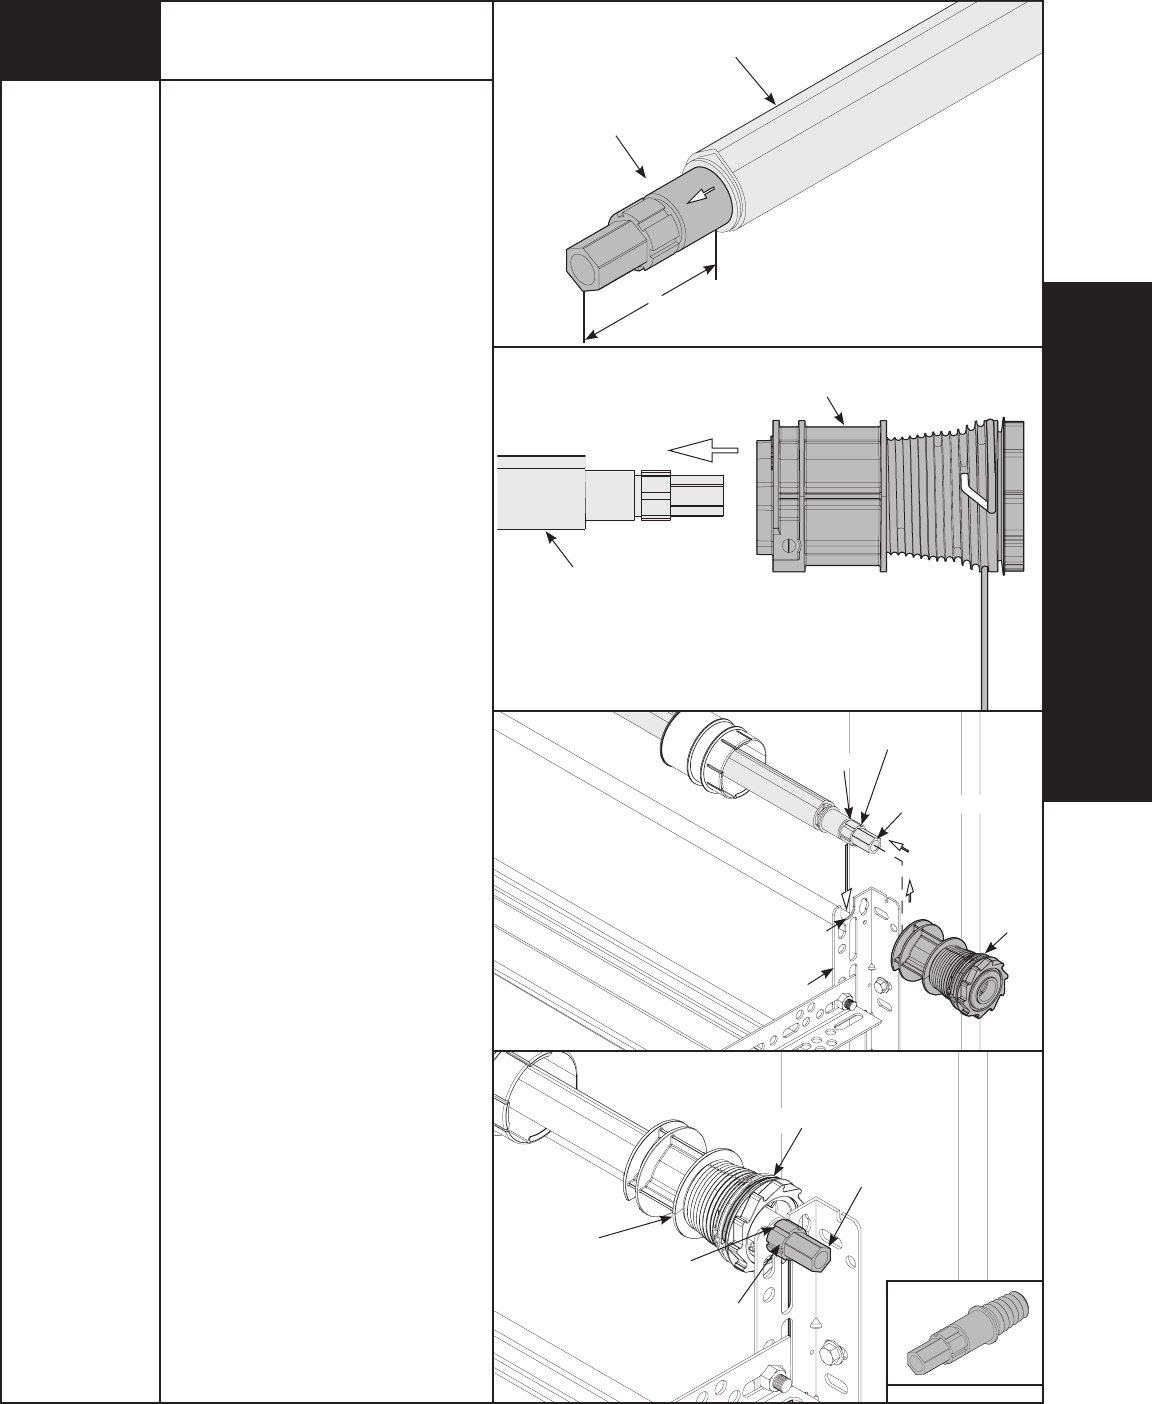
The winding shaft must extend past the
cable drum far enough to expose the
splines and the groove. Align the
winding shaft groove with the round
notch in the flagangle.
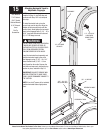
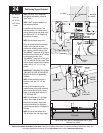
For double spring applications:
Repeat for opposite side.
For single spring applications: Insert
the loose winding shaft into the left
hand cable drum prior to sliding the
cable drum over the TorqueMaster
®
spring tube assembly.
NOTE: On single spring applications,
take care in handling the loose winding
shaft (left side) so that it does not slide
back into the TorqueMaster
®
spring
tube assembly.
WINDING
SHAFT
RIGHT DRUM
5”
WINDING SHAFT
CABLE
DRUM
GROOVE
ROUND NOTCH
FLAGANGLE
SPLINES
COUNTERBALANCE CABLE
Cable Drums
LOOSE WINDING SHAFT
Tape Measure
TORQUEMASTER
®
SPRING TUBE ASSEMBLY
TORQUEMASTER
®
SPRING TUBE ASSEMBLY
GROOVE
CABLE
DRUM
SPLINES
WINDING SHAFT
INSTALLATIONINSTALLATION