


33
ZIP52 FINISHING - PF .
6.1
6.2
OPERATING MANUAL
EDITION 01 /2010 PART NO. ZZB012ENG
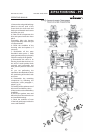
The following instructions are general.
Refer to the specifi c diagrams of each pump model to operate correctly.
ATTENTION: Before you perform any maintenance or cleaning operation:
- Supply yourself with the proper equipment,
- Wear the garments and specifi c protection devices with regard to the
nature of the fl uids with which you will come into contact,
- Close the compressed air delivery and discharge the pressure from the
pump and pipes connected to it,
- If necessary, depending on the intervention, disconnect the product and air
side connection pipes, remove the pump from the base or support it is faste-
ned to and turn it over on top of a container suitable for collecting any liquid
it may contain.
After the pump has been reassembled following maintenance operations, re-
set and check the effi ciency of the earthing connection of the individual parts
of the pump.
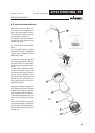
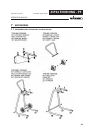
1) Diaphragm replacement (Preventive maintenance)
Mark the coupled parts with a felt-tip pin so as to make subsequent reassembly
easier.
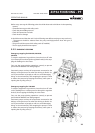
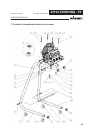
a) Remove the suction and delivery manifolds. (6.1).
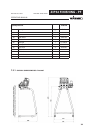
b) Disassemble the fastening nuts and remove the external covers. (6.2).
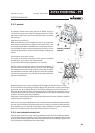
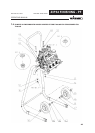
c) Turn the two end nuts of the external diaphragm disks in contraposition
with the appropriate spanners and disassemble one of them.
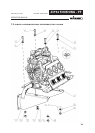
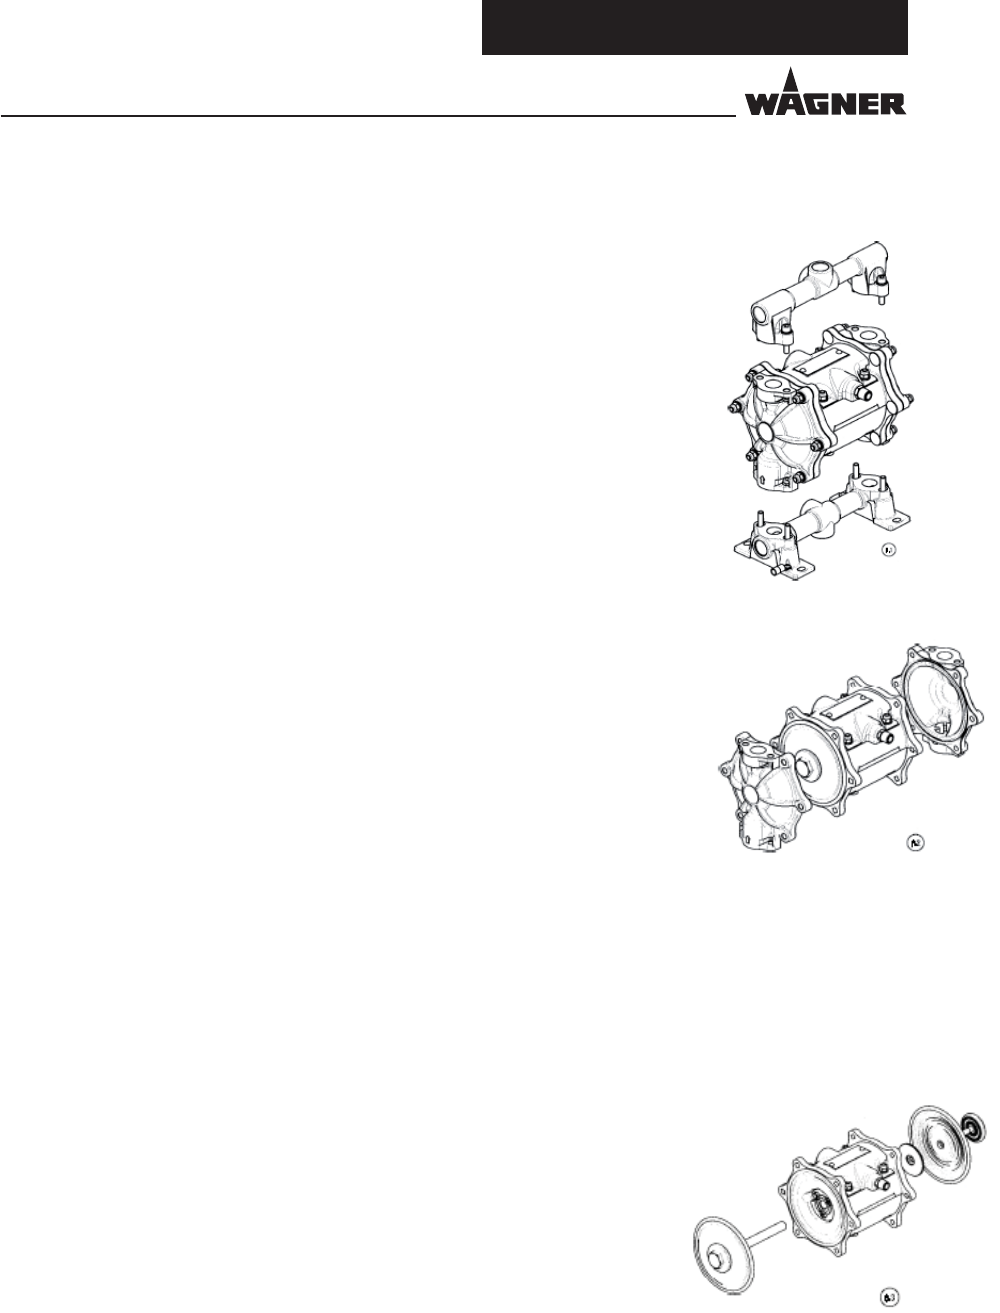
d) Remove the freed diaphragm with its relative internal disk, and extract the
shaft from the motor block.(6.3).
e) Lock the end of the shaft released from the diaphragm in a vice (adopting
the proper precautions to avoid damaging it) and disassemble the external
diaphragm disk from the opposite end. Now remove the second diaphragm
with its internal disk.
f) Assemble the new diaphragm with its internal disk and opportunely tighten
it with the relevant external disk.
g) Free the shaft from the vice, put it inside the motor block after lubricating
it with grease, assemble the internal diaphragm disk, diaphragm and external
disk, and then properly tighten it by using two spanners in contraposition on
the nuts of the external disks.
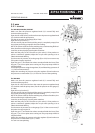
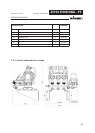
h) Reassemble the external covers and then the manifolds while making sure
you check the positioning of the suction and delivery valves, the relative seals
and proper tightening of the screws. (6.4).
2) Diaphragm replacement (due to breakage)
In the case the diaphragms are replaced as a consequence of breaking, it is ne-
cessary to clean all the internal parts of the motor and check the condition of
the seals and reversing valve, which may have been damaged by contact with
the pumped fl uid.
a) Follow the sequence described under paragraph 1, points a), b), c), d) and e).
b) Disassemble the pressure side cover and extract the reversing valve.
6.4 MACHINE MAINTENANCE