110 SCXG-SVX01B-EN
Periodic Maintenance
Checklists
Monthly Checklist
The following check list provides the
recommended maintenance schedule to
keep the unit running efficiently.
Disconnect power source and
allow all rotating equipment to
stop completely before servicing
or inspecting the unit. Failure to
do so may result in injury or
death.
1. Inspect unit air filters. Clean or replace
if airflow is blocked or if filters are dirty.
2. Inspect coils for excess moisture or
icing. Icing on the coils may indicate low
airflow supply, restricted airflow from
dirty fins, evaporator frost protection
sensor problems, or a shortage of
refrigerant flowing through the coil.
3. Check that condensate from the
evaporator and economizer coils flows
freely through the condensate piping,
traps, drain pan, and drainage holes.
Remove algae and or any airflow
obstructions.
4. Check the condition and tension of fan
belts. Adjust tension if belts are floppy
or squeal continually. Replace worn or
fraying belts in matched sets.
Note: Check and adjust belt tension at
least twice daily the first days of new belt
operation. Belt tension will rapidly de-
crease until the belts are run in.
Maintenance
5. Check the liquid line sight glasses
during operation. Bubbles in the sight
glasses indicate a possible shortage of
refrigerant or an obstruction in the
liquid lines, such as dirty liquid line filter
driers.
6. Inspect filter driers for leaks, flow
obstructions, or temperature drop
across the filter drier. A noticeable
temperature differential, such as 5 F, in
the liquid line may indicate an
obstruction. Replace the filter drier if it
appears clogged.
7. Inspect the optional waterside
economizer coil. Clean the coil to
prevent airflow restrictions through the
fins.
8. Check and record operating pressures.
Semi-Annual Maintenance
1. Verify the fan motor is properly
lubricated. Follow lubrication
recommendations on the motor tag or
nameplate. Contact the motor
manufacturer for more information.
2. Lubricate fan bearings. For best results,
lubricate bearings during unit operation.
Refer to the “Fan Bearings” section on
page 100.
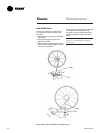
3. With power disconnected, manually
rotate the fan wheel to check for
obstructions in the housing or
interference with fan blades or inlet
guide vane option. Remove
obstructions and debris. Center the fan
wheel if necessary.
4. Check the fan assembly sheave
alignment. Tighten set screws to their
proper torques.
5. Check water valves for leakage at
valve stem packing nut.
6. Inspect the inlet vane assembly and
perform maintenance procedures in
the IGV maintenance section on page
106.
Note: Perform this procedure monthly if
the unit is in a coastal or corrosive environ-
ment.
Annual Maintenance
Check and tighten all set screws, bolts,
locking collars and sheaves.
1. Inspect, clean, and tighten all electrical
connections.
2. Visually inspect the entire unit casing
for chips or corrosion. Remove rust or
corrosion and repaint surfaces.
3. Visually check for leaks in refrigerant
piping.
4. Inspect fan, motor, and control contacts.
Replace badly worn or eroded contacts.
5. Inspect the thermal expansion valve
sensing bulbs for cleanliness, good
contact with the suction line, and
adequate insulation from ambient air.
6. Verify the superheat setting is between
12 and 17 F at the compressor.
When checking operating pressures and
conditions, establish the following
nominal conditions for consistent mea-
surements.
1. Leaving air temperature greater than
60 F.
2. Entering air temperature between 80
and 90 F
3. Entering water temperature greater
than 65 F
4. Inlet vanes at least halfway open
5. Compressors running at full load
6. Drain the condensing water system
and inspect it thoroughly for fouling.
Clean the condensers if necessary.
ƽƽ
ƽƽ
ƽ
WARNING
!
Owner


