


Troubleshooting & Repair,
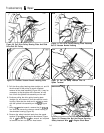
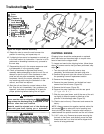
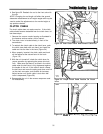
Figure 47. Reconnect Idler Pulley Tension Spring
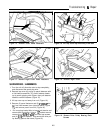
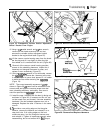
9. Lift the drive belt over the edge of the drive pulley
and engage the pulley, beveled edge in, and slide
the drive belt pulley plate and drive shaft into
position. Install the two hex head screws and lock
washers removed earlier, and tighten securely
(Figure 46).
10.
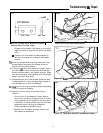
Reach around to the back of the unit, and making
sure the drive belt is fully engaged in all pulleys,
reconnect the tension spring to the threaded stud to
maintain tension on the drive belt (Figure 47).
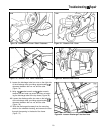
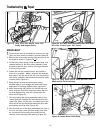
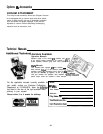
NOTE: The beveled edge of the drive belt should be
engaged against the transmission pulley and the two
pivoting idler
pu//eys,
and the flat side of the drive be/t
should be engaged against the larger, angled pu//ey with
the wider groove (Figure 48).
ii.
Reassemble covers to unit in reverse sequence of
disassembly.
DRIVE CHAINS
General
The drive chains may be accessed by tilting the back of
the unit up, and supporting it securely to prevent the unit
from falling backward during service. Drive chain
access is from under the unit, and extreme care must be
used when checking, tightening, or replacing drive
chains.
Do not tip the unit for service if the fuel tank is
full. Drain the fuel tank carefully, and follow all precau-
tions for handling gasoline when performing this step.
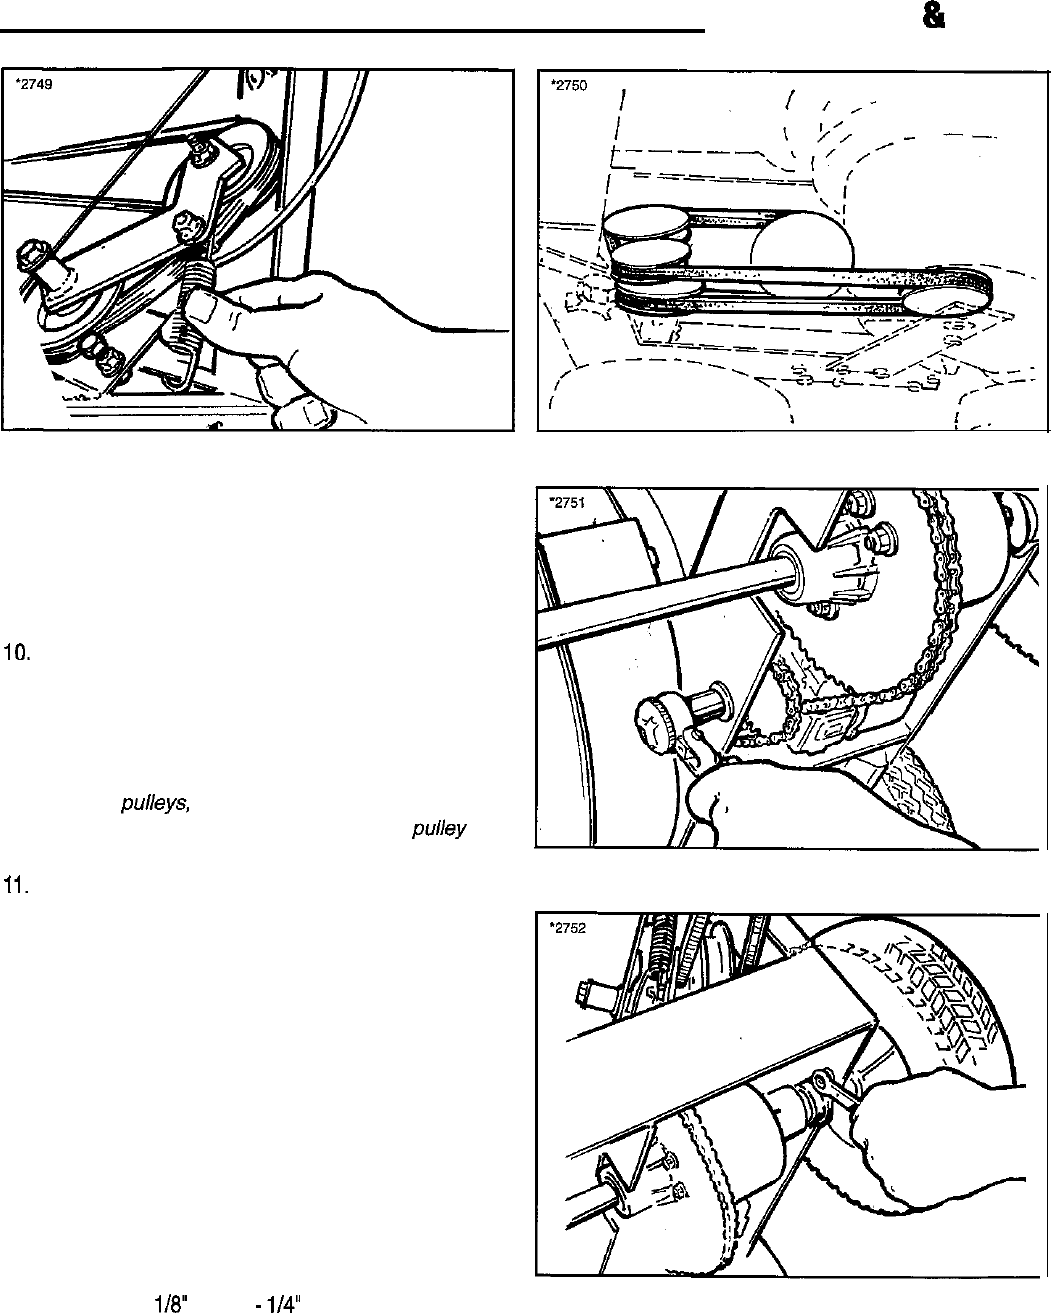
Drive chain tension may be adjusted by moving
adjustable sprocket mounting brackets (front chain) or
the drive axle (rear chain) to achieve desired tightness.
Chains will have
i/8” (front)
-
l/4” (rear) of flex between
sprockets when properly tensioned.
Figure 48. Drive Belt Installed Position On Pulleys
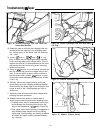
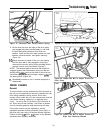
Figure 49. Loosen Hex Nut To Adjust Tension On
Front Chain
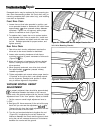
Figure 50. Loosen Hex Nut To Adjust Tension On
Right Axle Mounting Bracket
33