


Troubleshooting & Repair
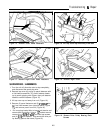
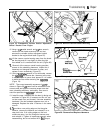
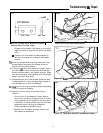
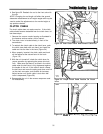
Figure 35. Remove Discharge Tube Hex Head Cap
Screw And Hex Nut
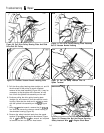
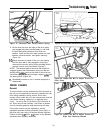
13. Rotate the rotor to move the first chipping knife into
position at the rear opening in the shredding cham-
ber. Pulling slowly on the starter rope will make the
rotor rotate.
14. Insert a
l/Z”
thick x 1 l/2”
-
2”
wide x IO
-
12” long
piece of wood into the chipping/shredding chamber
under the sharp edge of the chipper knife. This will
support the knife as it is disassembled from the rotor,
and prevent the rotor from turning as the mounting
screws are removed.
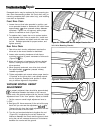
15. Using an
allen
wrench or hex bit socket, unscrew the
two cap screws that secure the chipper knife to the
rotor. It may be helpful to clean out the sockets on
the cap screws with a smaller
allen
wrench or piece
of bent wire before attempting to remove the screws
(Figure 38).
16. Carefully remove the chipper knife by pulling the
board slowly out of the chipping/shredding chamber.
Avoid touching the sharp edge of the blade with bare
hands as even a “dull” chipping edge can inflict a
serious cut.
17. Rotate the rotor and remove the other chipper knife
following the same procedure.
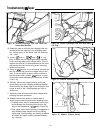
18. Sharpen both knives equally or replace both to
ensure proper balancing and correct chipping action.
l Chipping knives may be resharpened until the dis-
tance between the mounting holes and the top
edge of the blade bevel is
l/16” apart (Figure 39).
l Slow speed water-cooled grinding is suggested to
help maintain blade temper and a long lasting
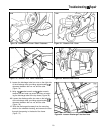
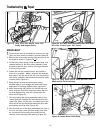
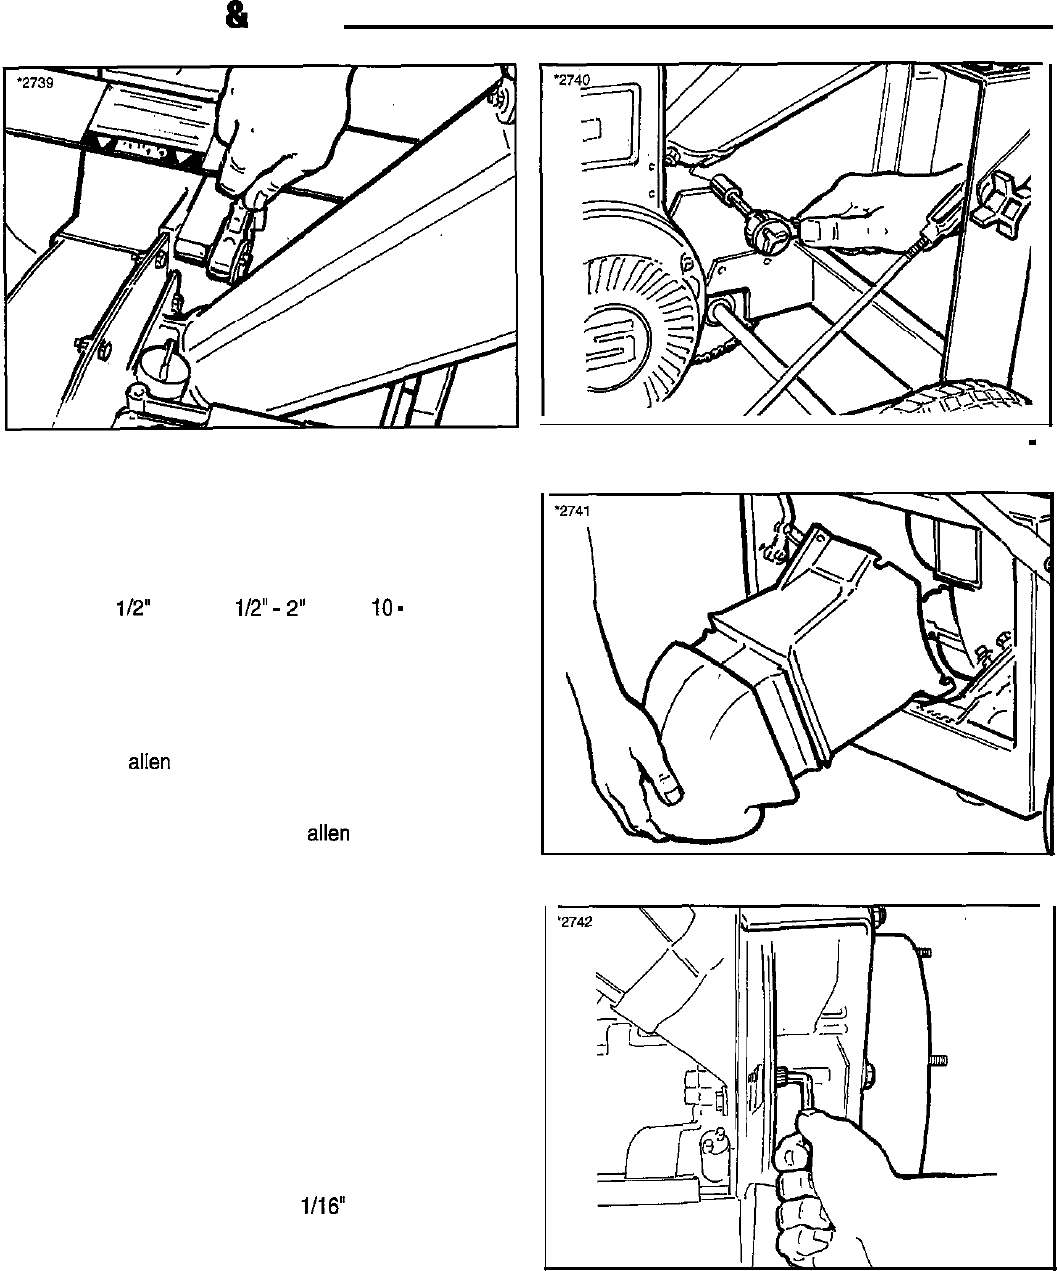
Figure 36. Loosen Discharge Tube Hex Head Nuts
-
Left Side
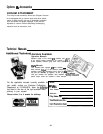
Figure 37. Remove Discharge Tube
sharp edge. Rapid grinding and heating of blades
will soften the edges, making repeated sharpen-
Figure 36. Remove Chipper Knives
ing necessary.
30