


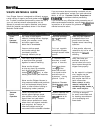


Troubleshooting
&
Repair
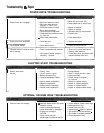
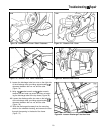
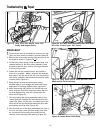
Figure 20. Pull Drive Pulley Bearing Plate And Slide
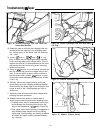
Figure 21. Pull Drive Pulley Bearing Plate Assembly
Drive Belt Off Pulley
Out Of Vacuum Nozzle Housing
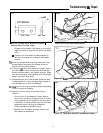
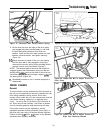
Figure 22. Remove Vacuum Nozzle Housing Nuts
Figure 23. Pull Off Safety Interlock Wire At
Spade Terminal
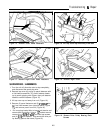
5. Pull the drive pulley bearing plate straight out, and lift
the drive belt off the pulley to permit complete
removal of the plate assembly (Figure 20). It may be
necessary to tap the plate with a hammer to help
free it from the splined hub assembly on the rotor.
6. Continue pulling the drive pulley bearing plate
straight out, and remove it from the vacuum nozzle
housing. Note that the shaft end is splined to mate
with the splined hub assembly on the
rqtor
(Figure
21).
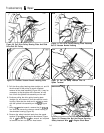
7. Using a i/2” socket wrench, remove the (4)
5116-18
hex nuts that secure the vacuum nozzle housing to
the shredder housing (Figure 22).
8. Remove the safety interlock leads from the spade
terminal (Figure
23),
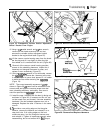
and engine block base (Figure
24). A l/2” socket and i/2” box wrench are required
Figure 24. Remove Hex Nut And Screw Securing
to remove the hex nut and hex head screw.
Safety Interlock Wire #2 To Engine Block Base
26