


UltraGlow
®
G36D Zero Clearance Direct Vent Gas Fireplace
35
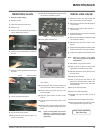
MAINTENANCE
INSTRUCTIONS
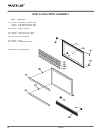
1)
Always turn off the gas valve before cleaning.
For relighting, refer to lighting instructions.
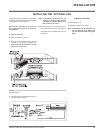
Keep the burner and control compartment
clean by brushing and vacuuming at least
once a year. When cleaning the logs, use a
soft clean paint brush as the logs are fragile
and easily damaged.
2)
Clean appliance and door with a damp
cloth (never when unit is hot). Never use
an abrasive cleaner. The glass should be
cleaned with a gas fi replace glass cleaner.
The glass should be cleaned when it
starts looking cloudy.
3)
The heater is fi nished in a heat resistant
paint and should only be refi nished with heat
resistant paint. UltraGlow
®
uses StoveBright
®
uses StoveBright
®
Paint - Metallic Black #6309.
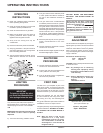
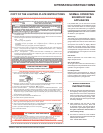
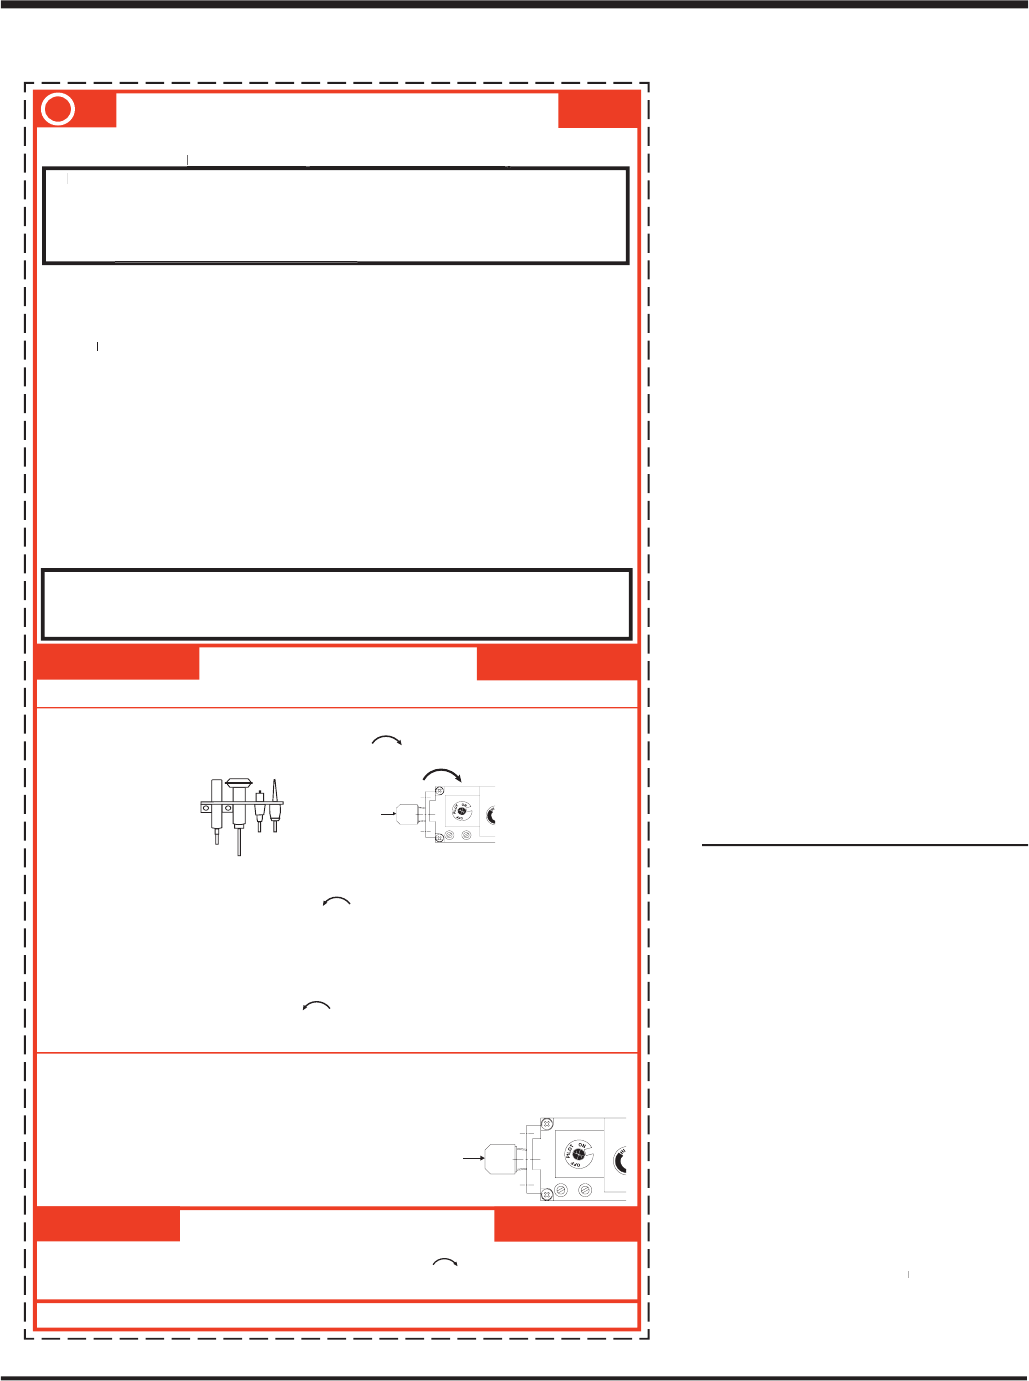
COPY OF THE LIGHTING PLATE INSTRUCTIONS
OPERATING INSTRUCTIONS
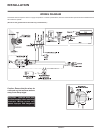
Gas Inlet
OFF
TO
TURN OFF GAS
APPLIANCE
FOR
YOUR SAFETY
READ BEFORE LIGHTING
YOUR SAFETY
READ BEFORE LIGHTINGYOUR SAFETY
LIGHTING INSTRUCTIONS
1)
T
urn of
f the flame switch.
2) Push in the gas control knob slightly and turn clockwise to “OFF”. Do not force.
3)
T
urn of
f all electric power to the appliance if service is to be performed.
Yo
u may shut of
f the pilot during prolonged non use periods to conserve fuel.
1)
Push in gas control knob slightly and turn clockwise to “OFF”. Knob
cannot be turned from
“PILOT” to “OFF” unless knob is pushed in slightly
. Do not force.
2)
Wa
it
fi
ve
(5)
minutes
to
clear
out
any
gas.
If
you
then
smell
gas
ST
OP!
Follow
step
“B”
in
the
Safety
Information above on this label. If you don’t smell gas, go to the next step.
3)
Tu
rn knob on gas control counterclockwise to“PILOT”.
4)
Push
in
control
knob
all
the
way
and
hold
in.
Continually
push
and
release
the
black
button
on
spark
igniter until pilot lights. Continue to hold the control knob in for about 1/2 minute after the pilot is lit.
Release knob and it will pop back up. Pilot should remain lit. If it goes out, repeat steps 1) to 4).
If
knob
does
not
pop
up
when
released,
stop
and
immediately
call
your
service
technician
or
gas
supplier
.
If
the
pilot
will
not
stay
lit
after
several
tries,
turn
the
gas
control
knob
to
“OFF”
and
call
your
service technician or gas supplier
.
5)
Tu
rn gas control knob counterclock-wise to “ON”.
6)
Use rocker switch to operate main burner
.
A)
This
appliance
has
a
pilot
which
must
be
lighted
by
hand.
When
lighting
the
pilot,
follow
these
instructions exactly
.
B)
BEFORE
LIGHTING
smell
all
around
the
appliance
area
for
gas.
Be
sure
to
smell
next
to
the
fl
oor
because some gas is heavier than air and will settle on the
fl
oor
.
WHA
T TO
WHAT TO WHA
DO IF
YOU SMELL
GAS
YOU SMELL GASYOU SMELL
-
Do not try to light any appliance.
-
Do not touch any electric switch, do not use any phone in your building.
-
Immediately
call
your
gas
supplier
from
a
neighbours
phone.
Follow
the
gas
supplier
’s
instructions.
-
If you cannot reach your gas supplier
, call the
fi
re department.
C)
Use
only
your
hand
to
push
in
or
turn
the
gas
control
knob.
Never
use
tools.
If
the
knob
will
not
push
in
or
turn
by
hand,
don’t
try
to
repair
it,
call
a
quali
fi
ed
service
technician.
Force
or
attempted
repair may result in a
fi
re or explosion.
D)
Do
not
use
this
appliance
if
any
part
has
been
under
water
.
Immediately
call
a
quali
fi
ed
service
technician
to
inspect
the
appliance
and
to
replace
any
part
of
the
control
system
and
any
gas
control which has been under water
.
E)
This appliance needs fresh air for safe operation and must be installed so there are provisions for
adequate combustion and ventilation air
.
CAUTION: Hot while in operation. Do not touch. Severe Burns may result. Due
to
high
surface
temperatures
keep
children,
clothing
and
furniture,
gasoline
and
other
liquids
having
fl
ammable
vapors
away
.
Keep
burner
and
control
compartment
clean. See installation and operating instructions accompanying appliance.
DO NOT REMOVE THIS INSTRUCTION PLATE
W
ARNING:
WARNING: W
If
you
do
not
follow
these
instructions
exactly
,
a
fire
or
explosion
may
result
causing
property
damage,
personal
injury
or
loss
of
life.
I
mproper
installation,
adjustment,
alteration,
service
or
maintenance
can
cause
injury
or
property
damage.
Refer
to
the
owner
’s
information
manual
provided
with
this
appliance.
F
or
assistance
or
additional
information
consult
a
qualified
installer
, service agency or gas supplier
, service agency or gas supplier
.
918-47
3
This appliance must be installed in accordance with local codes, if any; if none, follow the
National Fuel Gas Code,
ANSI Z223.1/NFP
A
ANSI Z223.1/NFPA ANSI Z223.1/NFP
54, or Natural Gas and Propane Installation Codes,
CSA
B149.1. (Australia:
B149.1. (Australia:
CSA B149.1. (Australia: CSA
AG601, New Zealand: NZS 5261
AG601, New Zealand: NZS 5261
)
)
FOR UNITS NOT EQUIPPED WITH ELECTRIC SPARK BOXES:
FOR ALL PROPANE UNITS AND UNITS EQUIPPED WITH ELECTRIC SPARK BOXES:
ST
OP! Read the safety information above on this label.
Gas Inlet
1) Push in gas control knob slightly and turn to
“
PILOT
”
position.
2)
Push
in
control
knob
all
the
way
and
hold
in
until
the
pilot
lights
up.
Continue
to
hold
the
control
knob in for about 20 seconds after the pilot is lit. Release knob.
3) Push in gas control knob slightly and turn to "ON" position.
4)
T
urn ON the
fl
ame switch.
ELEMENT
THERMO-
ELECTRIQU
E
PILOT
BURNER
THERMOPILE
VEILLEUSE
NORMAL OPERATING
SOUNDS OF GAS
APPLIANCES
It is possible that you will hear some sounds
from your gas appliance. This is perfectly normal
due to the fact that there are various gauges
and types of steel used within your appliance.
Listed below are some examples. All are
normal
operating sounds
and should not be considered
as defects in your appliance.
Burner Tray:
The burner tray is positioned directly under the
burner tube(s) and logs and is made of a different
gauge material from the rest of the fi rebox and
body. Therefore, the varying thicknesses of steel
will expand and contract at slightly different
rates which can cause "ticking" and "cracking"
sounds. You should also be aware that as there
are temperature changes within the unit these
sounds will likely re-occur. Again, this is normal
for steel fi reboxes.
Pilot Flame:
While the pilot fl ame is on it can make a very
slight "whisper" sound.
Gas Control Valve:
As the gas control valve turns ON and OFF, a
dull clicking sound may be audible, this is normal
operation of a gas regulator or valve.
Unit Body/Firebox:
Different types and thicknesses of steel will
expand and contract at different rates resulting
in some "cracking" and "ticking" sounds will be
heard throughout the cycling process.