


R
R
R
August 13, 2009
7034-106F
Page 5
Mt. Vernon Pellet Stove (AE)
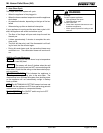
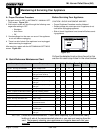
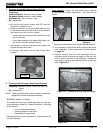
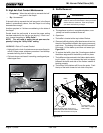
Figure 35.1 - Large Clinker
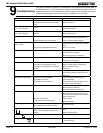
5. Cleaning Firepot with Firepot Clean-Out Tool
• Frequency:
Softwood Pellets: Weekly or every 5 bags
Hardwood Pellets: Weekly or every 3 bags
Alternate Fuel: Daily or everyr 1 bag
• By: Homeowner
a. Be sure the wall control screen says OFF and the
appliance is allowed to cool.
b. It may be necessary to use your repot clean-out tool
to chip away material that has built up on the sides of
the repot and to push out any clinkers.
• Larger clinkers may have to be removed from the
top of the repot.
• If the clinker adheres to the sides of the repot, you
will need to manually clean the repot.
c. After power is restored, the auto-clean system will
recycle and then clean itself.
d. The firepot floor plate must be fully closed when
nished.
Clinker
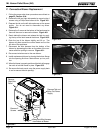
6. Cleaning Heat Exchanger, Drop Tube & Exhaust
• Frequency: Monthly or every 1 ton of fuel (aprx. 50
bags).
• By: Homeowner
NOTE:
There are heavy duty vacuum cleaners specically
designed for solid fuel appliance cleaning.
WARNING! Hopper Fire Risk!
For trouble free use of your pellet appliance you must per-
form cleaning as called for in these instructions. Not doing
so will result in:
• Poor operating performance
• Smoke spillage into the home
• Overheating of components
Not properly cleaning your appliance on a regular basis will
void your warranty.
a. It is necessary to remove the bafe to gain access to the
heat exchanger. Follow instructions for bafe removal
on page 39.
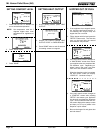
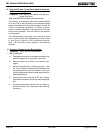
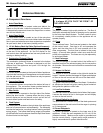
b. Vacuum the ash from the heat exchanger with an
upholstery brush to remove the majority of the ash. Be
sure to vacuum the back of the bafe also. Inspect the
drop tube and remove any residue build-up in the drop
tube. Figure 35.3.
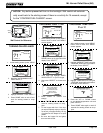
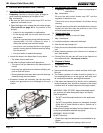
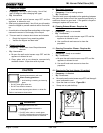
Figure 35.2 - Example of a dirty heat exchanger
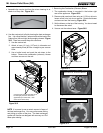
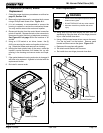
Tools Needed: A Shop Vac and generic micro cleaning
kit; at head and Phillips screwdriver; 11/ Nut-driver or
wrench.
* Can be purchased at your local hardware store.
Shop Vac* Example
Micro Cleaning Kit*
Example
Figure 35.3