


R
R
R
September 21, 2006
7014-082B
Page 1
CB 1200 Pellet Stove
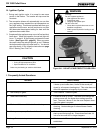
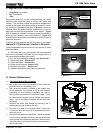
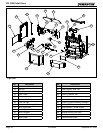
Correct Flame Size, Yellow/White in Color
Correct
Figure 31.3
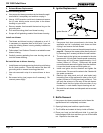
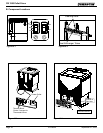
Ash Build Up in Firebox
Pellets Back Up
In Feed Tube
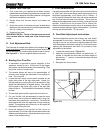
Firepot Overfills
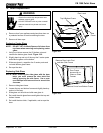
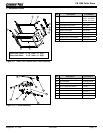
Tall, Lazy Flame, Orange in Color
Incorrect
Figure 31.1
Figure 31.2
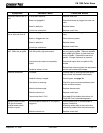
Poor quality pellet fuel, or lack of maintenance, can create
conditions that make the repot ll quickly with ashes and
clinkers. This condition makes the appliance susceptible to
overlling the repot with pellets which may result in smok-
ing, sooting and possible hopper res. Figure 31.1 shows an
example where the repot overlls, pellets back up into the
feed tube and ash has accumulated in the rebox. Figure
31.2 illustrates an inefcient and non-economical method
of
burning of fuel caused by poor quality pellet fuel. Figure 31.3
is showing the correct ame size when good quality, premium
pellet fuel is burned.
If the ash buildup exceeds the half way point in the repot
IMMEDIATE ATTENTION AND CLEANING IS REQUIRED.
Follow the detailed instructions found in this section for each
step listed below.
• Shut down the unit by turning down the thermostat and
allow unit to completely cool down. (Do not unplug the unit, it
can cause smoke spillage in the room).
• Pull the heat exchanger cleaning rods. Section 10.7
• Empty the repot. Section 10.2
• Clean the rebox. Section 10.4
• Empty the ash drawer. Section 10.3
• Dispose of the ashes. Section 10.6
• Restart the appliance with premium grade fuel.
C. High Ash Fuel Content Maintenance
• Frequency: As needed
• By: Homeowner
• Task:
1. Convection Blower Replacement
a. Use proper shut down procedures to shut down the
appliance and let it completely cool.
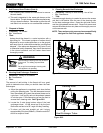
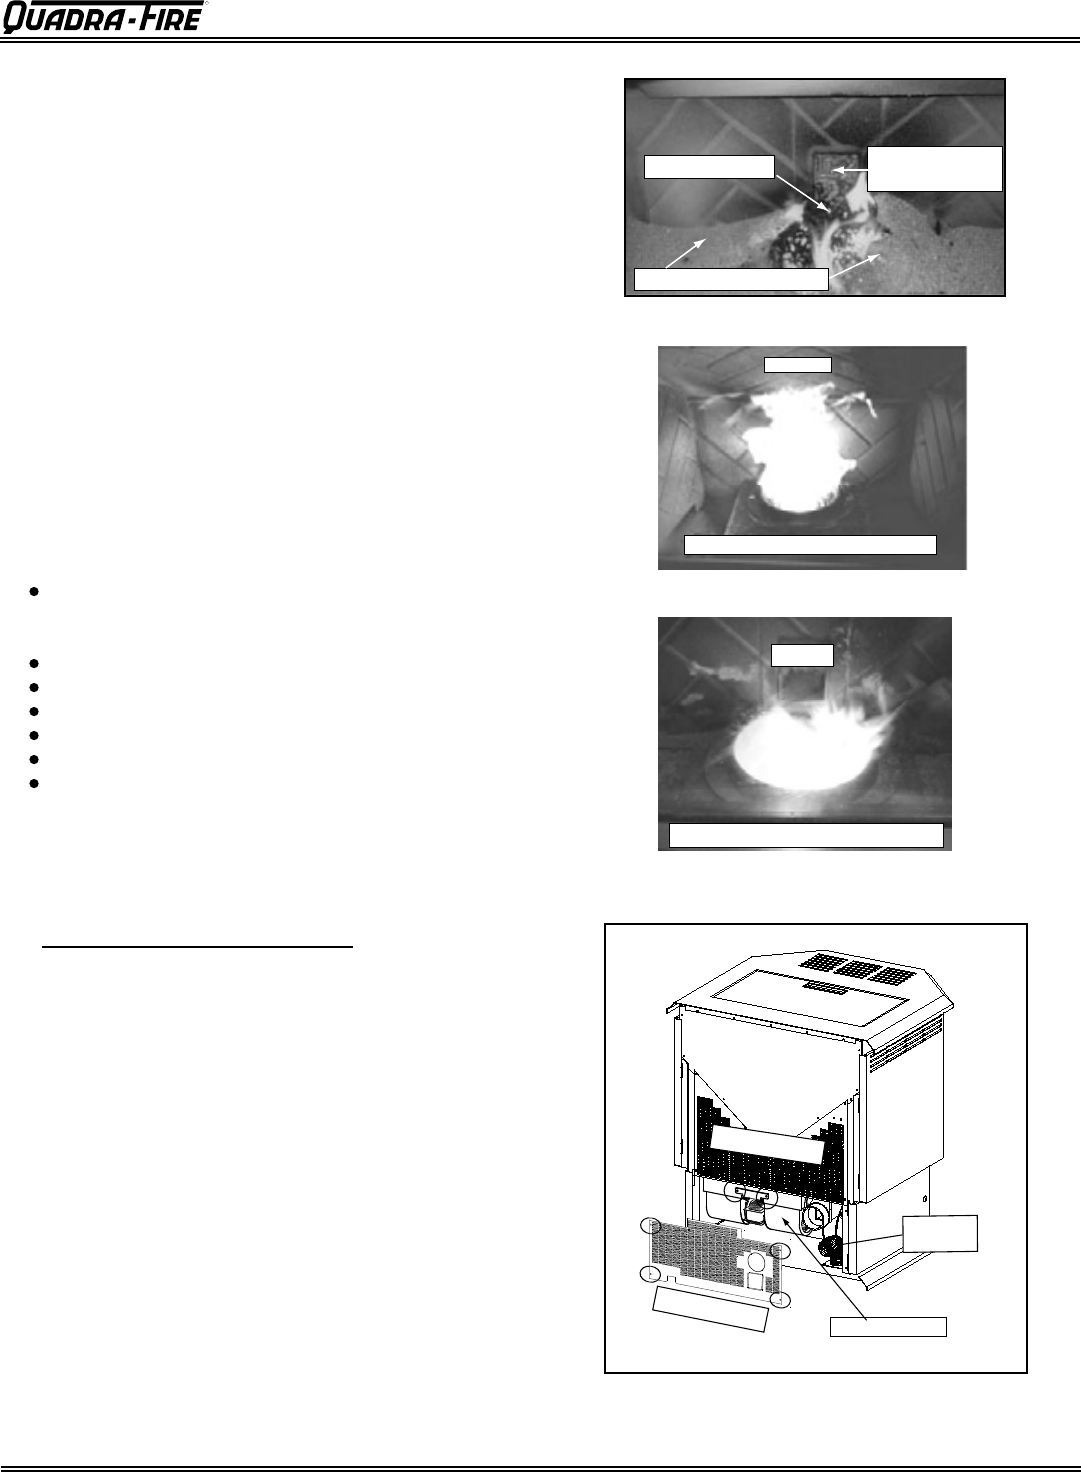
b. The convection blower is located at the bottom rear
of the appliance. If an outside air kit is also installed,
depending on your particular installation you may or
may not have to remove the outside air ange. If you
do, remove the 2 screws using a Phillips head screw-
driver. You do not need to remove the ex pipe from
the ange.
c. Remove the lower rear screen by removing the 4
screws securing the screen to the unit.
d. The motor is mounted on a removable bracket. Remove the
2 screws just above the motor and the whole assembly will tilt
down and pull out.
e.
Disconnect the wires from the blower. The wires coming
from the wiring harness are white, red and tan and the
wires coming from the blower are black, white and red.
The white connects to white, the red to red and black to
the tan color wire.
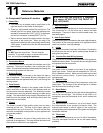
D. Blower Replacement
Figure 31.4
Remove 2 Screws
Remove 4 Screws
Outside Air
Flex Hose
Convection Blower