


Pelco Manual C1968M-A (1/02) 9
PROGRAMMING
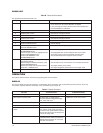
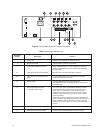
Table A . Programming Menu
Press ALT + MENU to toggle in or out of the programming menu.
Menu Item Function Procedure
[1] Change channel name that
ID INPUT appears on the screen.
[2] Change date and time that
DATE-TIME appears on the screen.
[3] Change the amount of time
SEQUENCE that each screen is displayed
during the sequence mode.
(Screens always rotate in the
order of QUAD, CH1, CH2,
CH3, CH4.)
[4] Change the PIP Format
MISC (horizontal or vertical), Auto Reset
time (off, 1 to 60 seconds), Alarm
Beep (on or off), alarm Sensor
Type (normally open or normally
closed) and Active Out (TTL high
to alarm or TTL low to alarm).
EXIT Return to normal display mode.
a. Press CH1 (1 flashes yellow and the first character in the CH1
description turns yellow).
b. Use the up and down arrows (CH1 and CH2 buttons) to change
a character. Up advances it through the alphabet, then the
numbers, and finally the ASCII symbols. Use the left and right
arrows (CH3 and CH4 buttons) to advance to the next or return
to the previous character position.
c. When you have finished with CH1, press the right arrow until the
first character of CH2 turns yellow.
d. Continue to change characters and advance through the
channels until all desired channel names are entered.
e. Press RESET.
a. Press CH2 (2 flashes yellow and the month character in the
DATE field turns yellow).
b. Use the up and down arrows (CH1 and CH2 buttons) to change
the month.
c. Use the right arrow (CH4) button to advance to the day character
position.
d. Use the up and down arrows (CH1 and CH2 buttons) to change
the day.
e. Use the right arrow (CH4) button to advance to the year
character position.
f. Use the up and down arrows (CH1 and CH2 buttons) to change
the year.
g. When you have finished with the date, press the right arrow until
the first character of the TIME field turns yellow.
h. Continue to change characters and advance through the time
function until all desired changes are entered.
i. Press RESET.
a. Press CH3 (3 flashes yellow and the time character in the QUAD
field turns yellow).
b. Use the up and down arrows (CH1 and CH2 buttons) to change
the time. Time range is OFF, 1 to 30 seconds.
c. Use the left and right arrows (CH3 and CH4 buttons) to advance
to the next or return to the previous channel position.
d. Continue to change channels and advance through the times
functions until all desired changes are entered.
e. Press RESET.
a. Press CH4 (4 flashes yellow) (The format character in the PIP
FORMAT field turns yellow)
c. Use the left and right arrows (CH3 and CH4 buttons) to advance
to the next or return to the previous field.
d. Continue to change fields and advance through the settings until
all desired changes are entered.
e. Press RESET.
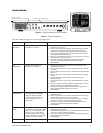
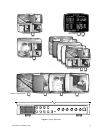
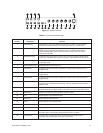
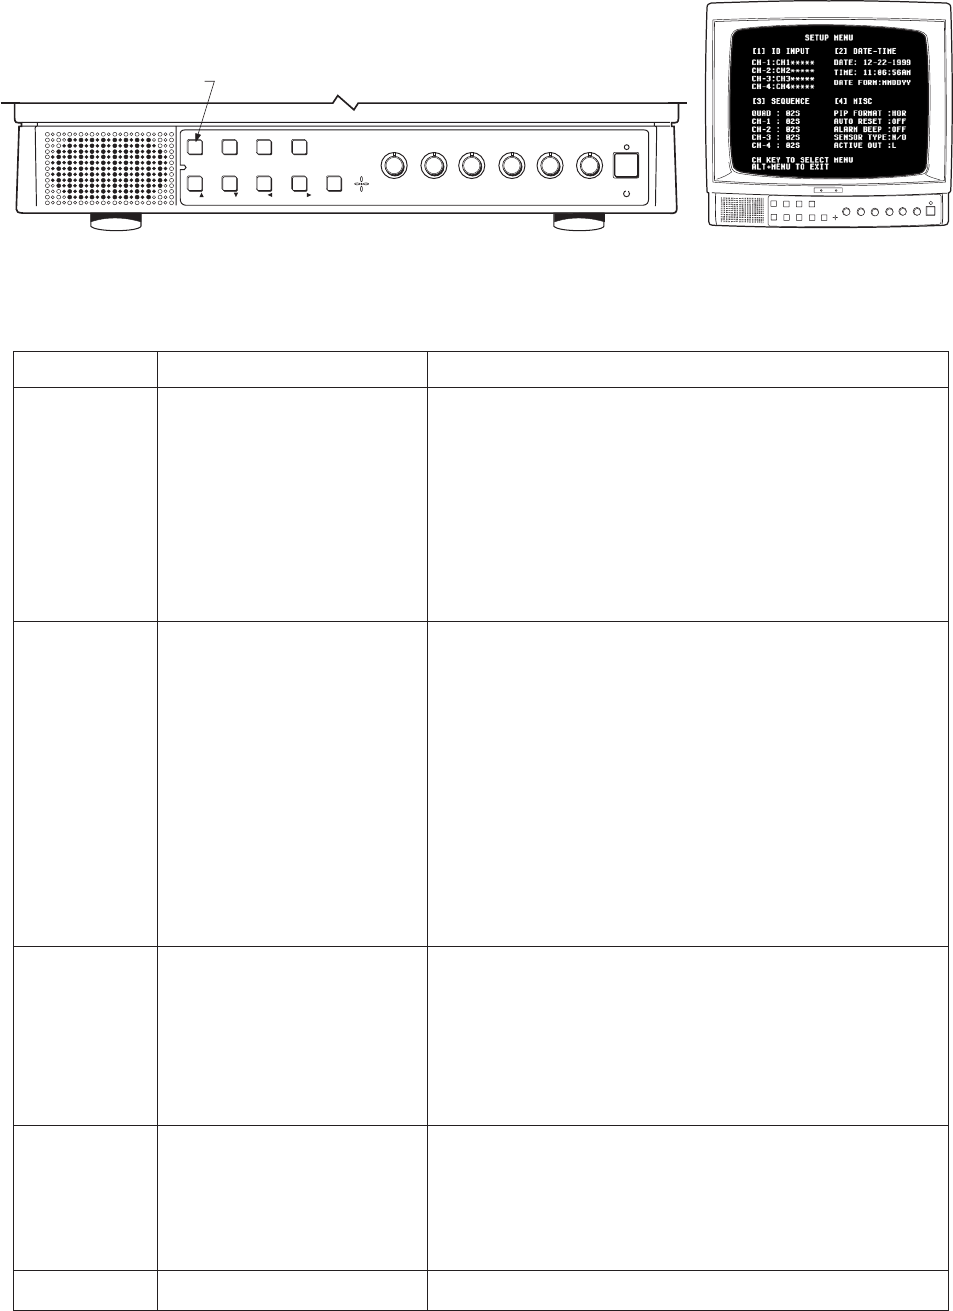
Press ALT + MENU
QUAD
MENU
CH4
VCR
PIP
SEQ
CH3
ZOOM
FREEZE
CH2
RESET
ALT
CH1 TALK
AUDIO
MIC
TINT SHARP COLOR BRIGHT
CONTRAST
VOLUME POWER
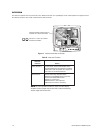
FRONT PANEL PROGRAMING BUTTONS
RETURNS TO DEFAULT
(ALT+MENU ENTERS/EXITS SETUP MENU)
Figure 5. Control Locations on Front of Monitor