Page 15
301 Fulling Mill Road, Suite G ©Copyright 2005 by On-Q/Legrand, Inc All Rights Reserved.
Middletown, PA 17057 www.onqlegrand.com
(800)-321-2343
D. Configuring the WAP 802.11g to work with a Router
If you are connected to the Internet through a Router, you will want to change the IP Address of
the WAP to also be a member of the Router’s subnetwork. This will allow you to access the WAP
at a future date, if you need to re-configure its security or login settings.
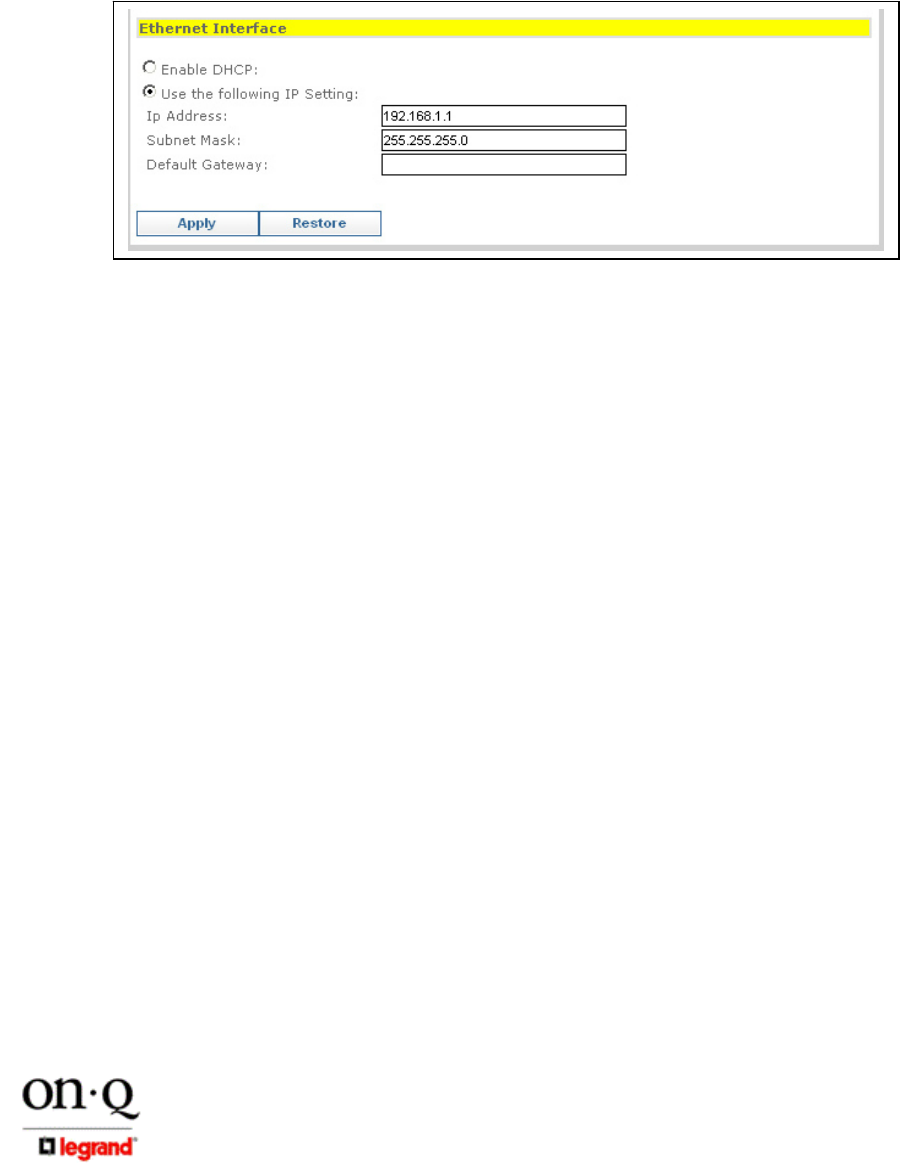
1. Use the Ethernet Interface area at the bottom of the Simple Setup Screen to accomplish
these tasks (see Figure 24).
2. The Enable DHCP button is selected when you want the server to automatically assign the
IP Address, Subnet Mask and Default Gateway of the WAP. If you are going to make the
WAP part of the Router’s subnetwork, you would instead click on the Use the following IP
Setting button.
3. If the router is using the 192.168.10 subnetwork, enter 192.168.10.100 into the IP Address
field. Use an address (like 100) that is higher than the number of PCs you are likely to attach
to this router.
4. Enter 255.255.255.0 into the Subnet Mask field.
5. Enter 192.168.10.254 into the Default Gateway field and click Apply.
6. To verify that you can access the WAP 802.11g at its new IP address, run the Ping command
(ping 192.168.10.100) from any router attached PC.
Figure 24
