


33
Configuration
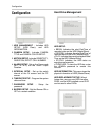
SAVE DVR INFO: Once the ENTER button
has been pressed on SAVE DVR INFO, the
DVR information will be saved to HDD.
• If the DVR information is saved properly,
the message NOW CHANGE HDD
DISK will be shown on the system.
• Then power off the DVR and change with
new HDD.
• Be sure to write down the DVR
information such as NTSC/PAL,
MODEL name, Channel, HDD location
(PORT 1, PORT2). When you want to
retrieve the Data), you must do based
on this DVR information.
LOAD DVR INFO: LOAD DVR INFO:
Retrieves the data recorded on a HDD from
other system.
HDD retrieval procedure:
• Install the HDD with new system and
power on.
• Press the [STOP] button when the DVR
is booting.The HDD CHANGE
MODE-ON message will appear.
• Data retrieval will occur when the LOAD
DVR INFO option is selected in the
Menu.
NOTE: If the HDD settings are changed
between backup and retrieval, there is a
chance that data will be lost.
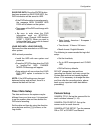
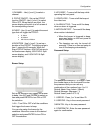
Time / Date Setup
The date and time on the system may be
different from your time zone. It is important
to set the system date and time before the
DVR starts recording.
Set the date and time by using the direction
arrow buttons and the [-][+] buttons, or the
Jog shuttle.
• Date format- American / European /
Asian formats
• Time format- 12 hours / 24 hours
• Month format- English/Numeric
The following is recommended during initial
setup:
• Set the time/date,
• Go to HDD management and CLEAR
HDD
• RUN all factory defaults.
DO NOT change the date and time
recording has started, as it may corrupt the
System data archive and cause playback
errors. If it is necessary to change the date
and time after the recording starts, please
back up any important video data before
proceeding.
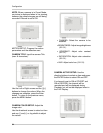
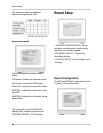
Camera Setup
CAMERA TITLE: Set up the camera title for
each individual channel (1~16).
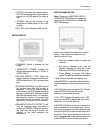
CAMERA COLOR SETUP: Set up the
camera color for each channel.
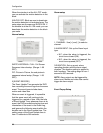
CAMERA ACTIVE SETUP: Turn the camera
ON or OFF at COVERT and Record.