44
Bartacking
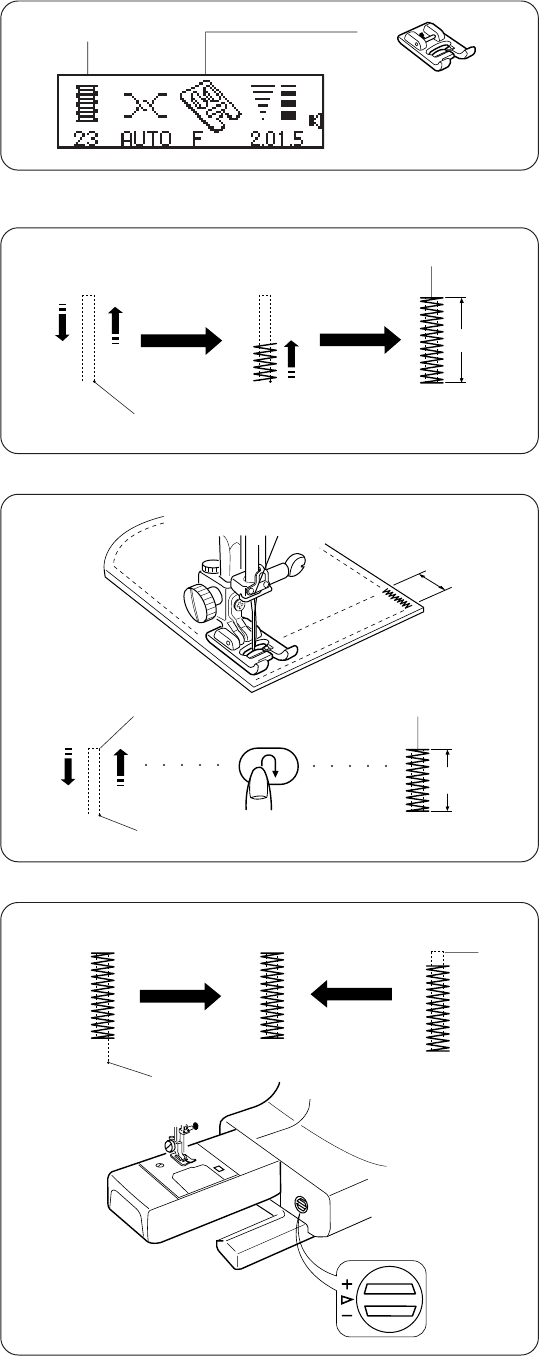
1 Stitch pattern: 23
2 Presser foot: Satin stitch foot F
Switch to “Low” speed setting. Four lock stitches will be
sewn first. Then sew to the desired length and press the
reverse button.
The desired length has been now determined. Continue
sewing until the machine stops automatically.
* This stitch is used for reinforcement of the heavily
strengthened part of a garment.
The maximum bartack length is 1.5 cm (5/8”) dependent
on fabric.
When you change the stitch length or stitch width, press
width key “+” or “-”, or length key “+” or “-”.
1 Starting position
2 Ending position
3 Pre-set 1.5 cm (5/8”)
To sew less than 1.5 cm (5/8”) of bartacking, sew the
length required, then press the reverse button. The
length is memorized. Depress the foot control until the
machine stops automatically.
• Memorizing bartacking
When repeatedly sewing the same size bartack, press
Memory key and restart sewing.
4 Length required
5 Reverse button
6 Starting position
7 Ending position
• Adjusting the evenness of bartacking stitches
Make a test on an extra piece of fabric to check your
settings.
If the bartacking is uneven, adjust the stitch length by
turning the feed balancing dial as shown.
8 Starting position
9 An extra length is left from the starting position.
10 Turn the feed balancing dial to “+” direction.
11 Matching the position. (Correct position)
12 An extra length is left at the returning position.
13 Returning position.
14 Turn the feed balancing dial to “-” position.
1
2
1
2
3
4
4
6
5
7
4
9
11
12
8
10 14
13


