


24
Practice Common Stitching Skills
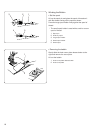
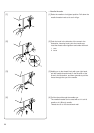
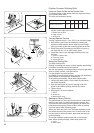
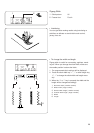
Using the Seam Guides on the Needle Plate
The seam guides on the needle plate are engraved to help
you measure seam width.
The lines are marked as follows.
* The numbers indicate the width from the center needle
position to the edge of the fabric.
1
Needle drop position
2 Edge of fabric
1 Guide lines
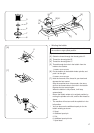
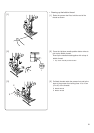
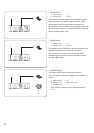
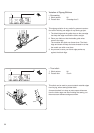
Turning Square Corners
Turning a square corner 1.5 cm (5/8 “) from the fabric edge:
1. Stop stitching and lower the needle by pressing the
Up/down needle position button when the fabric edge
facing you lines up with the cornering guides as shown.
2. Raise the presser foot and turn the fabric to line up to
the edge with the 1.5 cm (5/8”) seam guide.
3. Lower the presser foot and begin stitching in the new
direction.
1 Up/down needle button
2 Cornering guides
3 Presser bar lifter
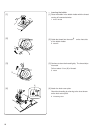
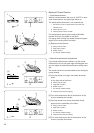
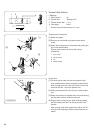
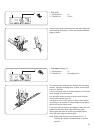
Using the Quilting Bar
The stitch and its uses:
Quilting is stitching two layers of fabric together with batting
in between to add dimension and warmth.
You can use quilting on entire garments or parts of garments,
such as yokes, pockets, cuffs and collars.
It is also popular for table fashions.
In addition to straight stitch quilting, you can quilt with deco-
rative stitches or stitch pattern combinations.
To do quilting successfully, follow these simple steps:
1. Loosen the quilter screw 1 on the back of the presser
foot holder as shown.
2. Slide the quilting bar w into the opening under the
screw to the width of quilting stitches you desire.
3. Tighten screw.
4. See page 47 for how to operate.
1 Screw
2 Quilter bar
3 Measurement lines
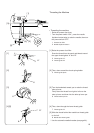
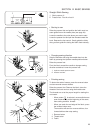
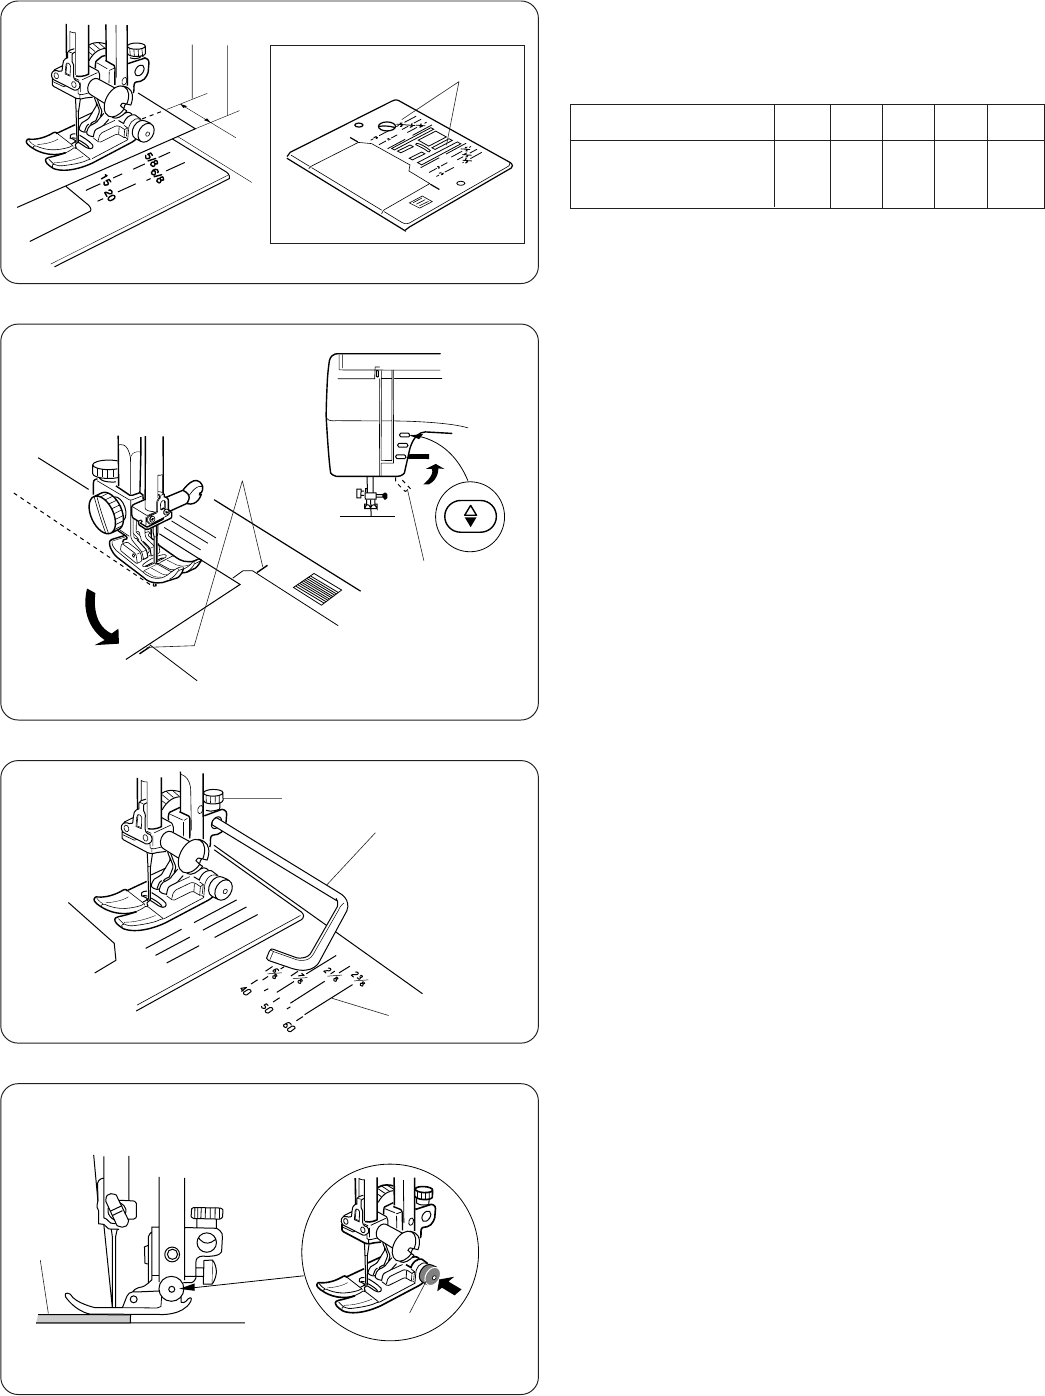
Sewing on Heavy Fabrics
The black button on foot A will lock the foot in a horizontal
position if you push it in before lowering the presser foot.
This ensures even feeding at the beginning of seams and
helps when sewing many layers of fabric such as sewing
over welt seams when hemming jeans.
When you reach the point of an increased thickness, lower
the needle and raise the presser foot. Press the toe of the
foot and push in the black button, then lower the foot and
continue sewing.
This button releases automatically after a few stitches.
Note: When sewing an edge, select stitch pattern 02.
1 Fabric
2 Black button
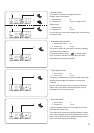
Numbers on needle plate
Seam width center needle
position guide line (cm)
15 20 4/8” 5/8” 6/8”
1.5 2.0 1.3 1.6 1.9
1
2
3
2
3
1
1
2
3
1
2