


ZIO
®
/ZIO PLUS LCD WALL MODULES
63-2719—03 4
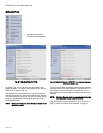
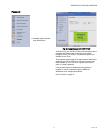
SAVE BUTTON
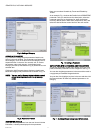
A SAVE button is available on screens that allow entries or
selections. It is enabled whenever any change is made on the
screen, and allows you to save your selections/entries at any
time. See the ROOMSP Details area of the Categories and
Parameters window in Fig. 12 on page 7 for an example of the
SAVE button.
Save is enabled whenever a change is made to the current
page. When you press the SAVE button, the preview screen
displays and your changes are reflected in the preview.
If you try to leave the current screen without saving (click
another icon or press the Back or Next button) and have made
changes, a warning message appears.
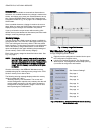
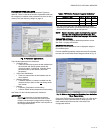
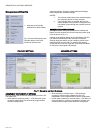
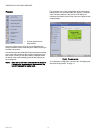
Memory Usage
The wall module has a fixed amount of memory available for
configuration data. The TR70 has 1,020 bytes of memory, the
TR71 has 2,000 bytes of memory, and the TR75 has 4,950
bytes of memory. To view the current memory use information
click on the Memory Usage Details button. A new window
opens and displays a bar graph indicating the percentage of
current memory used in each memory category.
Each of the memory categories should be below 100%. See
Fig. 4 on page 4.
NOTE: For a single Zio memory usage must be equal to or
less than 100% in order to download the configura-
tion to the programmable controller. If using multiple
Zios, you should also check the Spyder Resource
usage. Total Zio memory use is limited to 5K bytes
on Spyder.
View the online help in the WEBs-AX Workbench to see
troubleshooting tips for reducing memory usage in the TR70
Series if memory use is above 100%.
The following warning message displays when the memory
usage is greater than 100%:
“Warning: Memory Limit Exceeded. The current wall
module configuration requires more memory than the wall
module model can support. You will need to change the
configuration so that the memory usage is 100% or less
before pressing the FINISH button.”
Fig. 4. Memory Usage Details screen.
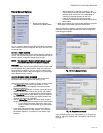
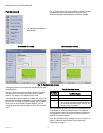
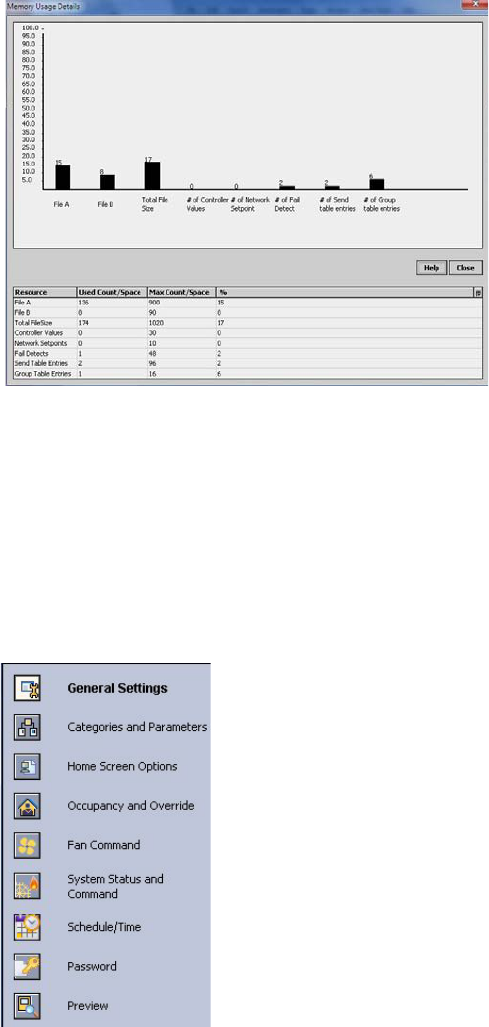
Wall Module Configuration
To begin configuring the wall module:
1. Right click on the configuration’s function block to open
the Configuration Properties menu.
2. Left click on Configure Properties. The Configuration
Wizard opens. The Configuration Wizard steps (see Fig.
5) are used to configure the wall module.
See “General Settings”.
See page 5.
See page 9.
See page 10.
See page 12.
See page 13.
See page 14.
See page 15.
See page 16.
Fig. 5. Wall Module - Configuration Wizard window showing
Menu selections only.