


Service
22 311879F
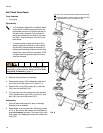
Heavy-Duty Diaphragm Repair
Tools Required
• Torque wrench
• 19 mm open end wrench
• O-ring pick
• Lithium-base grease
Disassembly
1. Relieve the pressure.
2. Remove the manifolds and disassemble the ball
check valves as explained on page 18.
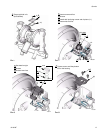
3. Remove the clamps (106) holding the fluid covers
(101) to the air covers (23). Pull the fluid covers
(101) off the pump. See F
IG. 12.
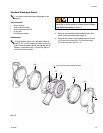
4. Once the fluid covers are removed, the diaphragm
on the side of the pump which was last pressurized
with air will be separated from the center section/air
cover. This allows you to grip the diaphragms.
5. Diaphragms are assembled handtight. To loosen,
grip both diaphragms securely around the outer
edge and rotate counterclockwise. One diaphragm
assembly will come free and the other will remain
attached to the shaft. Remove the freed diaphragm
(403) and air side plate (104).
6. Pull the opposite diaphragm assembly and shaft
(24) out of the center housing (1). Hold the shaft
flats with a 19 mm open end wrench and remove the
diaphragm and air side plate from the shaft.
7. Inspect the diaphragm shaft (24) for wear or
scratches. If it is damaged, inspect the bearings (19)
in place. If the bearings are damaged, refer to page
24.
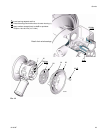
8. Reach into the center housing (1) with an o-ring pick
and hook the u-cup packings (402), then pull them
out of the housing. This can be done with the bear-
ings (19) in place.
9. Clean all parts and inspect for wear or damage.
Replace parts as needed.
If your pump uses standard diaphragms, see page
19.
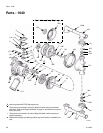
A Fluid Section Repair Kit is available. Refer to
page 27, 35, or 43 to order the correct kit for your
pump. Parts included in the kit are marked with an
asterisk, for example (401*). Use all the parts in
the kit for the best results.
To reduce the risk of serious injury, whenever you are
instructed to relieve pressure, always follow the Pres-
sure Relief Procedure on page 11.
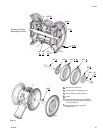
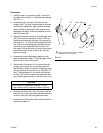
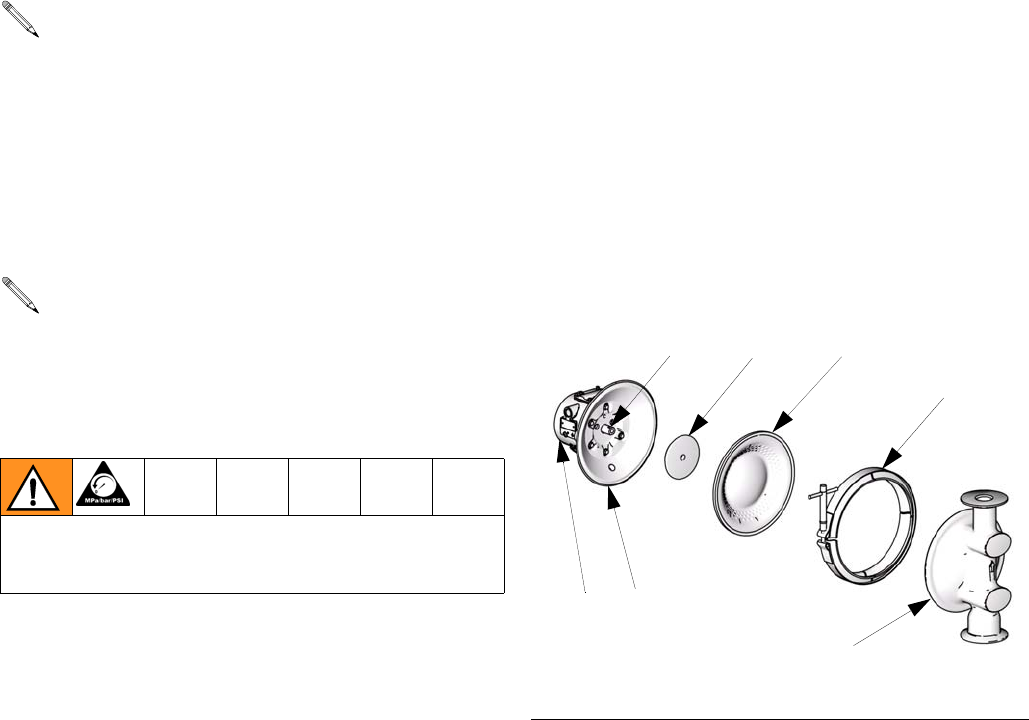
FIG. 12
ti10630a
106
24 104 403*
101
231