


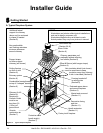


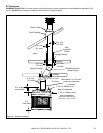


22
• Place the replace on a continuous at surface.
• Follow framing instructions in Section 6.
WARNING! Risk of Fire! Prevent contact with sag-
ging, loose insulation.
• DO NOT install against vapor barriers or exposed
insulation.
• Secure insulation and vapor barriers.
• Provide minimum air space clearances at the sides
and back of the replace assembly as outlined in
Section 6.
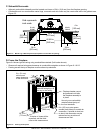
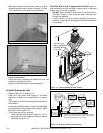
Protective metal strips are placed 2 in. (51 mm) under the
front of the fireplace and must extend beyond the front
and sides of fireplace opening by 2 in. (51 mm).
1 in. (25 mm)
overlap
WARNING! Risk of Fire! Protective metal hearth strips
MUST be installed. DO NOT cover metal strips with com-
bustible materials. Sparks or embers may ignite ooring.
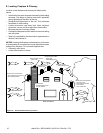
• Refer to Figure 7.7.
• Locate the two protective metal hearth strips measuring
approximately 26 in. x 4 in. (660 mm x 102 mm) included
with this replace.
• Slide each metal strip 2 in. (51 mm) under front edge of
replace.
• Overlap strips in the middle of replace opening by 1 in.
(25 mm) minimum..
• Metal strips must extend beyond the front and sides of
the replace opening by at least 2 in. (51 mm).
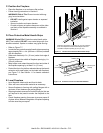
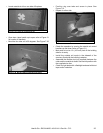
• Protect the front of a platform elevated above the hearth
extension with metal strips (not included with replace)
per Figure 7.8. See Section 11 for hearth extension
instructions.
Raised Platform
Floor
2 in.
(51 mm)
1 in. (25 mm) min.
overlap
2 in.
(51 mm)
Top piece must overlap
bottom piece
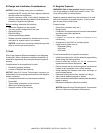
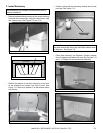
• Level replace side-to-side and front-to-back.
• Shim with non-combustible material as necessary.
• Secure replace to framing with nailing anges with a
minimum of two fasteners per nailing ange.
• Shipping brackets removed in Section B may be (but are
not required to be) used to anchor the replace to the
oor.
• Check replace opening for square to ensure proper t
of glass doors. Measure diagonals of replace opening
to make sure they are equal.
Heat & Glo • EXCLAIM-50 • 4013-041 • Rev AA • 7/12