


13
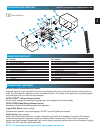
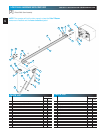
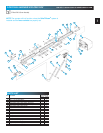
MAIN ASSEMBLY
FOR HELP-1.800.354.3643 OR GENIECOMPANY.COM
NOTE: If installing an extension kit for an
8 feet high door, refer to the instructions
included with the extension kit now.
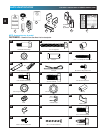
7. Attach “end” rail section [3C].
• Attach “end” rail in same way as “middle” rail
(step 5). (“End” rail section screw has “hook”
on one end only.)
8. Flip power head/rail assembly over (upside
down), so that entire length of screw is visible
from above.
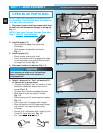
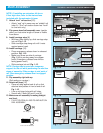
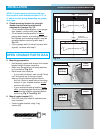
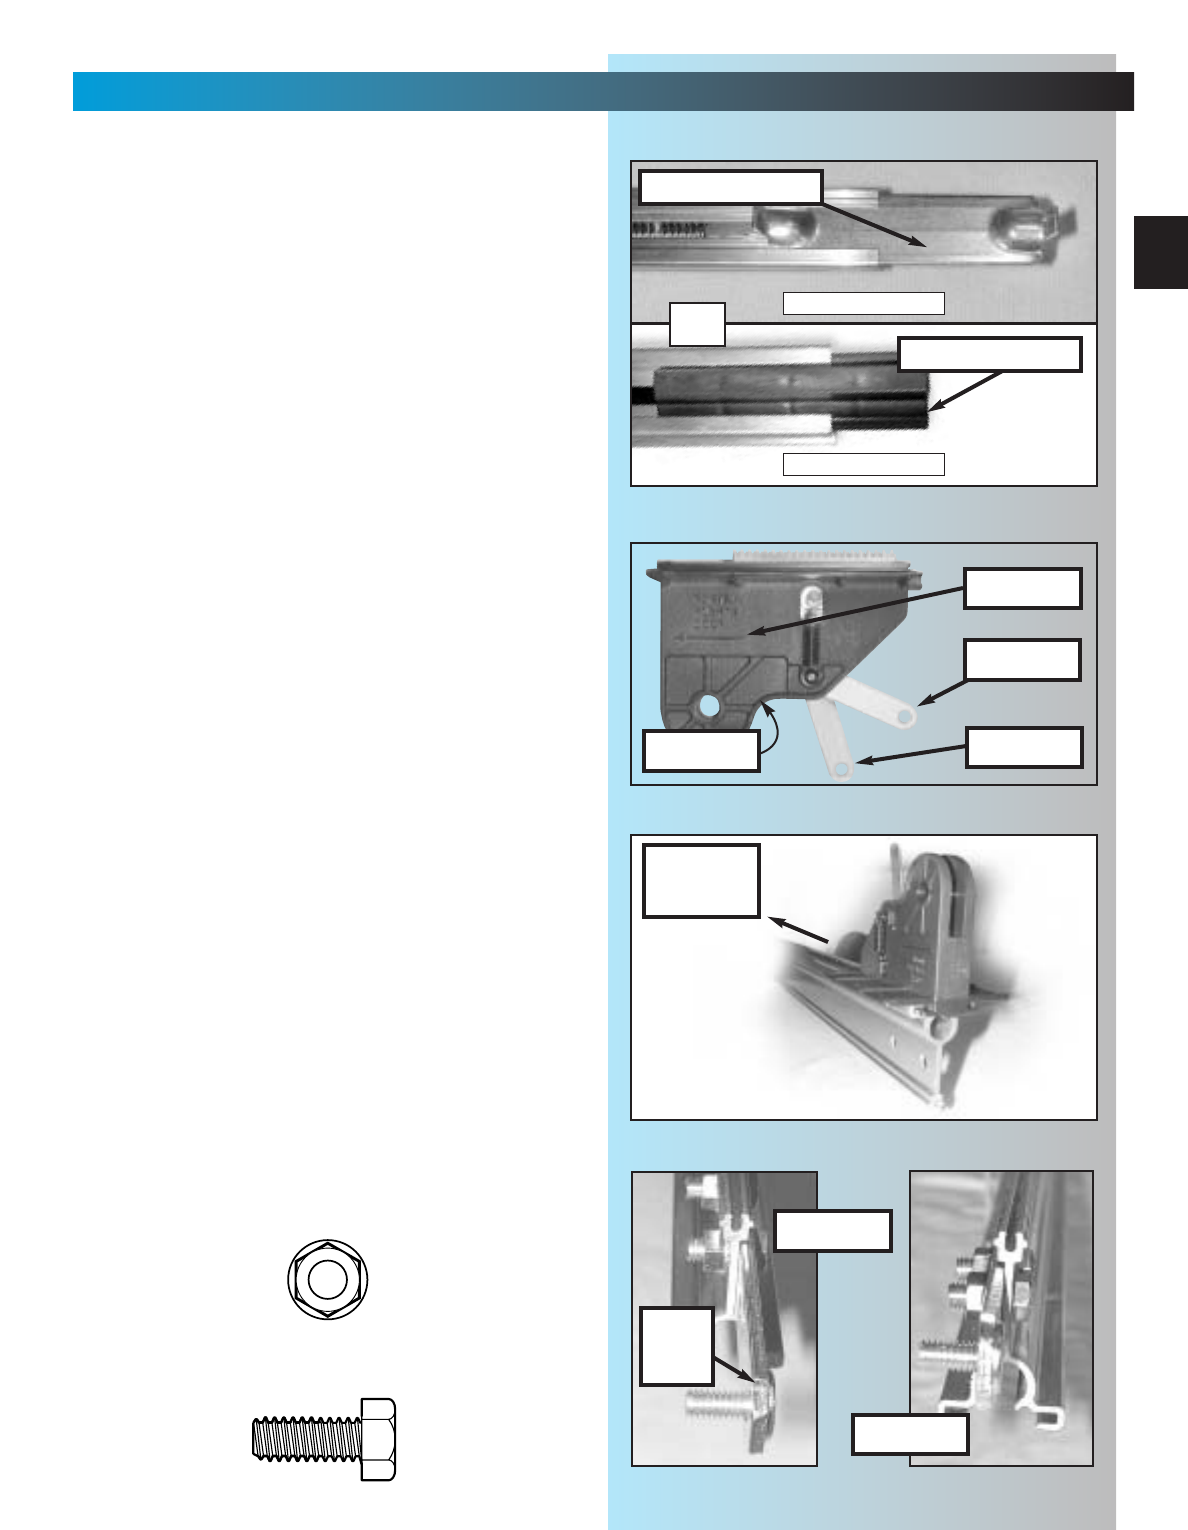
9. Install carriage stop [6].
• With bent tabs facing up, slide carriage stop
into rail. Fig. 1-13.
• Slide carriage stop along rail until it rests
against power head.
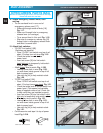
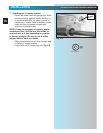
10.Install carriage [10].
• Place emergency release lever in released
position. Fig. 1-14.
• Make sure arrow on side of carriage
(Fig. 1-14) is pointing away from power
head. (Emergency release lever will be
facing power head.)
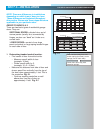
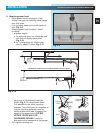
• Slide carriage into rail. Fig. 1-15.
NOTE: Carriage can be used as a temporary
support for the rail while performing the next few
steps of assembly. Slide carriage to mid point of
rail. Place emergency release lever in engaged
position.
11.Flip assembly right side up.
(Rail resting on carriage.)
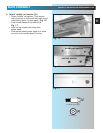
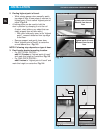
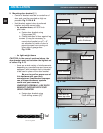
12. Attach rail strap
[13]
.
• Place rail strap against end of rail so that
attached stud passes in front of end of rail.
Fig. 1-16.
•Line up rail strap holes with rail holes.
• Secure with 2 bolts [46] and 2 nuts [9].
13. Make sure rail assembly is resting straight
and level.
•FULLY TIGHTEN ALL BOLTS AND NUTS IN
RAIL ASSEMBLY.
Fig. 1-13
Fig. 1-14
engaged
released
arrow
Fig. 1-15
power
head
carriage stop
carriage
Fig. 1-16
wrong
correct
rail
strap
5/16" Flange nut
5/16" x 3/4" Hex head bolt
[
9
]
[
46
]
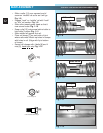
carriage stop
USES BUMPER
NO BUMPER
OR