


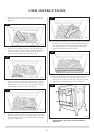
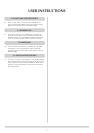


14
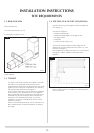
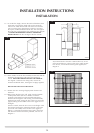
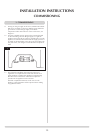
3.1.5 To set the flue length, measure the total wall thickness, then
add 65mm. This total flue length will give the minimum
clearance of 50mm between the rear of the stove and the
wall. To cut the flue to length using a hacksaw, first insert
the square cardboard fitment into the flue. This will support
the inner flue. Cut through the flue and fitment. See diagram
2. ENSURE THE REMAINING FITMENT IS REMOVED
FROM THE FLUE. File the cut edges of the flue smooth.
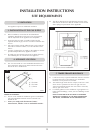
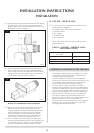
3.1.6 From outside, locate the flue assembly into the hole until the
terminal is flat against the wall. Ensure the terminal is
vertical. NOTE THE ORIENTATION OF THE TERMINAL.
See diagram 3. Mark the four fixing holes, remove the
terminal and drill the holes, inserting the rawplugs supplied.
DO NOT FIX THE FLUE AT THIS STAGE.
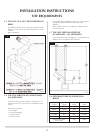
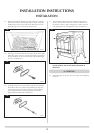
3.1.7 Position the stove ensuring all appropriate clearances are
observed.
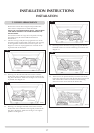
3.1.8 Before fixing the flue in the wall, apply a bead of suitable
weatherproof sealant (silicone or similar) around the
perimeter of the back face of the terminal B Diagram 3.
Feed the flue through the wall ensuring it travels smoothly.
Working from inside, engage the flue in the inner and outer
spigots, making sure the rubber seals on the spigots are not
damaged.
From the outside, insert the four screws in the flanges of the
flue terminal ensuring the sealant has formed a water tight
joint to the wall. Finally secure the flue to the spigot by
drilling a 3.5mm hole through the larger hole in the spigot
and insert the stainless steel screw provided; refer to C in
Diagram 3.
Any terminal which is less than 2 meters above any access
(level ground, balcony or above a flat roof to which people
have access), is to be fitted with the guard supplied, see
diagram 4.
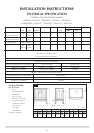
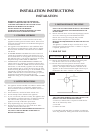
INSTALLATION INSTRUCTIONS
INSTALLATION
2
AR0630
3
AR0606
4
AR0603