Page 32 Page 33
Remote Access
network setup
Remote Access
remote surveillance
remote surveIllance
Remote Surveillance using Internet Explorer 8:
The DVR features built-in browser-based software that allows you to access your system remotely over your local area network
(LAN) or over the Internet using Internet Explorer®. Once you have configured the network settings on the DVR to match those on
your router and forwarded the ports needed by the DVR to enable remote access over the Internet, you will be ready to remotely
view your cameras using a webcam program based on an ActiveX control. For this to work, you will have to enable the ActiveX
control options that are built into Internet Explorer. You will also need to check your “User Account Control” setting. It is strongly
suggested that you be running the latest version of Internet Explorer (currently IE8).
Configuring Windows “User Account Control”:
Check the “User Account Control” setting in Windows Vista or Windows 7 to be sure the setting is configured as shown below. If
not you might receive an error message informing of a codec that is missing or not installed.
Windows Vista
1. Open the Control Panel
2. Select “User Accounts and Family Safety”
3. Select “Add or Remove User Account”
4. Select user account to change
5. Select Turn User Account Control on or off”. Note: Depending on your version of Vista, this screen might be accessible on
the bottom of the “Select User Account to Change” screen under “Additional things you can do” > “Go to main user ac-
count page”.
6. Uncheck the box next to “Use User Account Control (UAC) to help protect your computer.”
7. You will need to re-start your computer for the change to take effect.
Windows 7
1. Open the Control Panel
2. Select “User Accounts”
3. Select “Change User Account Control Settings”
4. In the “Choose to be notified about changes to your computer” screen, move the slider to the lowest setting “Never no-
tify”.
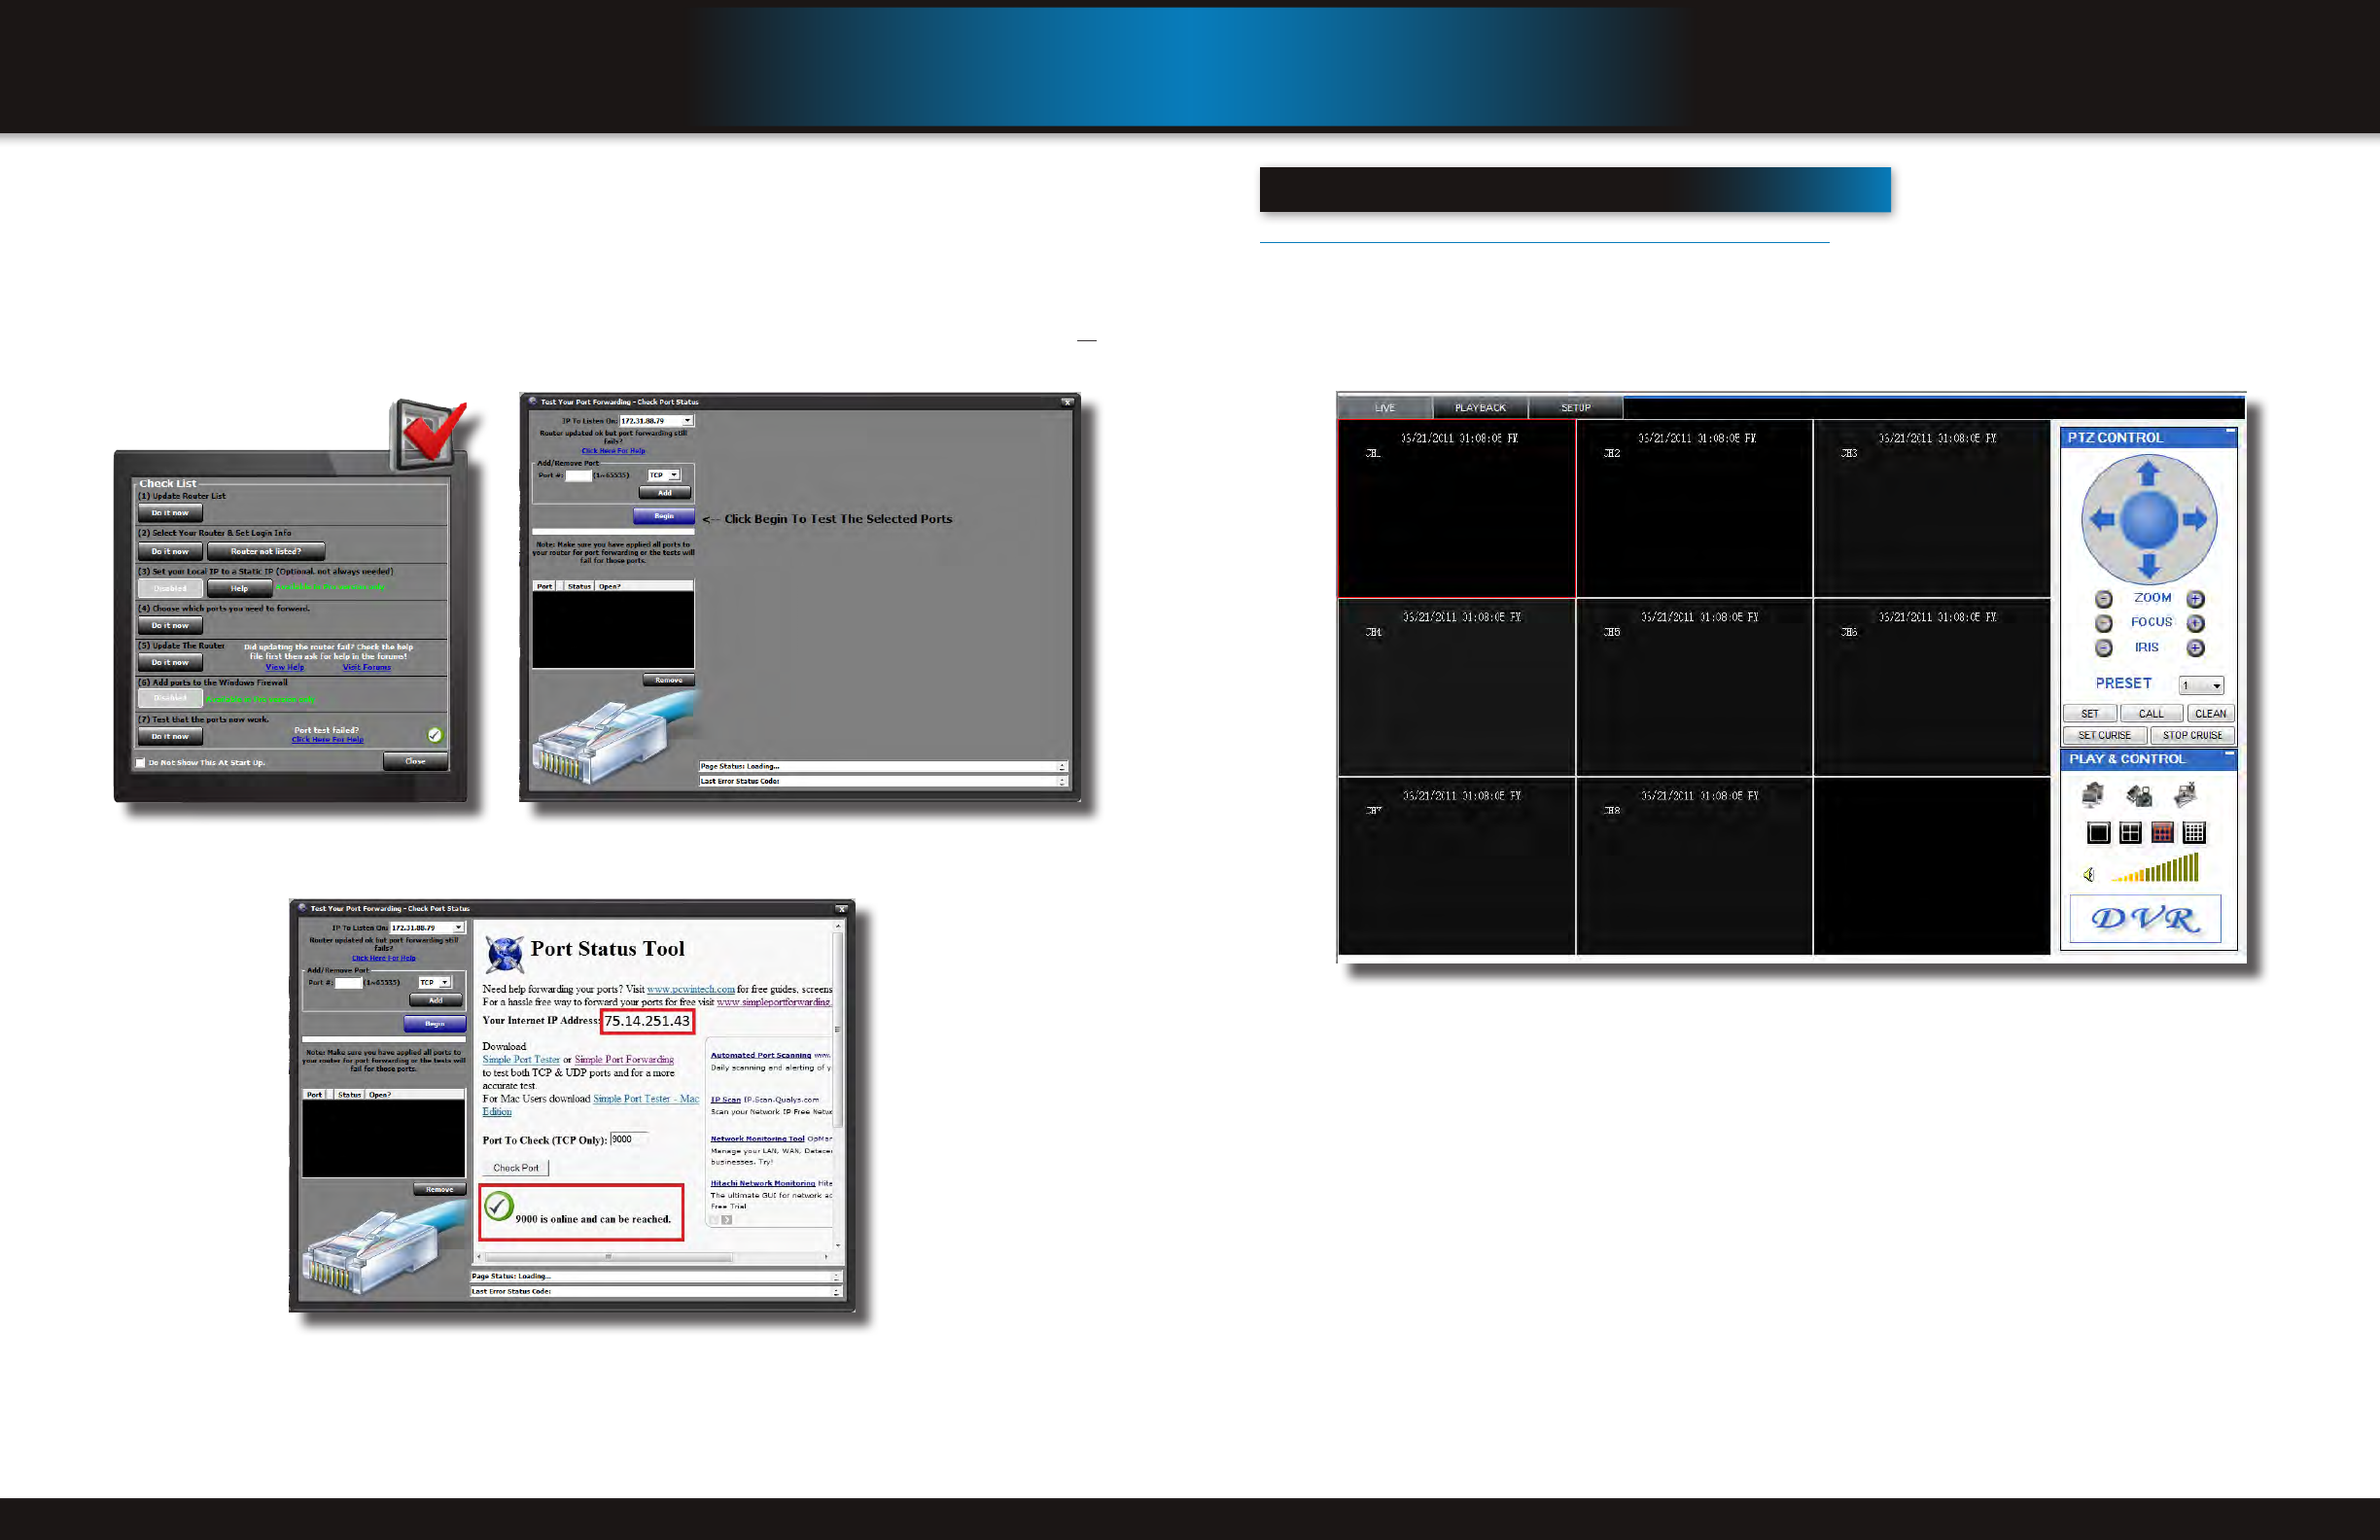
Test Your Port Screen with Results
Test Your Port Screen
Checklist Screen
Step 3: Test Port Forwarding
1. In the Checklist Screen, test if the ports are working by clicking on the “Do it now” button in item “(7) Test that the ports
now work.”. (See “Checklist Screen” below).
2. You should receive a message in the right side of the “Test Your Port Screen“ screen, “Port Status Tool” stating that the
port is online and can be reached, then you have set it up correctly. You will also receive an IP Address.
3. To connect to your DVR from the Internet, you will need to put the Internet IP address you received in the message into
the browser or access program window. If you had to change your port from Port 80, then you need to put that port at the
end of the address preceded by a colon (“:”). Example: if you used port 85, you will need to enter: http://75.14.251.43:85


