Page 14 R-3450
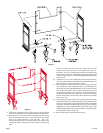
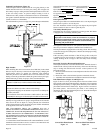
12. Replace and attach the (2) 1" x 13-3/4" divider brackets onto the
glass frame assembly with the (6) screws and (6) nuts from Step 7.
13. Grasp bottom of glass frame, push upward and insert glass frame
into glass frame support top, push inward and insert glass frame
into glass frame guide.
14. Attach two door latches to bottom of firebox.
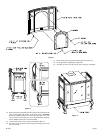
15. Replace casing front onto outer casing.
16. Replace casing top onto outer casing.
17. Replacement of gasket on glass frame and front flange on inner
body is completed.
Operating Guidelines
Before operating this heater, please review the safety warnings pages at
the beginning of this manual and those precautions and warnings listed
below.
1. Know what type of ignition system this model has (standing pilot) and
follow the applicable SAFETY and LIGHTING instructions.
2. Check to ensure there are no gas leaks. If you are unsure, turn gas off
to the heater and call a service person or your gas utility.
CAUTION: Clothing or other flammable material should not be
placed on or near the appliance.
WARNING: Children and adults should be alerted to the hazard
of high surface temperature and should stay away to avoid burns
or clothing ignition. Young children should be carefully supervised
when they are in the same room as the appliance.
3. Tampering is DANGEROUS and voids all warranties. Any component
that is found to be faulty, must be replaced with an approved
component.
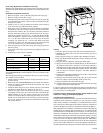
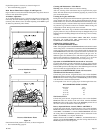
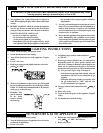
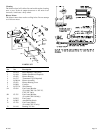
Initial Lighting (Figure 21)
Upon completing the gas line or turning the gas valve "ON" after it has
been in the "OFF" position, a small amount of air will be in the lines. When
first lighting the appliance, it will take a few minutes for the lines to purge
themselves of this air. Once the purging is complete, the appliance will
light and operate satisfactorily.
Subsequent lightings of the appliance will not require such purging if the
gas valve is not turned to "OFF."
Standing Pilot Operation
1. Follow the SAFETY and LIGHTING INSTRUCTIONS for standing
pilot controls found in this manual and on labels found attached to the
appliance.
CAUTION: During the initial purging and subsequent lightings,
never allow the gas valve control knob to remain depressed in the
"pilot" position without pushing the piezo ignitor button at least
once every second.
2. During the heating season, leave the control valve knob in the "ON"
position. This will allow the pilot flame to remain lit. Turn the burner
flame on or off with the appliance ON/OFF rocker switch, wall
switch, remote control kits or 750 millivolt wall thermostat.
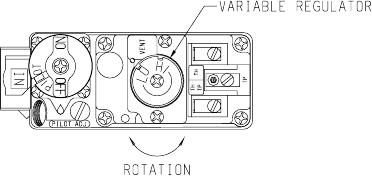
NOTE: The gas control valve allows you to increase or decrease the
height of the main burner flame. The control valve has a pressure regulator
with a knob as shown in Figure 21. Rotate the knob clockwise to "HI" to
increase the flame height and counterclockwise to "LO" to decrease the
flame height.
3. When the heating season is over, turn the on/off switch to "OFF" and
the control valve to "OFF". The system, including the pilot light, will
be shut down.
Figure 21
Maximum and Minimum Input
The gas valve on the appliance allows the input to adjust between a
maximum input of 30,000 Btuh for Natural gas and Propane gas to a
minimum input of 19,500 Btuh for Natural and 22,000 Btuh for Propane.
Please be advised, the maximum input provides the greatest amount of
yellow flame and ember glow on the log set. The minimum input
substantially decreases the yellow flame and ember glow on the log set.
Maintenance & Service Instructions
IMPORTANT: Turn off gas before servicing appliance. It is
recommended that a competent service technician perform these check-
ups at the beginning of each heating season.
• DO NOT put anything around the heater that will obstruct the flow
of combustion and ventilation air. See clearances.
• DO examine venting system periodically. Clean and replace dam-
aged parts. Examinations should be made at the start of the heating
season and also in mid heating season under average conditions.
• Clean Burner and Control Compartment
Keep the control compartment, logs, and burner areas surrounding the
logs clean by vacuuming or brushing at least twice a year.
Cleaning Procedure
1. Let the unit cool if it has been operating.
2. Shut off gas supply .
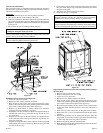
3. Lower valve cover on firebox.
4. Release two door latches at bottom of firebox.
5. Grasp bottom of glass frame, pull forward until bottom of glass
frame is removed from glass frame guide and pull downward until
glass frame is removed from glass frame support top.
6. Vacuum burner compartment especially around orifice/primary air
openings.
7. Grasp bottom of glass frame, push upward and insert glass frame
into glass frame support top, push inward and insert glass frame
into glass frame guide.
8. Attach two door latches to bottom of firebox.
9. Ignite pilot. (See Lighting/Operating Section of Manual)
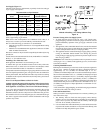
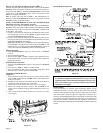
10. Operate the main burner and visually check to make sure the flame
pattern appears similar to the pictorial illustration shown for main
burner flame pattern, Figure 15. If it appears abnormal call a service
person.


