


www.desatech.com
120441-01A20
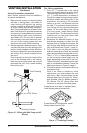
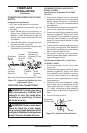
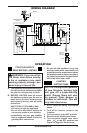
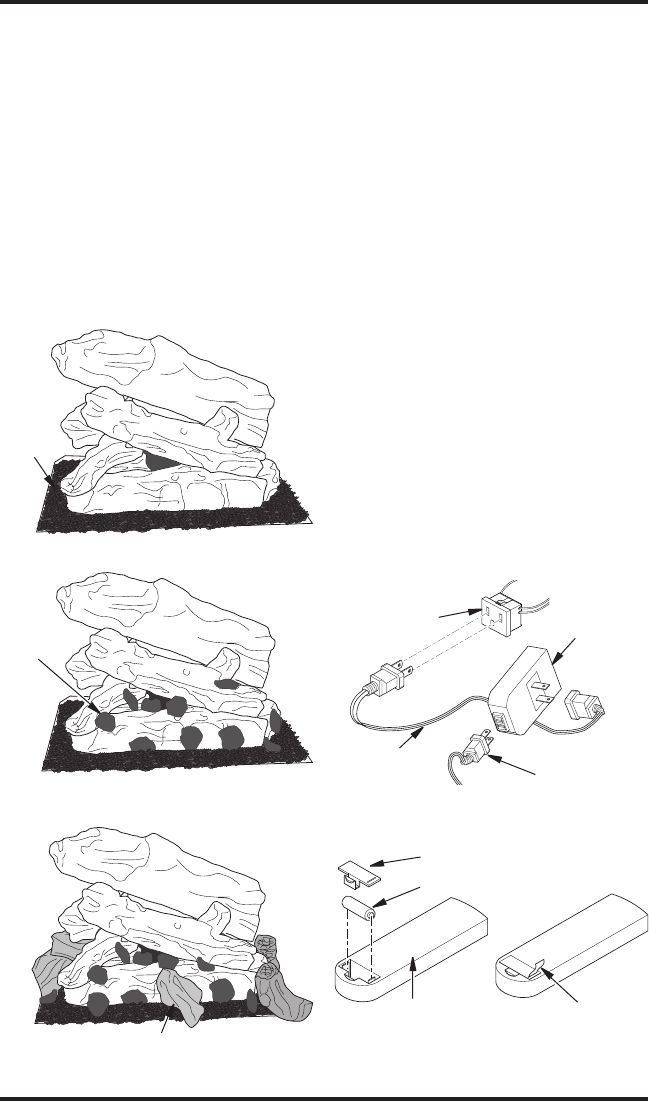
Figure 32 - Installing the WRC Remote
Receiver
Fireplace
Receptacle
Remote
Control
Receiver
Extension
Cord
Ignition
Module Plug
WALL SWITCH INSTALLATION
Installation of a wall switch allows you to
activate gas control valve and turn replace
on and off. Wall switch is to be connected to
incoming 120 volt regular household wiring
that supplies electricity to replace.
REMOTE CONTROL INSTALLATION
(MODEL WRC)
Note: If using wireless hand-held remote
control, the wall switch must be in the ON
position to be operational. The remote control
then becomes the switching mechanism for
replace operation.
1. Remove center brick/control cover.
2. The WRC model receiver does not require
a battery. To install receiver:
a. Plug short extension cord into replace
receptacle.
b. Plug receiver uinit into extension cord.
c. Plug ignition module into receiver unit
(see Figure 32).
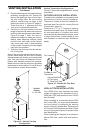
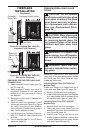
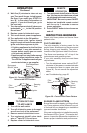
3. Activate remote handset battery by re-
moving insulating tab on back of handset
(see Figure 33). Battery is included pre-
installed.
4. Once battery is activated, the unit is ready
to use.
5. Replace center brick/control cover.
Figure 33 - Installing Battery into Back of
Handset
Pull to Remove
Insulation Tab
Battery Cover
12 Volt Battery
Back of
Handset
FIREPLACE
INSTALLATION
Continued
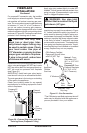
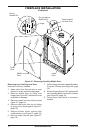
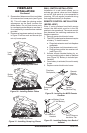
Figure 29 - Installing Lava Rock
Figure 30 - Installing Ember Flakes
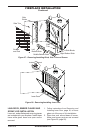
Figure 31 - Installing Scrap Log Pieces
Lava
Rock
Ember
Flakes
Scrap Log Pieces
3. Place ember akes around front and sides
of burner and on burner ports (see Figure
30). This will create the glowing ember
appearance as the flame touches the
ember akes. Do not block burner ports
by overlapping ember akes in one area. It
is not necessary to use all ember material
provided.
4. Place scrap log pieces randomly as shown
in Figure 31 on lava rock and around (but
not on) burner ports.