—58—
XVII. ECONOMI$ER+ CONFIGURATION
For most applications, the factory setting will be used to con-
trol the EconoMi$er+. However, there are 19 different vari-
ables that can be used to configure the control for wide range
of applications. The factory settings and variables are shown
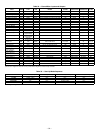
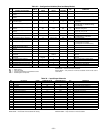
in Table 34.
IMPORTANT:
There is no way to reset/restore the factory
default configurations; use caution when making changes to
any set point or operational variable.
The EconoMi$er+ control accepts an occupied/unoccupied
switch input. This input is used to control the occupied and
unoccupied minimum ventilation damper position as shown in
Table 34 items 2 (ECONOMIN_SP) and 3 (U_ECONOMIN_SP).
These values represent the minimum damper position. In addi-
tion, the controls allows for different modes of compressor opera-
tion in the unoccupied mode. Using item 13 in Table 34
(OCC_MODE), the user can select one of the following unoccu-
pied modes:
• No unoccupied cooling
• Unoccupied free cooling (EconoMi$er+)
• Unoccupied free cooling and mechanical cooling
The EconoMi$er+ will control the cooling operation of the
unit based on the demand from the thermostat outputs Y1
and Y2. The EconoMi$er+ will monitor the fan output G, but
will not control the fan directly. Note that G must be ener-
gized for any cooling to take place. Gas or electric heating
will be controlled directly from the thermostat.
When a demand for cooling occurs, the control will check to
see if it is in the occupied or unoccupied mode. Depending on
the configuration, the control will move the outdoor air
damper to the ventilation position. If the outdoor air condi-
tions are acceptable, then the control will use the
EconoMi$er+ for free cooling. If the supply-air temperature
does not meet the configurable set point, then the control
will turn on additional stages of mechanical cooling. Several
compressor sequences can be used depending on the applica-
tion requirements; these will be covered in the mechanical
compressor staging section.
A. Compressor Configuration And Control
The EconoMi$er+ control can support from 1 to 4 compres-
sor stages. For the 3 to 12
1
/
2
ton units, there will only be 1 or
2 stages of compressor cooling, so the control is factory
configured for 2 stages. There is no difference between 1 and
2 stages. The control also provides the option to configure for
high sensible or high latent loads, but for units with only two
compressors this option does not apply.
Compressors are configured using item 10 (STAGE_TYPE)
in Table 34. The control also has the capability of controlling
directly to Y1 and Y2 inputs. The control can be configured
to control to the leaving-air temperature using Y1 and Y2 as
a low cool and high cool demand based on the supply air set
point and the rate of change of supply-air temperature. For
low cool the leaving air temperature set point will be
SAT_SP +2° F. For high cool the leaving air temperature set
point will be the supply-air temperature set point (SAT_SP).
To use this option, configure the compressor sequencing vari-
able (STAGE_TYPE) to a value of 3. Configure the supply air
temperature set point (SAT_SP) to the desired leaving air
temperature.
NOTE: The supply air temperature set point is also the tem-
perature used for EconoMi$er+ control.
The logic will control the operation of the compressors
depending on the configuration selected. If free cooling can
be used, then the compressors will be integrated with the
EconoMi$er+ to provide the lowest cost cooling control. The
logic includes time guards on the compressors to provide a
minimum of 3 minutes on and 3 minutes off time. The con-
trol will also prevent two compressors from starting at the
same time. The logic uses the EconoMi$er+ to prevent rapid
cycling of the compressors and low air temperatures.
B. Ventilation Air And Free Cooling
In order for the EconoMi$er+ to control ventilation air and
free cooling, several items must be configured.
EconoMi$er+ Type
First, select the EconoMi$er+ control type that will be used.
This is the EconoMi$er+ Type function (ECONO_TYPE)
defined by item 5 in Table 34. The choices are:
1. Vent only — This is used to have just ventilation con-
trol. The EconoMi$er+ will not provide free cooling,
but the occupied and unoccupied minimum positions
can be used.
2. Proportional — In this configuration, full propor-
tional EconoMi$er+ control will be used. When
EconoMi$er+ free cooling cannot be used, the damp-
ers will be set to the appropriate occupied and unoc-
cupied minimum positions.
3. Three-Position — This mode of EconoMi$er+ is used
to provide a minimum ventilation EconoMi$er+ posi-
tion and a fixed free cooling or high ventilation posi-
tion. The high ventilation position is controlled by the
optional Remote EconoMi$er+ Enable Switch Input
connected to terminals 11 and 12 on T3.
Supply Air Temperature Set Point
Once the type of EconoMi$er+ control has been selected, the
user will need to set the Supply Air Temperature set point
(SAT_SP). The SAT_SP has a range of 40 to 65 F.
NOTE: This will be the set point when both Y1 and Y2 are
closed. When just Y1 is closed, the set point will be ° F higher.
Minimum Damper Position
Set the occupied minimum damper position (ECONOMIN_SP)
and unoccupied minimum position (U_ECONOMIN_SP).
These should be set to provide the ventilation requirements at
full occupancy as defined by the building specifications. When
demand ventilation is used, the control will close the dampers
below this position based on measured CO
2
levels in the space
to provide additional operation savings.
The control will also allow for the use of a remote minimum
position potentiometer. This will only adjust the Occupied
Minimum position. If used, the software set point
ECONOMIN_SP should be set to 0 as the control will use the
largest set point.
The damper position is not linear with the amount of outside
air, so the user will need to set the position of the
EconoMi$er+ accordingly. It is best to use the following equa-
tion and measured data to set the position:
OA = % outdoor air
SAT = supply air temperature
RAT = return air temperature
OAT = outdoor air temperature
The SAT and OAT values can be read from the control and, if
the unit is equipped with an RAT sensor, then all three
values can be read. For the calculation to work properly,
there should be at least a 10° F difference between the OAT
and RAT temperatures.
OA =
SAT – RAT
*100
OAT – RAT


