


16
KNOWING YOUR SEWING MACHINE
OMPELUKONEESEEN TUTUSTUMINEN
CONOZCA SU M
ÁQ
UINA DE COSER
СВЕДЕНИЯ О ШВЕЙНОЙ МАШИНЕ
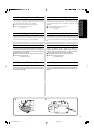
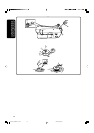
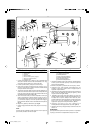
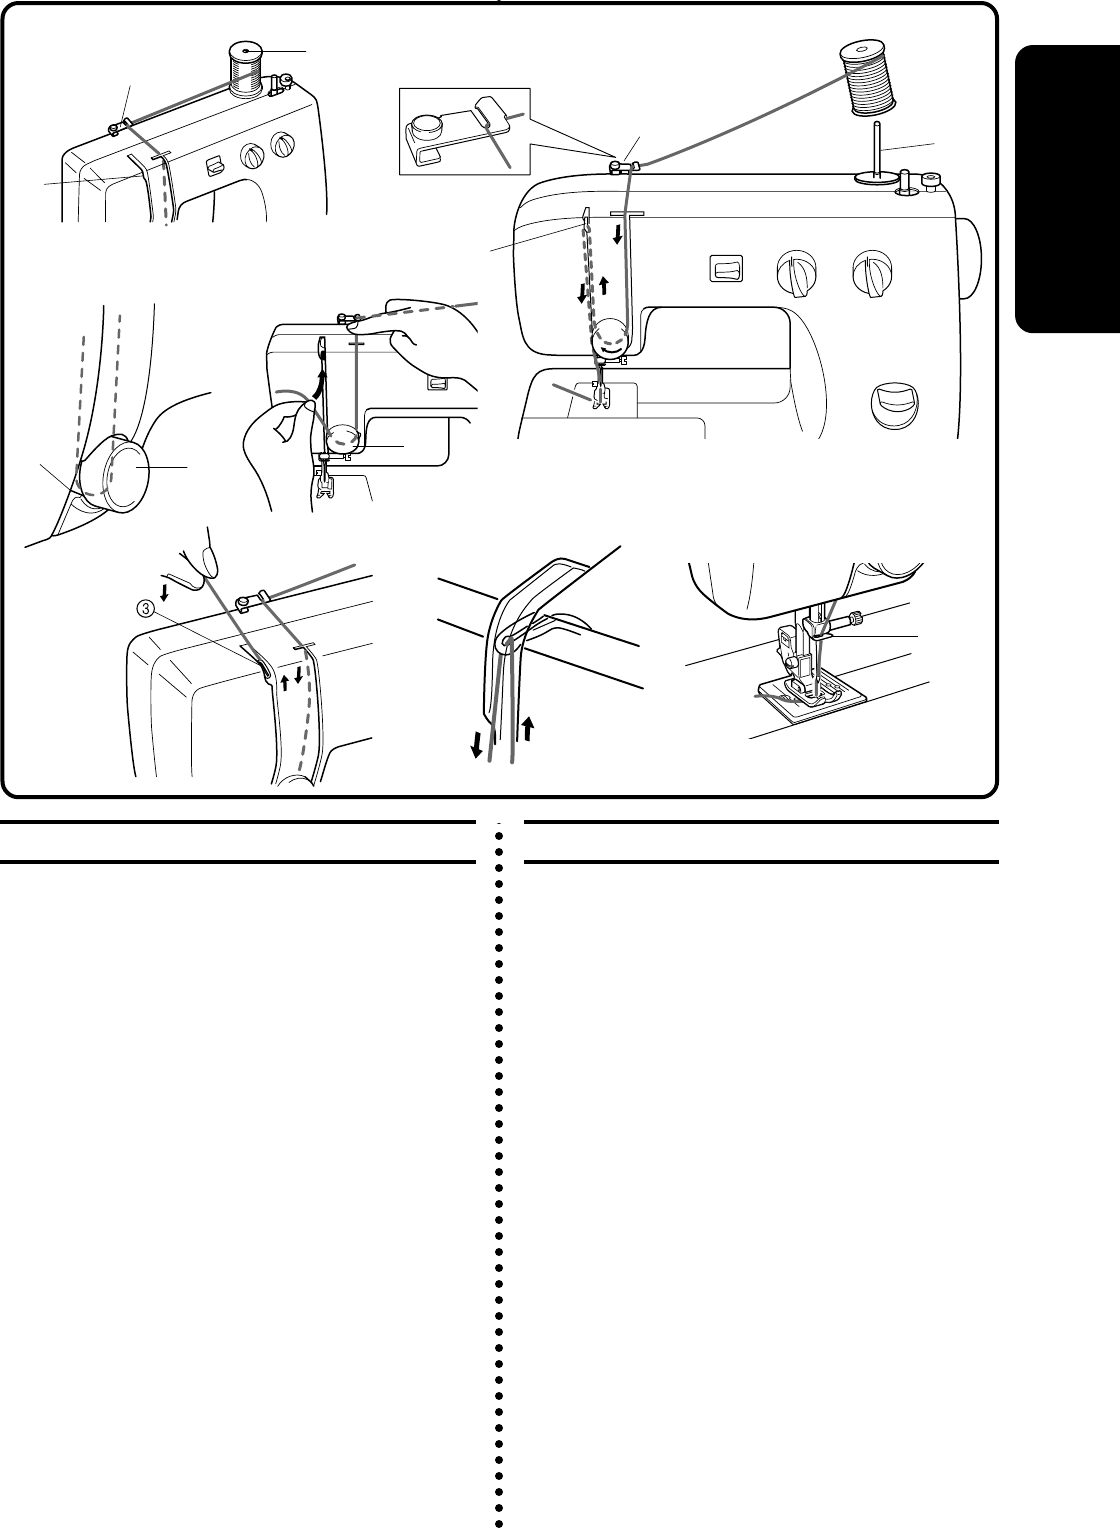
Upper (Needle) Threading
1 Spool pin
2 Thread guide
3 Thread Take-up Lever
4 Upper (needle) Tension
5 Thread Check Spring
6 Lower Thread Guide
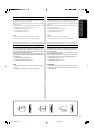
1. Raise the presser foot using the presser foot lever and turn the bal-
ance wheel toward you (counterclockwise) to raise the thread take
up lever to the highest position.
2. Pull up the spool pin and place a spool of thread on the pin.
3. Pass the thread through the first guide as shown and then forward
into the right side slot on the front of the machine.
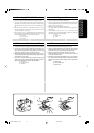
4. Guide the thread down from the right slot and around the upper
tension to the left seeing that the thread picks up the check spring
at the left of the tension area. (fig. A and B)
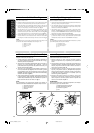
5. Guide the thread up the left side slot making sure that the thread is
to the right side of the thread take up lever until the thread is be-
hind the take up lever. Guide the thread to left bringing it up against
the take up lever and then continue down towards the needle
through the left side slot. This motion should automatically thread
the take up lever. (fig. C)
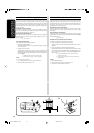
6. Bring the thread down to the needle area passing it behind the
thread guide just above the needle. (fig. D)
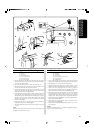
7. Thread the needle from front to back leaving a thread tail of about
5 cm (2").
NOTE:
If thread is incorrectly fed, the thread may break, cause stitches to be
skipped or cause the fabric to pucker.
1
3
2
4
5
4
6
AB
C
D
2
3
1
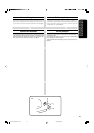
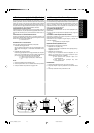
Ylä- eli neulalangan pujottaminen
1
Lankatappi
2
Lankaohjain
3
Langannostaja
4
Ylä- eli neulalangan kiristysnuppi
5
Kireyden säätöjousi
6
Alalankaohjain
1. Nosta langannostaja sen yläasentoon nostamalla paininjalan
nostovipua ja kääntämällä käsipyörää itseäsi kohti (vastapäivään).
2. Vedä lankatappi ylös ja aseta lankarulla lankatappiin.
3. Vedä lanka ensimmäisen ohjaimen läpi, kuten kuvassa, ja sitten
eteenpäin koneen etupuolella olevaan oikeanpuoleiseen uraan.
4. Ohjaa lanka alas oikeanpuoleista uraa pitkin ja ylälangan
kiristysnupin alitse vasemmalle. Varmista, että lanka nostaa kiristys-
alueen vasemmalla puolella olevan jousen (kuvat A ja B).
5. Ohjaa lanka ylös vasemmanpuoleiseen uraan. Varmista, että lanka
on langannostajan oikealla puolella, kunnes se on siirtynyt
langannostajan ylitse. Ohjaa lanka vasemmalle ja tuo se langan-
nostajaa vasten. Vedä sitä sitten alaspäin vasemmanpuoleista uraa
pitkin kohden neulaa. Tämän liikkeen on tarkoitus langoittaa langan-
nostaja automaattisesti (kuva C).
6. Vedä lanka alas neula-alueelle neulan yläpuolella olevan
langanohjaimen takaa (kuva D).
7. Pujota lanka neulansilmään edestä taakse. Jätä noin 5 cm (2 tuu-
man) langanpää.
VINKKI :
Jos lanka on pujotettu väärin, se voi katketa, hyppytikkejä saattaa ta-
pahtua tai kangas saattaa rypyttyä.
08C713_XE4683-001_P01-24 2008.04.02, 09:2916