7
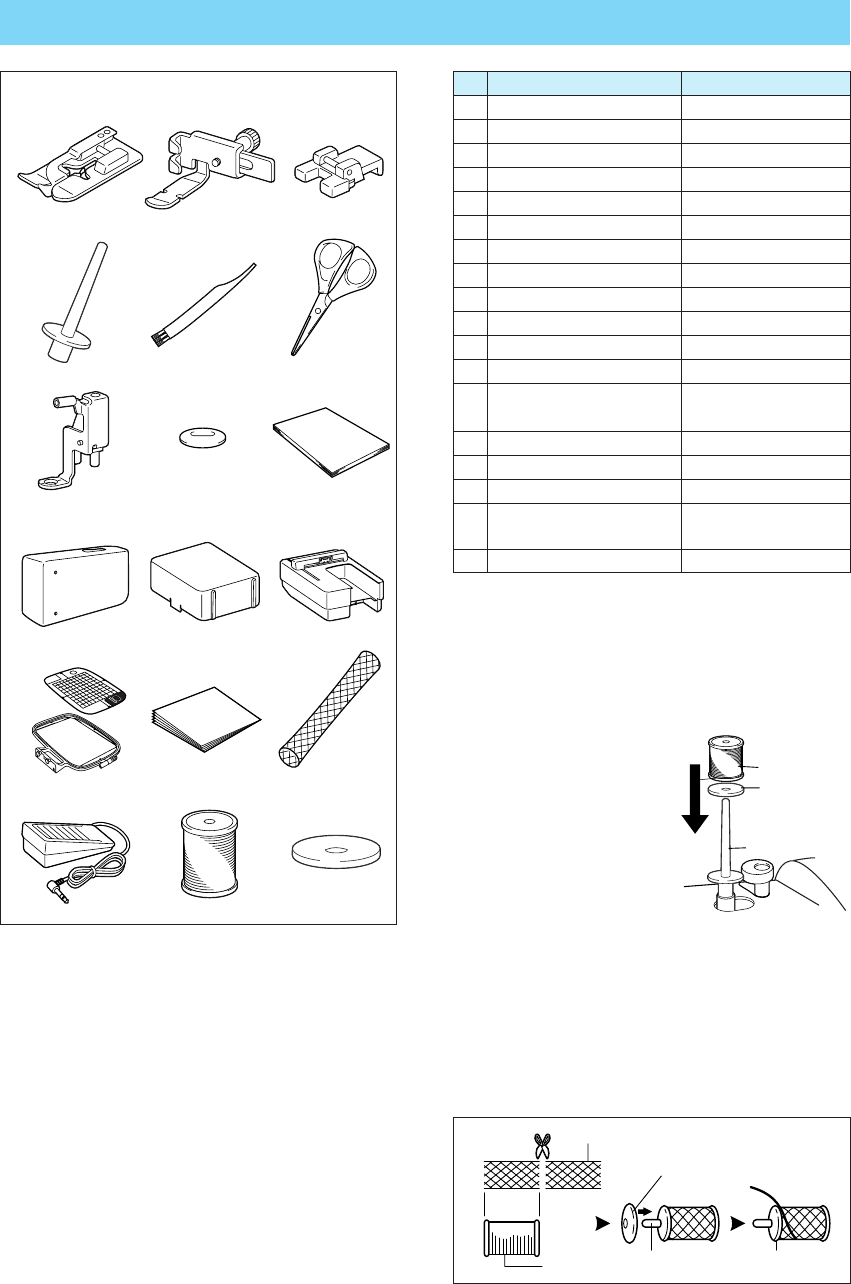
OTHER INCLUDED ACCESSORIES
123
456
789
10 11 12
13 14 15
16 17 18
R
R
No. Part Name Part Code
1 Blind stitch foot “R” X56409-001
2 Zipper foot “I” 103561-002
3 Button sew-on foot X59375-051
4 Extra spool pin * XA3336-051
5 Cleaning brush X59476-051
6 Scissors 184783-001
7 Embroidery foot “Q” XA5357-001
8 Key XA2005-051
9 Owner's Manual —
10 Hard case/Extension table —
11 Embroidery Unit Cover —
12 Embroidery unit —
13 Embroidery frame set SA432 (USA)
(Regular) XA6628-002 (Others)
14
Backing material (Stabilizer material)
—
15 Net ** XA5523-050
16 Foot controller XC1154-051
17 Embroidery bobbin thread SABTS (USA)
X81164-001 (Others)
18 Spool felt* X57045-051
1
2
34
4
Note
This method keeps the thread from twisting as it comes off the spool pin.
** Net
If using special threads which wind quickly off the thread spool, attach a net to the spool before using.
: Cut the net to match the size of the spool.
1 Net
2 Thread spool
3 Spool pin
4 Spool cap
If using metallic thread, we recommend that you
use a 90/14 home sewing machine needle.
Note (For U.S.A. only)
Foot controller : Model N5V
This foot controller can be used for sewing machine model PE-300S/PE-400D.
* Extra spool pin and spool felt
Use when embroidering with metallic thread.
1. Insert the extra spool pin into the end of the
bobbin winder shaft.
2. Install the spool felt and the thread spool in that
order, and then thread the upper thread.
1 Insert the extra spool
pin into the end of the
bobbin winder shaft
2 Spool felt
3 Thread spool
* When setting the
thread spool, set it
so that the thread
winds off from the
front of the spool.
* If using metallic thread, we recommend that
you use a 90/14 home sewing machine nee-
dle.
3
1
2


