15
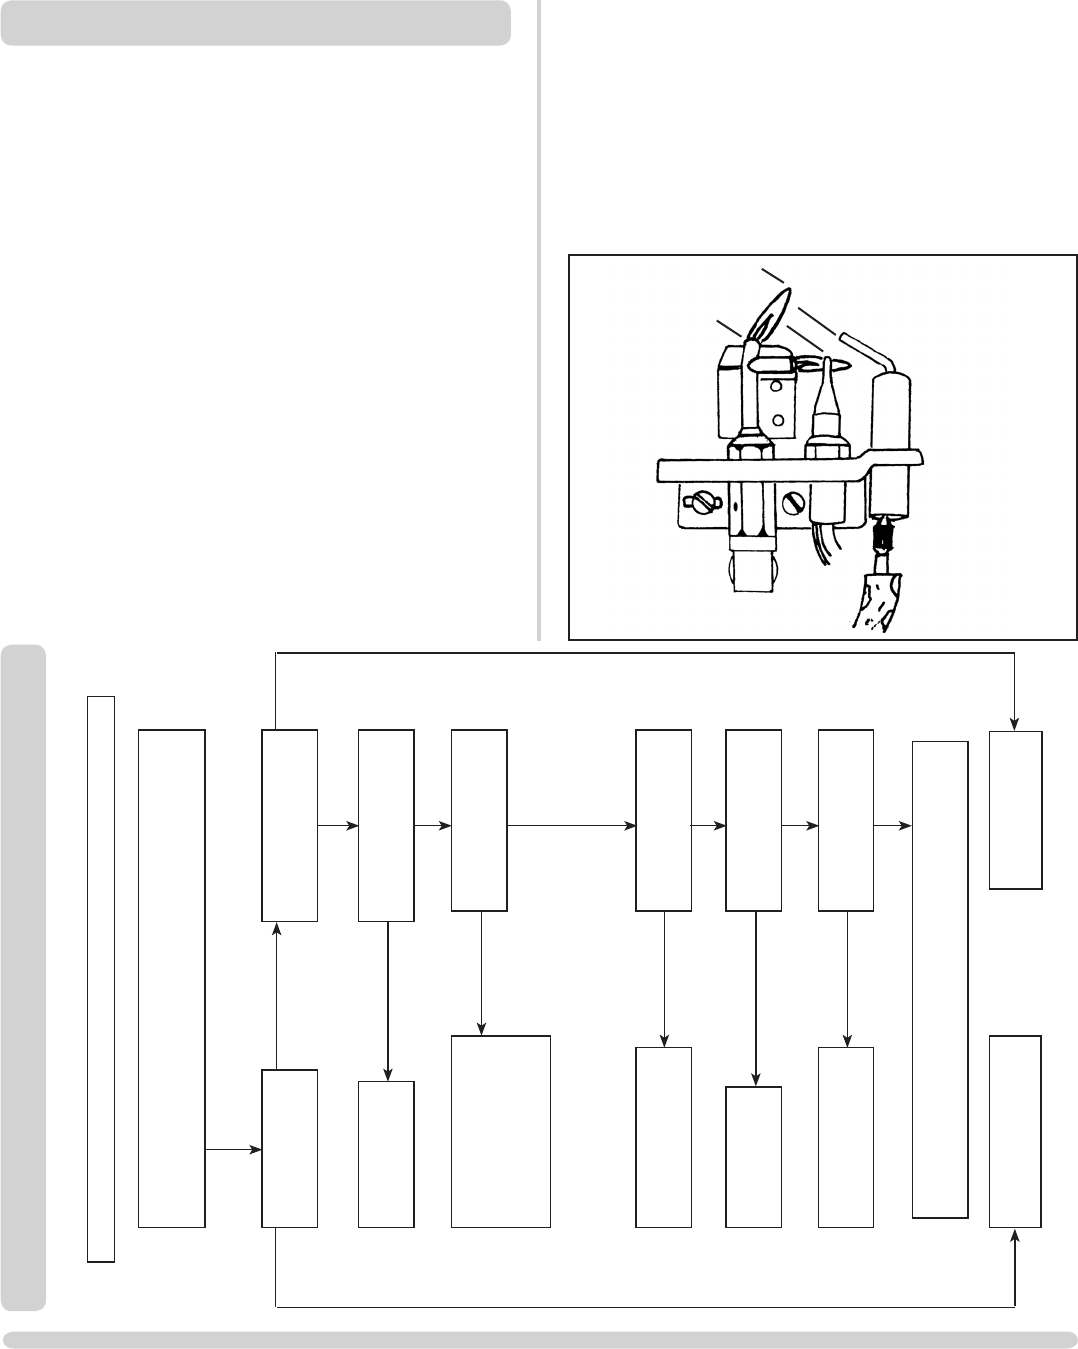
IGNITION FUNCTIONAL CHECK 1
PILOT WILL NOT LIGHT
Ensure there is no debris around the pilot assembly,
(e.g. soot, etc.) which could short the spark, clean the area.
Operate the valve.
Is there a spark?
Consult Section
2 and retry.
Check alignment of pilot
burner head, change the
ignition lead,
see Diagram 1 on page 14.
Check isolation tap and
gas meter, retry.
Correct and
retry.
Purge the gas pipes
and retry.
SEE 'NO SPARK'
CHART
SYSTEM OK
There is a blockage in the system, check the inlet test point,
the mag seating, valve and pilot filter.
Is the gas turned on to the
appliance?
Is the gas pressure correct?
Has the system got
any air in it?
Does the pilot light?
Is the control being
operated correctly?
Will the pilot light
with a match?
No Yes
No
Yes
No
Yes
Yes
No
No
Yes
No
No
Yes
Yes
SERVICING INSTRUCTIONS
SERVICING REQUIREMENTS/ FAULT FINDING CHARTS
1. SERVICING REQUIREMENTS
IMPORTANT – The glass panel on this appliance should
be checked for any signs of damage on the front face of
the glass panel (scratches, scores, cracks or other surface
defects). If damage is observed, the glass panel must be
replaced and the appliance must not be used until a
replacement is installed. Under no circumstances should
the appliance be used if any damage is observed. Please
isolate the appliance until a replacement glass panel has
been obtained and installed. Replacement glass panels
can be purchased from Gazco via the retailer from which
the appliance was purchased or any other Gazco
distributor.
This appliance must be serviced at least once a year by a
competent person. All tests must be serviced by best
practice as described by the current Gas Safe
recommendations.
1.1 Before any test are undertaken on the appliance, conduct a
gas soundness test for the property to ensure that there are
no gas leaks prior to starting work.
1.2 Before any tests are undertaken on the appliance it is also
recommended to fully check the operation of the appliance.
1.3 Special checks:
—Clean any lint or fluff from the pilot - pay particular
attention to the aeration hole in the side of the pilot.
—Clean away any fluff or lint from under the burner.
—Check that the spark gap on the pilot is correct.
1.4 Correct any faults found during the initial tests and then
re-commission the appliance conducting the usual safety
checks.
1.5 Advise the customer of any remedial action taken.
AR0097
3.5mm
15mm


