


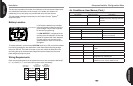
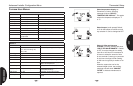
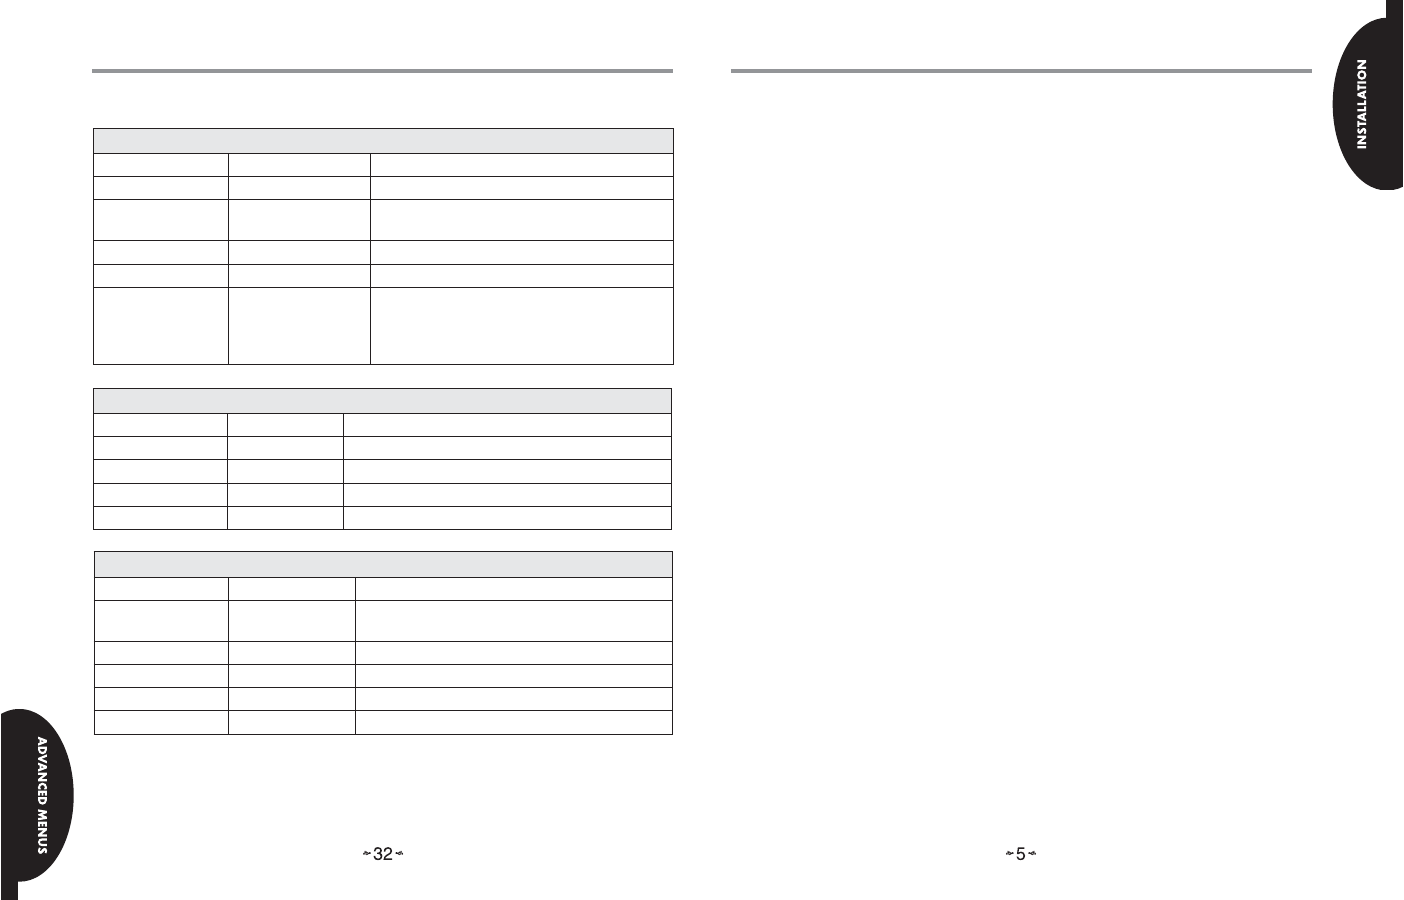
2 Week History (2 WK HIST)
Parameter Indications Comments
2wk Y1 Hrs XXX 2 Week First Stage Cooling Hours of Operation
2wk Y1 Cycles XXXX 2 Week First Stage Cooling Cycles
2wk Y2 Hrs XXX 2 Week Second Stage Cooling Hours Operation
2wk Y2 Cycles XXXX 2 Week Second Stage Cooling Cycles
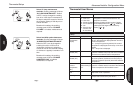
Advanced Installer Confi guration Menu
Life History (LIFE HIST)
Parameter Indications Comments
Total Days Pwrd XXXX Total number of days control has been
powered
Y1 Hrs XXXXXX First Stage Cooling Hours of Operation
Y1 Cycles XXXXXX First Stage Cooling Cycles
Y2 Hrs XXXXXX Second Stage Cooling Hours of Operation
Y2 Cycles XXXXXX Second Stage Cooling Cycles
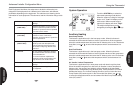
Air Conditioner User Menus
Status
Parameter Option Comments
Compressor Off, On Compressor Status
Mode AC, AC1, AC2, Time
Delay, Off
System Mode of Operation
Comp Hi Pres SW Closed, Open AC High Pressure Switch Status
Comp Lo Pres SW Closed, Open AC Low Pressure Switch Status
Outdr Temp Sens
(if enabled)
XXXF, FLT Outdoor Ambient Temperature Display
(if installed and enabled in setup)
This option will not appear unless the sensor
is enabled
Quick Install Steps
• Determine location of thermostat installation.
• Mount thermostat base to wall.
• Connect wires to thermostat base.
• Remove battery tag to provide battery power to the thermostat.
• Attach thermostat to base.
• Turn on power to system. Allow approximately 1 minute for the system to
confi gure.
• Set the time
• Select thermostat operating options in the Thermostat Options Confi guration
Menu.
• Perform thermostat/system operation checkout.
• Program thermostat or accept factory programming.
• Touch Run Schedule.
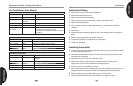
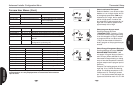
Installing thermostat
• Pull the thermostat body off the thermostat base. Forcing or prying thermostat
will cause damage to the unit.
• Place base at installation location and mark mounting hole locations on wall
using base as a template.
• Move base out of the way. Drill mounting holes.
• Attach base snugly to wall using two mounting screws. Levelling is for
appearance only and will not affect thermostat operation.
• Connect wires to terminal block on base.
• Push excess wire into wall and plug hole with a fi re resistant material (such as
fi berglass insulation) to prevent drafts from affecting thermostat operation.
• Remove battery tag to provide battery power to thermostat.
• Carefully line the thermostat up with the base and snap into place.
Installation