


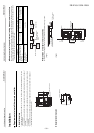
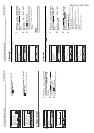
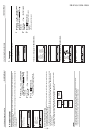


8. Press & hold 4sec.
Set the “press and hold” operation for the [
Lite-Vision plus Remote Controller
Installation Manual
ON / OFF] button.
1 Push the [ ∧ ] / [ ∨ ] button to select
“8. Press & hold 4sec.” on the “Initial
setting” screen, then push the “
Set” [
F2] button.
2 Push the [ ∧ ] / [ ∨ ] button to select
“ON” or “OFF”.
3 Push the [ MENU] button.
ÆWhen “ON” is selected, the air-conditioner
starts / stops running when the [
ON / OFF]
button is pressed and hold 4 seconds.
ÆW
hen “OFF” is selected, the air-conditioner
starts / stops running when the [
ON / OFF]
button is pressed.
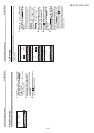
Initial setting(2/2)
6.Header/Follower
7.Language
8.Press & hold 4 sec.
Set
Return
Press & hold 4sec.
ON
OFF
Return Fix
Set
Lite-Vision plus Remote Controller
Installation Manual
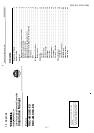
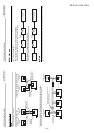
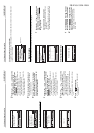
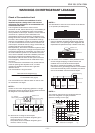
Field setting menu
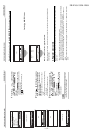
1. Test Mode
Set for the test operation after installation.
Before the test mode
• Perform the followings before turning on the power:
1) By using 500 V-megger, check that resistance of 1 MΩ or
more exists between the terminal block of the
power supply and the earth (earthing).
If resistance of less than 1 MΩ is d
etected, do not run the unit.
2) Check all valve of the outdoor unit is opened fully.
• To protect the compressor at the time of startup, leave the power on for 12 hours or more before operation.
• Do not press the electromagnetic contactor to forcibly perform the test mode. (It is very dangerous because the
protective device does not work.)
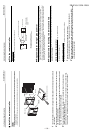
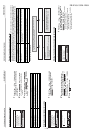
Performing the test mode
For the procedure of the operation, refer to the supplied Owner’s Manual. A forced test mode can be performed
according to the following procedure when the room temperature rises / falls enough for the thermostat to turn off.
In order to prevent a continuous operation, the forced test operation is released after 60 minutes have passed and
returns to the normal operation.
CAUTION
Do not perform the forced test mode for purposes other than the test mode because it applies an excessive load to the
devices.
1 Push the [ MENU] button to display the
menu screen.
2 Push and hold the [ MENU] button and
the [
∨] button at the same time to
display the “Field setting menu”.
ÆPush and hold the buttons for more than 4
seconds.
3 Push the [ CANCEL] button to return.
Item Function
1. Test mode Settings for when performing the tes
t operation after installation
2. Register service info
Registration of information about the con
tact number for service, model name and
serial number of the indoor unit and outdoor unit
3. Alarm history List of latest 10 alarm data
: error information of check code, date, time, and unit
4. Monitor function
Monitoring data of sensor temperature, rotati
ng speed of the compressor or other
factor.
5. DN setting Advanced settings using DN code
FILE NO. SVM-12004
– 106 –