


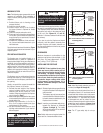


NOTE: DIAGRAMS & ILLUSTRATIONS ARE NOT TO SCALE.
16
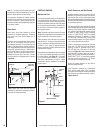
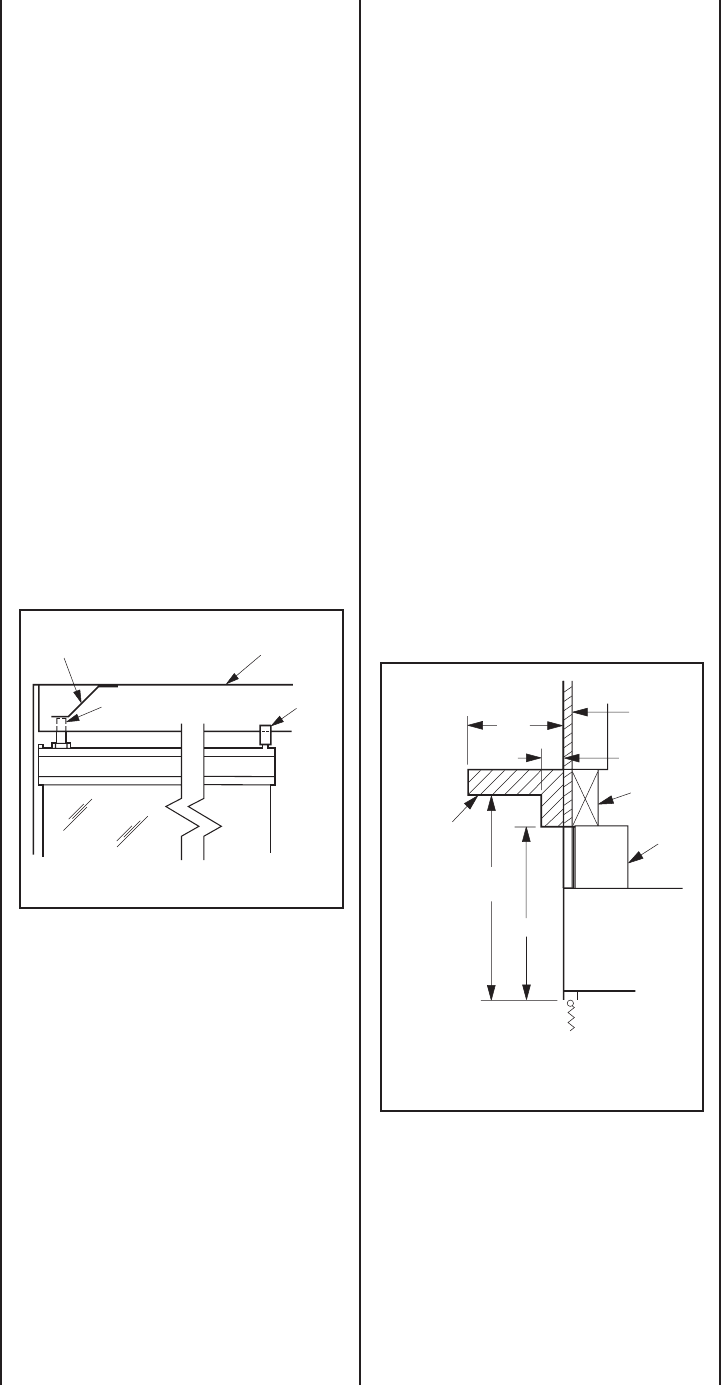
Figure 41
Note: A 1" air space must be preserved for all
combustible materials extending for any con-
tinuous length adjacent to the chimney.
It is especially important to insulate between
the studs of an outside chase cavity and under
the fl oor if the fl oor is above ground level. Do
not place insulation directly against the fi replace
or chimney system.
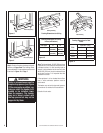
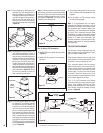
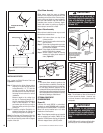
Glass Doors
Glass doors have been installed on these
fi replaces as standard equipment. Shipping
and transit may have moved them out of
alignment.
The doors are properly adjusted when the top
door trim is in a straight, level line and the
gap between the doors is even at the top and
bottom. If adjustments are required, grasp the
door handle and loosen the lower door pivot pin
using a 3/8” open end wrench*. Slide the door
panel on the hinge pin until the gap between
the upper door trim and upper frame is even.
Retighten the lower door pivot pin*. Repeat
this procedure for the opposite door if needed
(Figure 40).
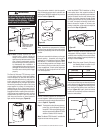
FIREPLACE FINISHES
Mantels and Trim
It is sometimes best to frame your fi replace after
it is positioned and the chimney is installed.
Frame enclosure for chimney and fi replace with
materials of suitable grade and size as dictated
by the prevailing constructions standards for
the structure in which the fi replace system is
to be located within.
Note: The header may rest on the two (2) metal
top spacers on top of the unit but the header must
not be notched to fi t around the spacers.
These fi replaces may sit directly on a combus-
tible surface. A 1" air space is required between
framing, insulation, building materials and the
chimney. A 1" air space is required between
framing, insulation, building materials and the
fi replace outer wrapper.
Combustible mantels and trim may be installed
12" above the fi replace opening as per NFPA
211-latest edition. and Figure 41. If a mantel
is of a noncombustible material, it is exempt
from these requirements as long as it does
not interfere with the installation or operation
of glass doors.
Figure 40
Pivot Pin
Roller
Pin
Upper Door
Guide Track
Spring Clip
*Note: Upper door pivot pins can also be
loosened for adjustment purposes; however,
it is easier to loosen lower pins.
12"
Min.
9 5/8"
Fireplace
Opening
Spacer
Combustible
Mantel
and Trim
12"
Max.
1 1/2"
Finished
Wall
Typical Installation
Header
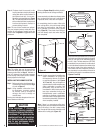
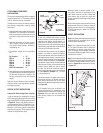
Hearth Extensions and Wall Shields
A hearth extension must be installed with all
fi replaces. Its purpose is twofold. It protects a
combustible fl oor in front of the fi replace from
both radiant heat and sparks and it distinguishes
the prescribed hearth extension area from other
non-protected surfaces.
The hearth extension must extend 16" beyond
the front and 8" beyond both sides of the fi replace
opening. Use a hearth extension constructed
of a durable noncombustible material having
an equal or better (lower k value) insulating
value of k = .84 BTU IN/FT
2
HR °F or a thermal
resistance that equals or exceeds r=1.19 HR
°F FT
2
/BTU IN. A minimum 3/8" (10 mm) thick
noncombustible material is all that is required
over a noncombustible or slab fl oor.
If there is a continuous perpendicular side wall
closer than 12" (305 mm) from the fi replace
opening, it must be protected with a 24" x
30"x 1/2" (610 mm x 762 mm x 13 mm) wall
shield (see Figure 42) constructed of a durable,
noncombustible material having an equal or
better (lower k value) insulating value than k =
.84 BTU IN/FT
2
HR °F. A continuous protected
side wall can not be closer than 7" (178 mm)
from the side of the fi replace opening.
Secure the hearth extension to the fl oor to
prevent possible shifting.
If the fi replace is installed on a combustible
fl oor, use the metal safety strips (provided)
on the fl oor extending half under the fi replace
and half under the hearth extension (refer to
Figures 6 and 7).